Use of Blender for Basic CG Tasks
Introduction
Blender is an open source animation tool with a sophisticated interface. In this lab, we will practice simple operations in Blender, creating three scenes.
Blender can be difficult to use at first, so please make sure to watch the Week 11 lecture where (near the end) I give a demonstration of how to use it. Blender should work on most devices, and we also have it installed on the lab machines. Please make sure to use V2.8 or above (we tested the labs on V2.82 and V3.3.1). Also, please note that Task 2 works slightly differently on the older version of blender.
For each task you must supply (via gitlab) both a rendered PNG, and your blender project file. Your PNG renders should match fairly closely to the reference images.
The starting repo is available here. This repo is empty, but you will still need to fork it, then commit and push your PNG / Project files to submit.
Task 1 - Manipulating Primitives
Create a snowman figure which consists of two large spheres (representing a lower and an upper parts of the body), a smaller sphere (the head) with an attached cone (the nose) and two small spheres (the eyes), and one thin and prolonged cylinder attached to the upper body (the arms). Make the different parts coloured as follows:
- lower body - blue,
- upper body - red,
- head - white,
- eyes - black,
- nose - orange,
- arms - brown.
Place your rendered image into a PNG file, and include your blender project.
Note: In this task you can leave the spheres with the default flat normals.

Task 2 - Texturing and Raytraced Lighting
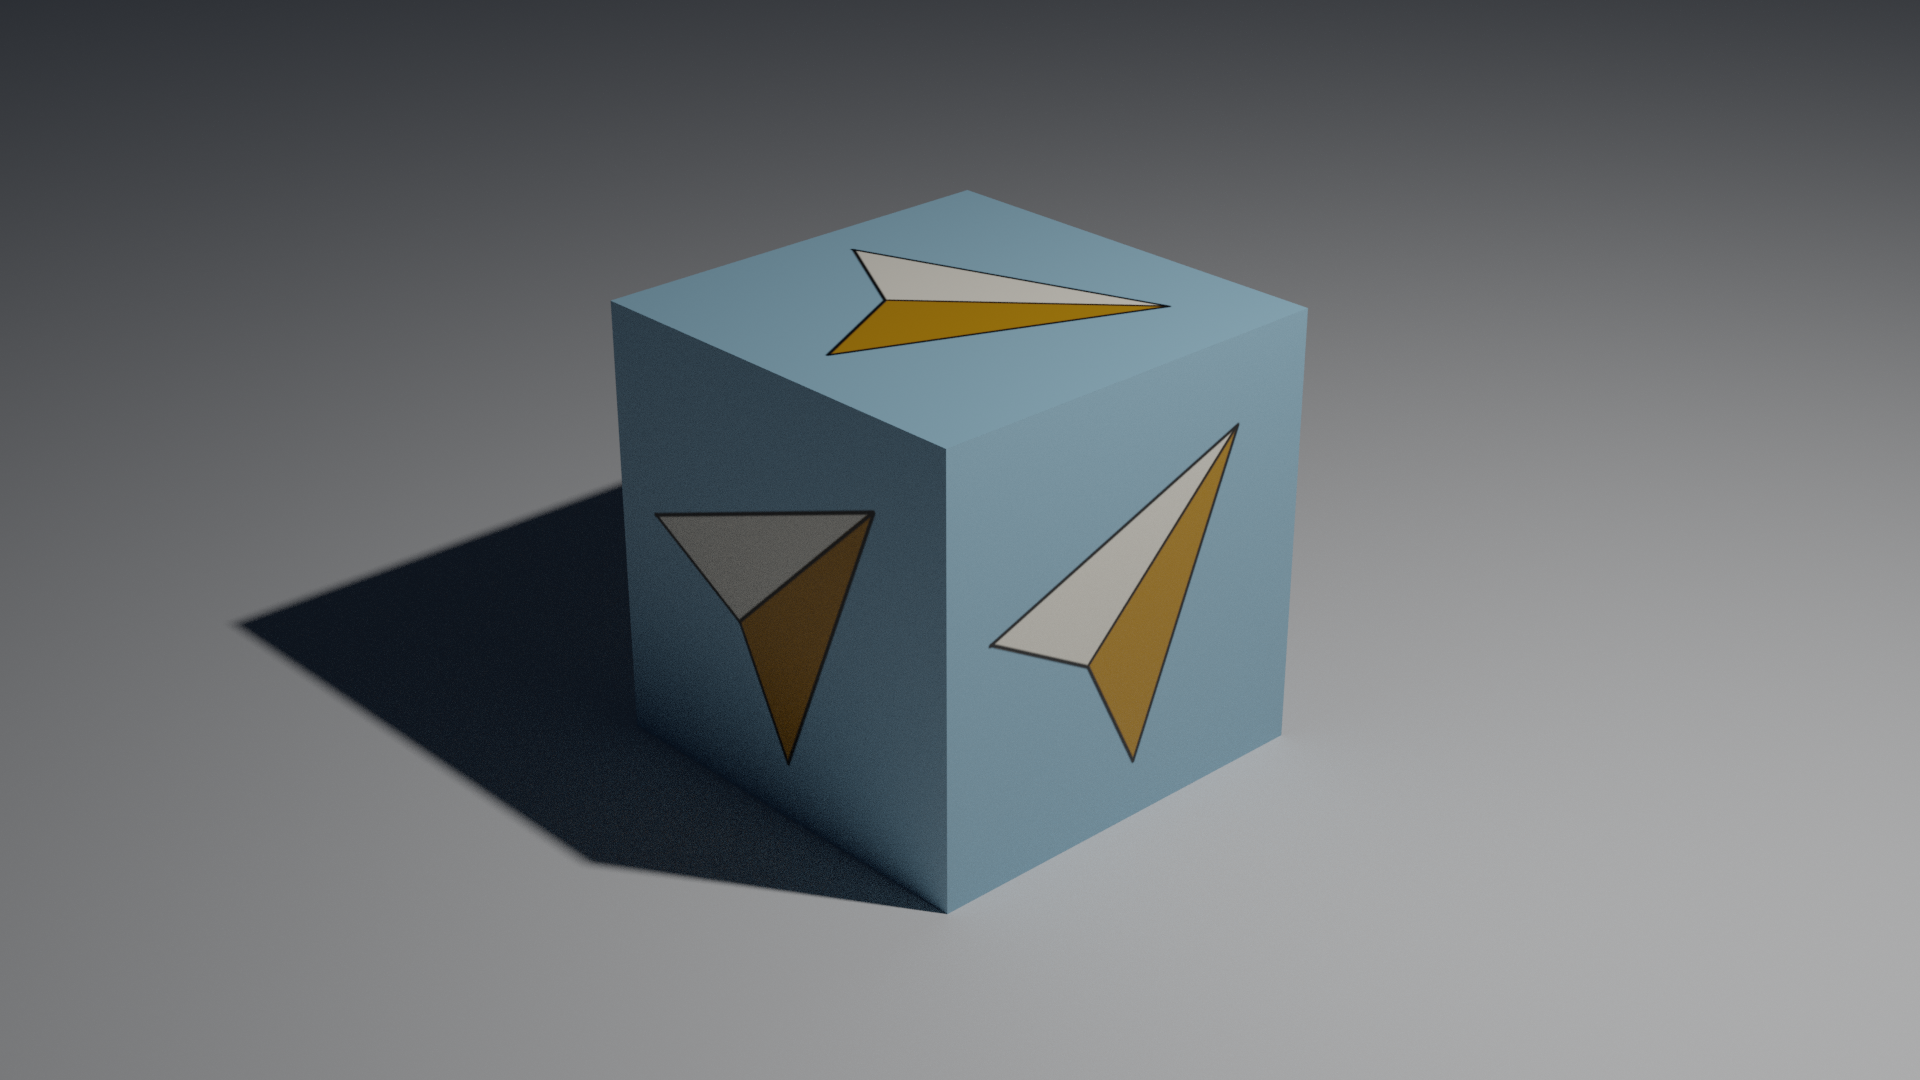
Create a cube with the computer graphics logo on all 6-sides, then add a floor plane just under the cube.

Hint: Once you have created a material and assigned a texture you will need to modify the uv mapping. This can be done via:
- Modeling -> Select -> All
- Modeling -> UV -> Cube projection
Cycles Renderer
For this task, we will switch the renderer from the default Eevee scanline renderer to the (much better) Cycles raytracer.
Skylight
Adding a skylight will depend on the version you are using. If you are completing this lab on the lab computers please follow the v2.82 instructions.
Blender v3.3.1: Delete the default light and then enable a background sky texture. Configure a Nishita sky texture as follows:
- Sun Elevation: 45
- Sun Rotation: 45
- Strength: 0.01
- all other settings left as default
Blender v2.82: Keep the default light as is, then enable a background sky texture. Configure a Hosek / Wilkie sky texture as follows:
- Turbidity: 2.2 (default)
- Ground Albedo: 0.3 (default)
- Strength: 0.1
The cube will now be lit with natural lighting from the sky texture.
Place your rendered image into a PNG file, and include your blender project.
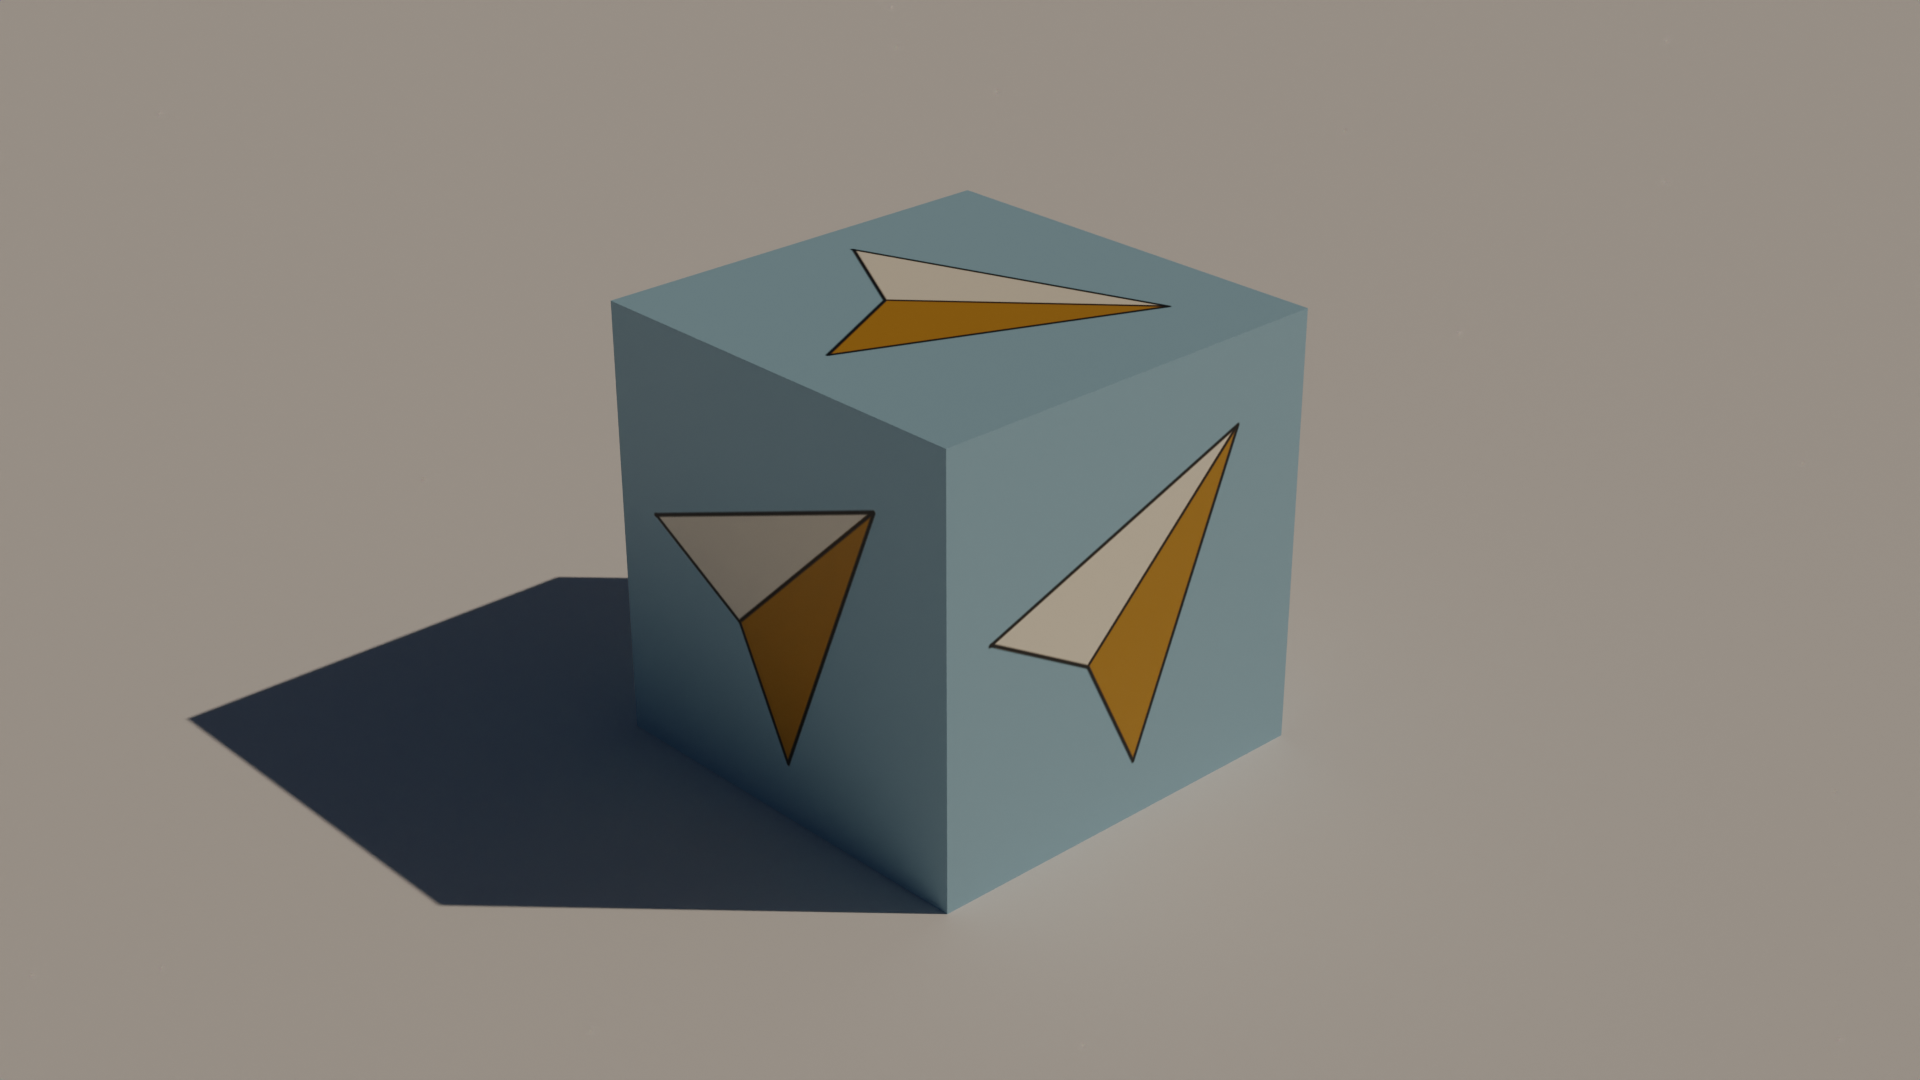
The Hosek / Wilkie version will look a little different, here is a reference image.
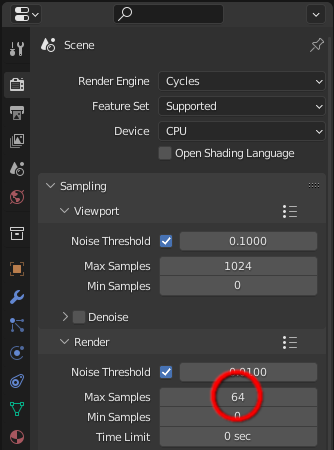
Note: rendering using cycles will be very slow, so set the max samples to something reasonable, such as 64. You can modify this setting here on the newer versions. On the older versions it defaults to 128, which should be ok, but feel free to lower it you need.
Task 3 - Constructive Solid Geometry
In this scene, we are going to create a girder-like shape.
To do this create a new scene, then modify the default cube’s scale to \((2.5, 0.5, 1.0)\)
CSG
We are now going to remove two sections from the cube. First, construct a cylinder of unit radius (this is the default), rotate it by 90 degrees, and modify its length to 3 units long. Next, apply a boolean modifier to the cube and remove two sections from the cube as depicted in the reference image. The cylinders should be placed 1.1 units from the cube’s centre when performing the subtraction, making the thinnest part of the object 0.2 units wide.
Workbench renderer
For this task, we will again switch the renderer, but this time to the workbench renderer (useful for technical drawings). Once you have done this, you can modify the girder’s material:
- Color: white
- Metallic: 1.0
- Roughness 0.5
In this particular task (but not in the others) you must smooth the normals of the object such that the edges are hard edges, but the curved part appears smooth. You might need to look around the UI to do this, or do a bit of searching through the blender manual.
Place your rendered image into a PNG file, and include your blender project.
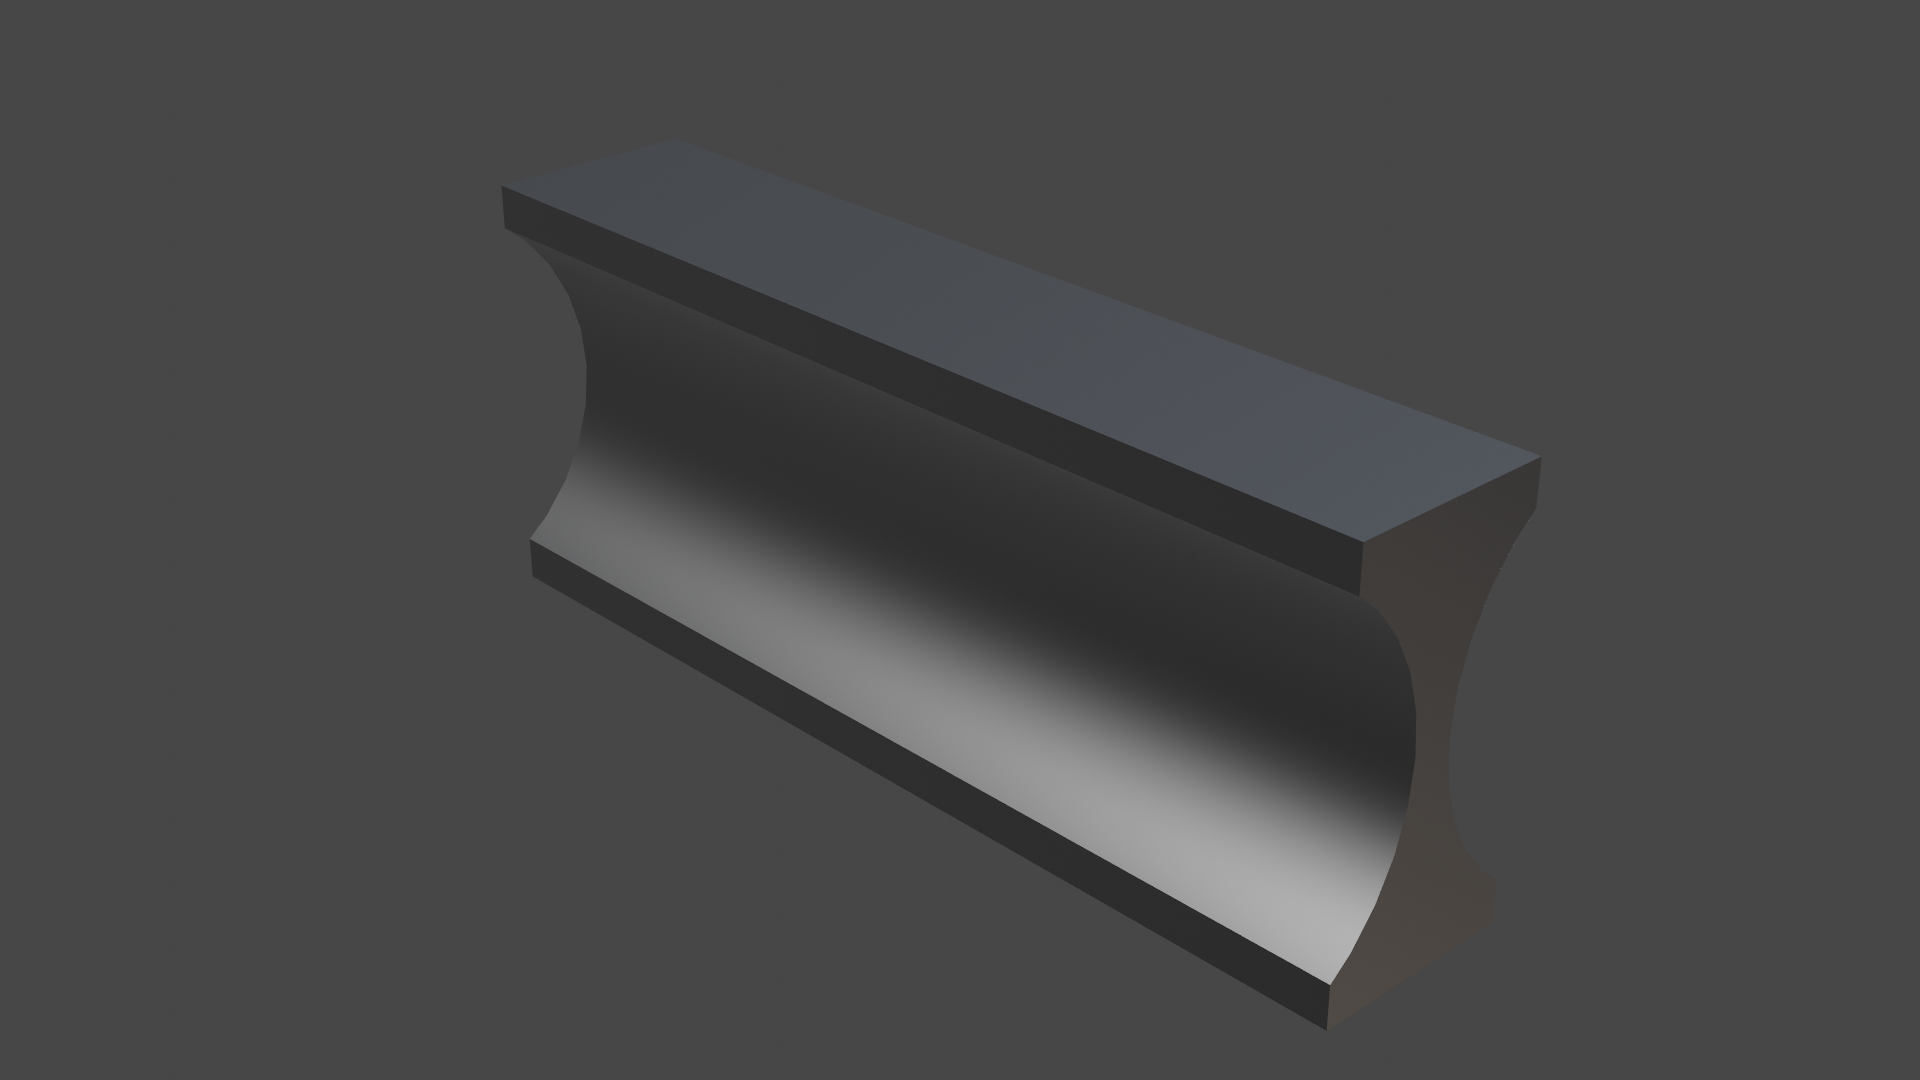
Note: When you switch to the workbench renderer the materials will change, so you need to do this before editing the material properties.