Note: Some tutorial groups may have undergone some slight last-minute modifications. Double-check your assignment group within your tutorial has not changed, i.e. if there is a new member in your group.
Week 3 GitKraken and Git Tutorial
In this week’s lab, you will learn about
- Git and Gitkraken for teamwork
- Trunk-based development workflow
- Collaborating with other developers on projects
Prerequisites#
For using GitKraken for free, you will need to sign up for GitHub Education Student Developer Pack with your ANU email ID. Note that the verification process after signing up could take up to 2 days (however most accounts are verified within an hour), so it would be beneficial to start this process as soon as possible. In case your student account is not verified by the start of the tutorial, you can also sign up for a Trial Period, which would cover the activities required for this tutorial.
- You have
git, GitKraken andpythoninstalled. - You know about the basics of
git(primarily from COMP2100). For a quick refresher, see [1]. - (Optional but recommended) You have a local SSH key for adding to SSH agents (GitHub and GitLab). [2][3]
- You have activated the Github Student Developer Pack.
Prelude: GitKraken#
Many students taking this course would have interfaced with git primarily via a terminal or inbuilt into IDEs (VSCode/IntelliJ for example). However, there are primary issues with doing version control for both approaches:
- CLI - does not feel intuitive and accessible due to the interface being a leaky abstraction. However, complex workflows can be automated and have high flexibility in running commands.
-
GUI via IDE - does not provide extensive support for advanced
gitcommands. However, it is more intuitive.
Discuss with your partners on what would be some use-cases where you would prefer interfacing with git via CLI over GUI and vice-versa.
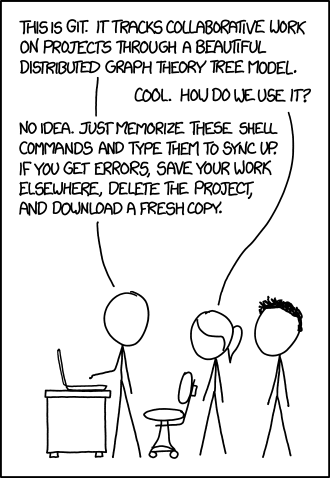
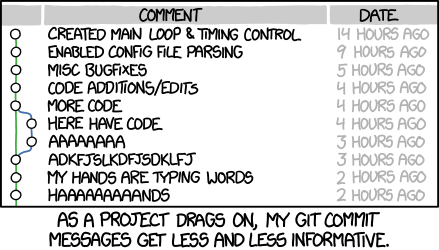
xkcd even has a dedicated comic strip for git:
Now, large projects divided into various teams typically want to effectively use git while:
- Streamlining complex workflows.
- Saving developer time in managing source code.
GitKraken attempts to solve the listed problems and brings out the best of both approaches. From GitKraken’s website:
Millions of developers and teams around the world choose GitKraken Client to make Git work for them. It makes Git more visual and accessible with an intuitive UI, the flexibility to switch between a GUI or a terminal, and a seamless experience across operating systems.
However, whatever git client is being used, you should have the following mental model for managing branches:

Aside: Trunk-based development#
Note: Some of this section’s content and images are from a blog by Optimizely
In Accelerate and the most recent State of DevOps reports, DORA (Google’s DevOps Research and Assessment team) points out that there is a predictive relationship between trunk-based development and high-performing software organizations. Google is not the only organization to have discovered this -nor nor did we necessarily have expected outcomes in mind when these policies evolved —it just seemed like nothing else worked. DORA’s result certainly matches our experience. Software Engineering @ Google
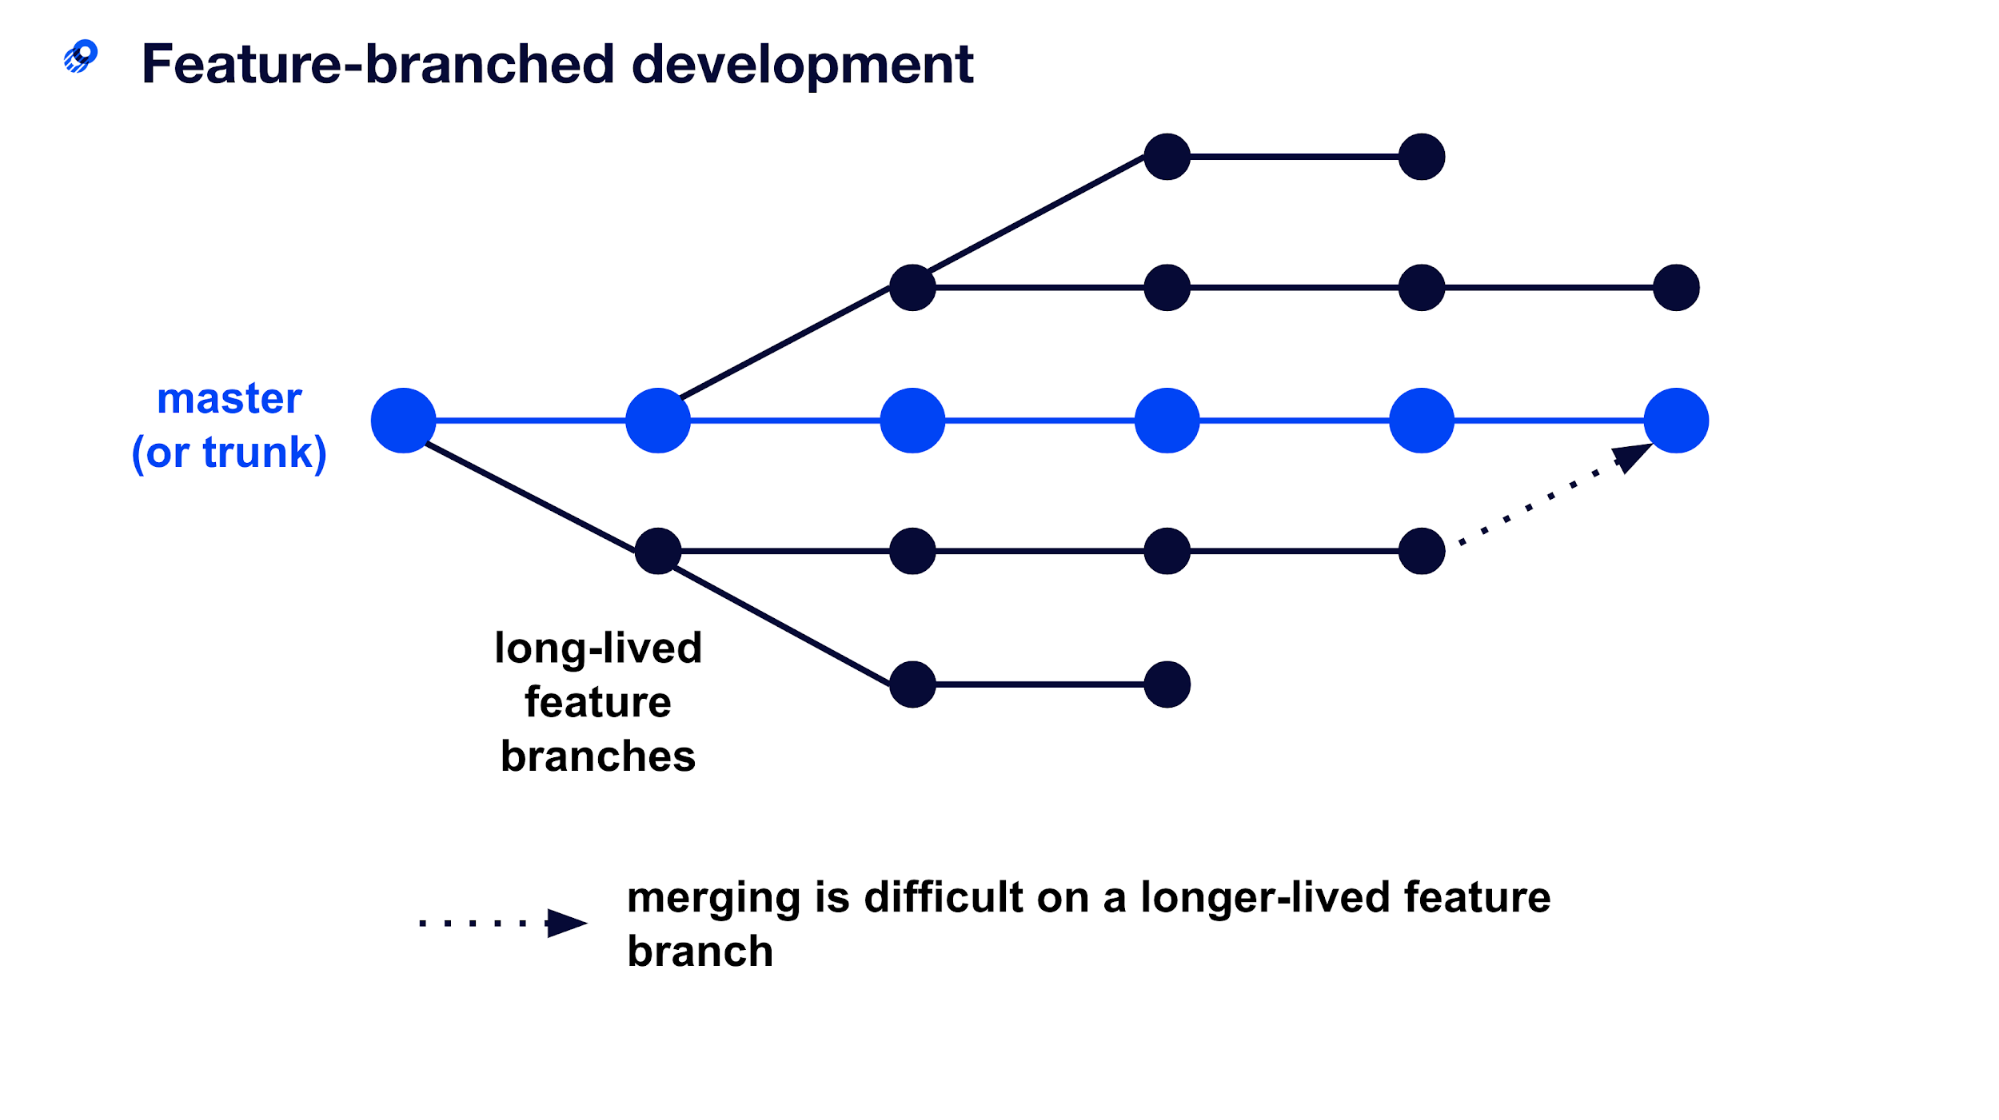
To understand the development of trunk-based development (TBD) and why it is the most popular strategy among teams these days, it’s useful to look at the original disruptive strategy, Gitflow, which had the policy of feature-branch development.
History#
In feature branch development:
- There are two branches to record the history of a project:
dev(which integrates new features), andmaster(which store the official record history after it is confirmed by QA that there is a stabledevbuild ready for release). For adding feature/solving bugs, a new issue is created and the correspondingfeaturebranch is created. - A new branch is not merged to
devuntil afeatureis complete, sometimes working for long periods on the local machine. This long time stretch can make the process of merging difficult due to divergence in source code betweendevandfeature, resulting in a lengthy code review process when looking to create a release branch to be deployed.
Instead, TBD takes a more continuous-delivery approach to software development, and branches are short-lived and merged as frequently as possible. The branches are smaller because they often contain only part of a feature. These short-lived development branches make the process of merging easier because there is less time for divergence between the main trunk and the branch copies.
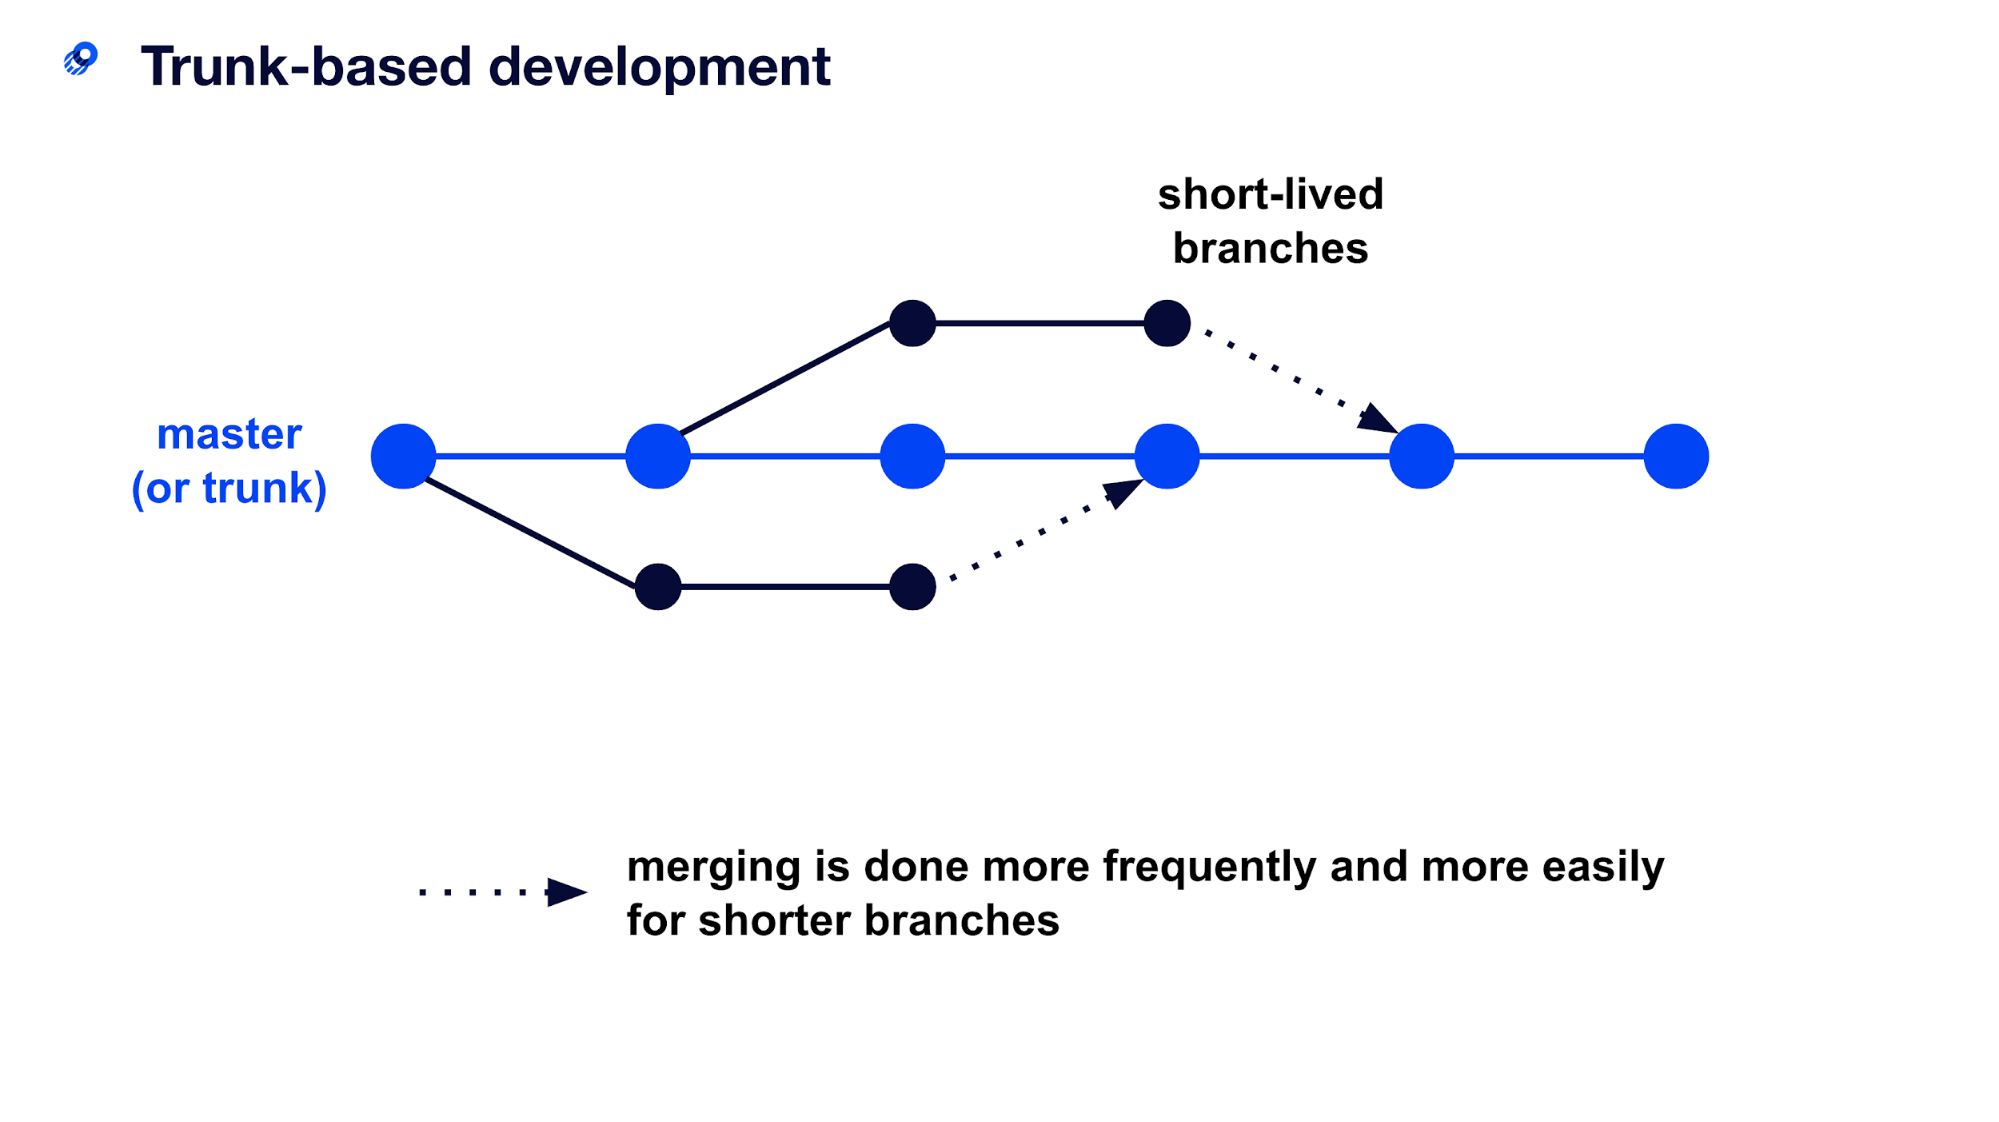
In short, TBD arose as a result of the following:
-
devbranches should be minimal, or at least be short-lived - Agile processes need to implement features incrementally, so updates are short and frequent
- Reducing work-in-progress introduced in having
devbranches from Gitflow.
VCS differences between SE @ Google vs others#
- Internally, Google has an in-house system (
piper) as their VCS instead ofgit.- It is a Centralized VCS (as opposed to
git’s Distributed VCS) where there can only be a single source of truth. It has worked well for them considering that they use a monorepo (i.e. a single repository for holding most of their projects with some exceptions). This repository now has the size of over 80 TB, making a clone (via any DVCS) to most local machines impossible due to limited storage and compute resources. - It also uses the branch management system of TBD with incremental commits directly to the main branch (generally
master) as shown by previous research. This solution has tended to be highly scalable and has least overhead during development. It can be seen by the fact that their repository is being handled by roughly 1,000 teams making 60000-70000 commits per working day, and the system still going smoothly (No small feat).
- It is a Centralized VCS (as opposed to
- In Open-Source Systems or teams in smaller organizations:
- Branch management via TBD has picked up in DVCS systems too and works well with agile practices.
- However, the nature of most open source projects are from prioritizing freedom, lack of coordination (people are free to contribute as they please), and lack of computing resources. Hence, a DVCS works well in this scenario.
- Also, most organizations already have
gitand various VCS and build systems to choose from that allow for fine-tuning repository policies, and don’t need the overhead of having an in-house solution from scratch.
Since we would be working with OSS in small teams for this course (and hopefully in the future too) we would be using the standard practice of using git with TBD.
Setup#
Logging In and Activating GitKraken Pro#
- Upon opening GitKraken, you would be prompted to Sign Up/Sign In using a hosting service/local credentials.
- Select GitHub as the hosting service for Signing In, and follow the remaining steps in the popped-up browser.
- Set up your profile with
- Username: <Student-ID>
- Email: <ANU-Email-ID>
- Profile Picture: <Optional>
- In case GitKraken complains about Weak SSH Key Generation possibly done by a previous version, click on the option: The SSH Keys were not generated using GitKraken
- Under view modes, choose GitKraken’s GUI-view over CLI.
Integrating GitKraken with Gitlab#
Now, since we have GitKraken Pro activated, we can integrate the service with ANU Gitlab for Tutorial/Assignment purposes. In case you would be needing GitHub for any of your work, a similar methodology would be followed in Preferences > Integrations using your GitHub credentials.
- Goto Preferences > Integrations > GitLab Self-Managed.
- Enter the Host Domain as: https://gitlab.cecs.anu.edu.au/.
- Click on the popped-up button Generate a token on GitLab.
- Set up your personal access token with the following settings:
- Token Name: GitKraken
- Expiration Date: <Leave Empty>
- Select Scopes: Put checkboxes on api and read_user
- Copy the newly created personal access token to the required field on GitKraken and click on Connect.
If there are no errors, you have now successfully integrated with Gitlab’s integration API.
Extension: SSH Keys#
Unlike the default authentication method (where you have to retype your username & password every time) for managing read/write access on a hosting service, ssh uses encrypted keys on a host’s machine (with ssh-agent). In fact, git is partially built on ssh to transfer data between hosts, so it is more secure by design to use SSH to authenticate transfers. However, HTTPS is easier to set up (and is the default in GitKraken) and doesn’t require knowledge or secure management of ssh keys. Hence, this step is completely optional and is for exploratory purposes.
Note that many organizations also require a user to have a GPG key for signing tags and commits, to verify the identity of the user. You can read more about it at [4].
- Goto Preferences > SSH.
- In case you have already set up SSH keys to be used on Gitlab/Github, you can use the local SSH agent in the default path or set up paths manually for the respective SSH Public/Private Key.
- However, if you haven’t set up an SSH key for Github/Gitlab before, you should click on generate keys and follow the steps outlined in [2] and [3].
Task 1: Forking a repo and adding collaborators#
- One of the members from each group assumes the role of a Product Owner (the only person who has access to deleting the repository and taking on a supervisory role for the project). That member should fork this repository.
- On GitHub, Go to Project Information > Members, and add the other members as Developers for the project.
-
Having appropriate accesses to the repository,
clonethe forked repository on the local machines from GitKraken’s menu. You would now have a graph view similar to the following: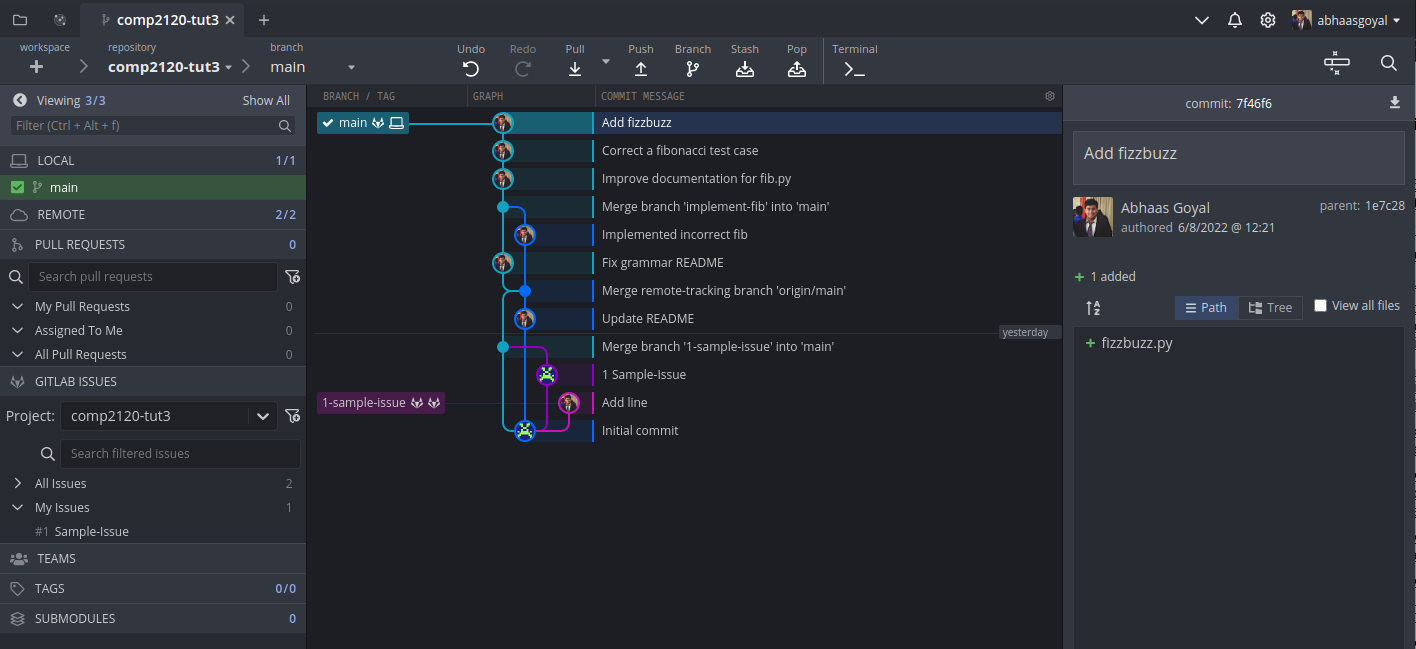
Explore the various functionalities being provided by GitKraken and see where it shines in comparison to alternative tools (Worktree Graph, checkout to specific branches/commits, git diff in commits, and git blame)
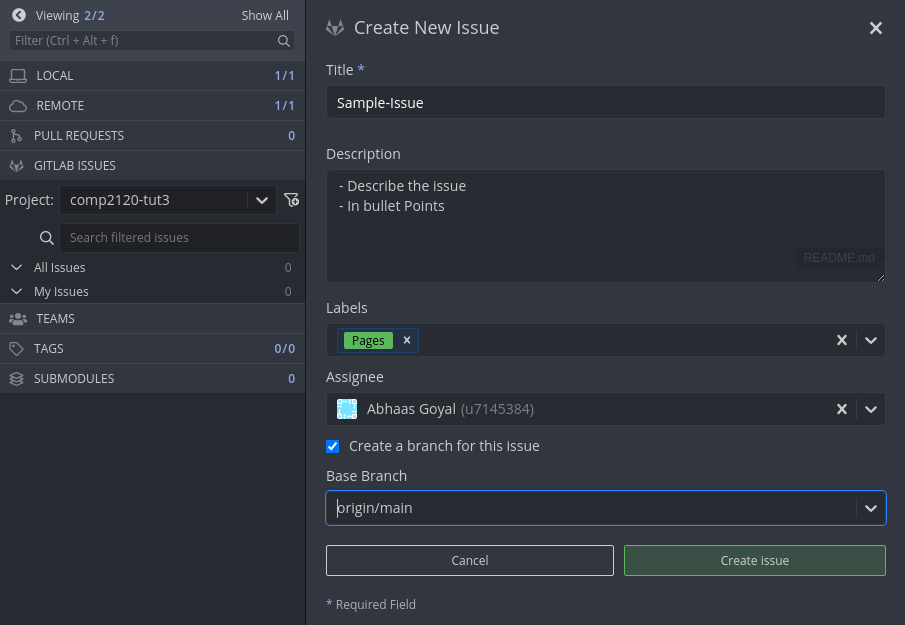
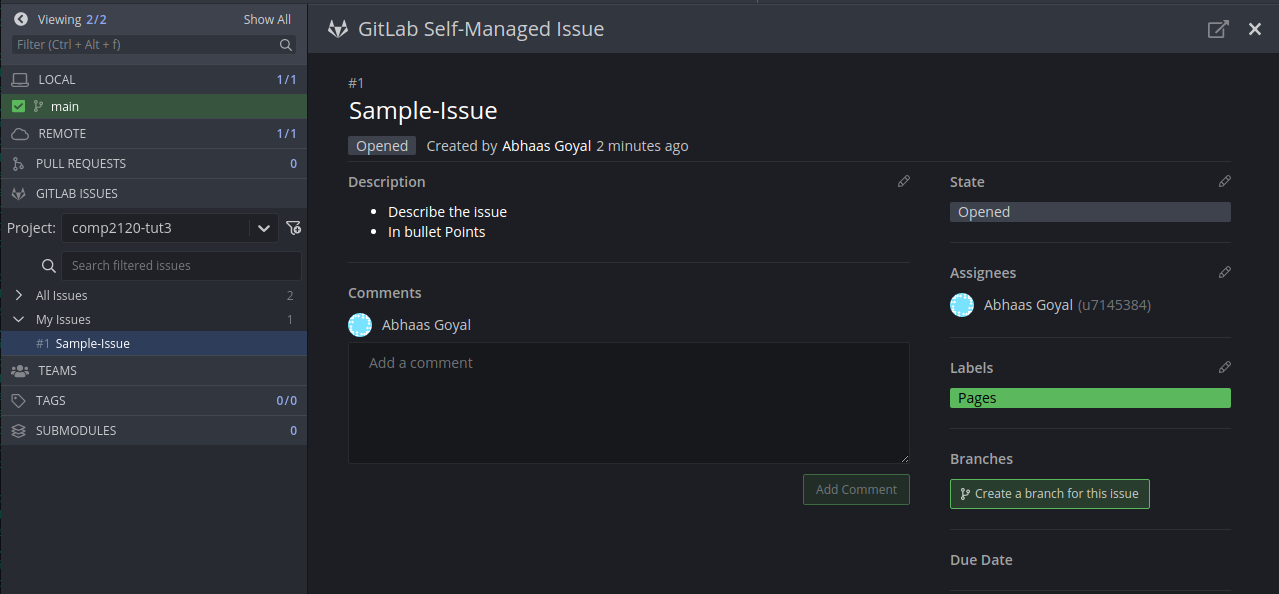
Task 2: Creating issues#
- The repository currently has some bugs and scope for adding new features.
- List those bugs/features, and distribute the responsibility of working towards solving them among the group.
-
Assign all issues, one for each person, by adding them on GitKraken from this dialog:
Task 3: Branching, committing and pushing#
-
From GitKraken, go to your assigned issue and create a new branch with a relevant name to the issue you are addressing (e.g. fix-architecture, add-feature-name, solve-bug-name). The new branch can be created from this dialog:
-
Fix the issue/bug that you were assigned, then
addandcommitthe changes from GitKraken.
What should you name your commit?
- Commit naming convention:
- should start with a verb
- should be in the present tense
- explain what it does to the codebase (e.g. Remove faulty condition from fibonacci, Fix failing algoTestCase, Fix issue #3 )
- try not to be like xkcd (even if we tend to be):
- Push the branch to
remote.
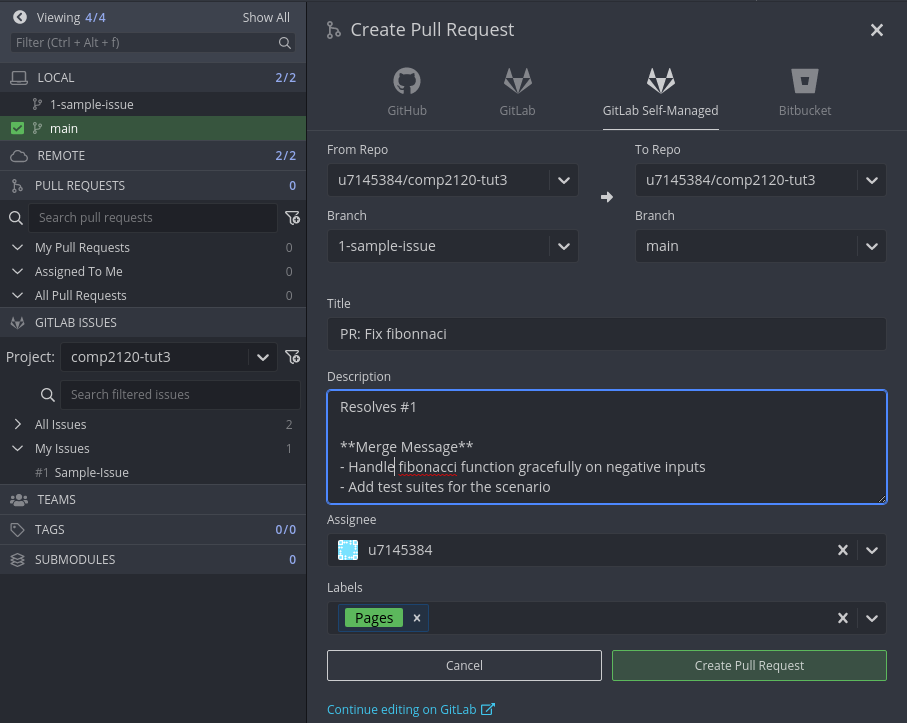
Task 4: Writing Pull Requests#
How should you describe your PR?
- On GitKraken, create a pull request (PR) to merge the changes from the branch you have just pushed to
master.- Name your pull request appropriately.
- The template of a PR description should be as follows (generally it varies for different code bases):
Fix/Add Feature #<assigned-issue-number>
Merge Message
• Describe what changes have been made to address the issue
• How have the changes been tested
• Explain changes in bullet points
For the next task, the Product Owner could take on the role of the Code Reviewer.
Task 5: Doing code reviews and resolving merge conflicts#
- On the browser, review the developers’ code and description for each PR (for the code, click on the Changes button for
git diffw.r.t. PR). Approve changes if it looks good. - Once your PR has been reviewed, merge your changes while also ticking on squashing the commits from the issue branch.
squashcombines multiplecommits into one.
Discuss the merits and potential demerits of using squash before merging changes
- Resolve any merge conflicts that arise accordingly.
- For issues with the unmerged branch due to conflicts, checkout to
masterand pull fromremote. - Drag-and-drop
masterinto the issue that is unmerged. - A pop-up will emerge where it will tell you that a merge conflict has arisen and whether you want to resolve it now. Click on Yes
- Now, GitKraken’s merge window will open where you can resolve individual files’ conflicts by keeping the necessary changes. After you are done, you can
commitwith the default merge message. - Push the changes from the issue branch to
remote(don’t forget tocheckouttofeaturebranch first). - Merge the required changes into
master.
- For issues with the unmerged branch due to conflicts, checkout to
You have successfully synchronized your changes in a single codebase (hopefully with a little overhead), and got a brief overview on using VCS in teams.
Extension: Resolving bugs in large codebases#
When you see a test fail, you need to know which commit introduced the failing test (so that you can see the changes done which led to that bug). To find out the commit, a basic strategy would be to hunt-and-peck for the commit that introduced the bug. Discuss some efficient ways to find out that specific commit.
Hint: Look at git bisect/git blame/other methods.
In the provided repository, how would you find out which commit introduced the bug by the above methodology? In the scenario that this bug is critical (in terms of security/core functionality), how would you approach the situation as a team?
Extension: Further Resources#
-
Software Engineering @ Google
- Read up on Chapter 16: Version Control and Branch Management
- It explains the history of various VCSs and decisions taken by Google for using
piper.
-
A Hacker’s Guide to Git
- At some point, you would need to know the internals of how
gitworks. - This blog demystifies most of the underlying concepts in an intuitive manner.
- At some point, you would need to know the internals of how
-
The official Git documentation
- A comprehensive and lengthy documentation of the whole
gitporcelain. - Generally more useful for looking up specific concepts rather than reading it all the way through, and when you’re comfortable using
gitin the real world.
- A comprehensive and lengthy documentation of the whole
-
MIT Missing Semester: Git
- Accompanied with an excellent video lecture teaching
gitconcepts from a bottom-up approach.
- Accompanied with an excellent video lecture teaching
References#
[1] Git Cheat-Sheet
[4] GPG Keys