Lab 3
In this lab, we use three techniques to draw a chessboard, a geometry solution, a texturing solution and a shader solution.
Source files for this lab can be found here.
As always please
- Fork the project.
- Commit and push to submit.
Note: This lab makes use of JOGL (Java OpenGL). JOGL is already set up in the lab environments, including VDI. In addition, we have instructions here for setting up JOGL on your own device. However, we can not guarantee that your device supports JOGL.
Task 1
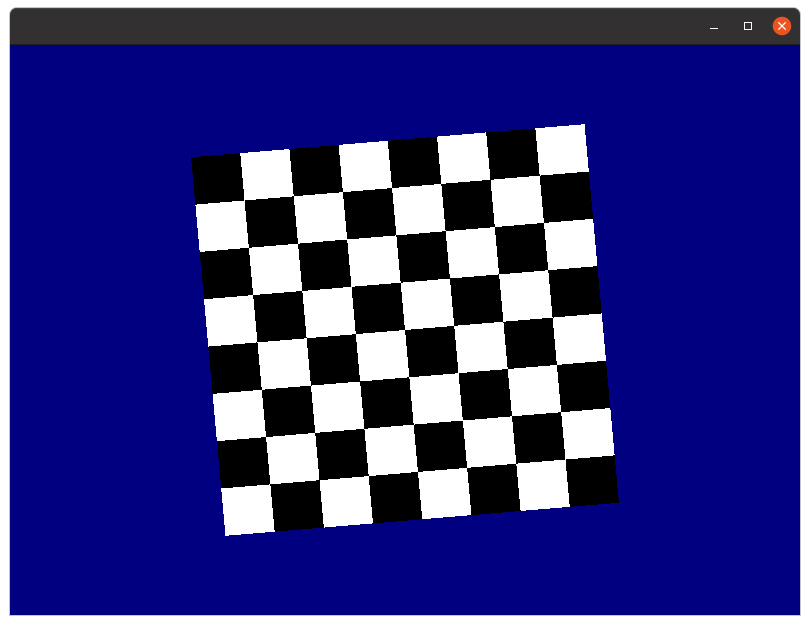
Implement a program using OpenGL 1.1 that displays a spinning chessboard.
The chessboard will spin around the z-axis (normal to your monitor) in the centre of the display on its centre. The display starts with dimensions 800 by 600, and you may assume the window is not resized. The background must be a shade of blue, and the squares that make up the chessboard alternate black or white. Each square should be 50x50 (screen pixels) and must be drawn by calling the provided drawSquare(GL2 gl) method.
You must use the Lab3 T1 program as a starting point and implement your code in Java using JOGL.
Task 2
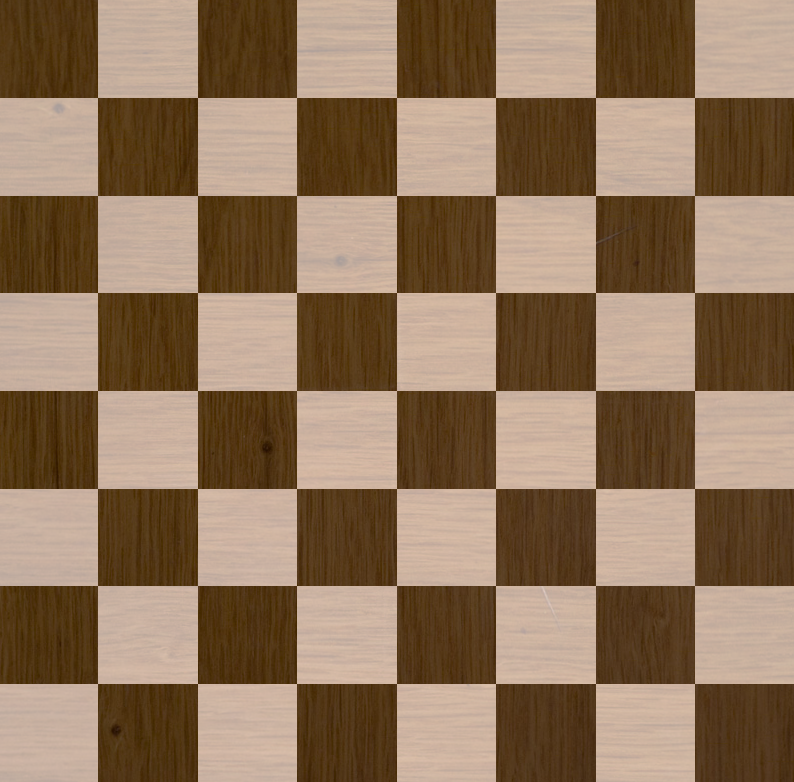
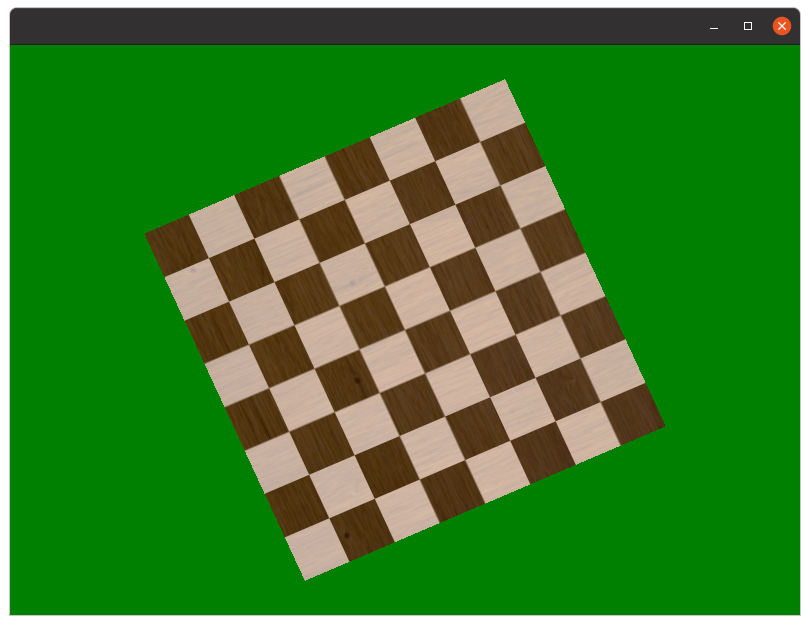
Implement a program using OpenGL 1.1 that displays a spinning chessboard by adding a texture image to a single large quad.
The chessboard will spin in the centre of the display on its centre. The display starts off with dimensions 800 by 600, and you may assume the window is not resized. The background must be a shade of green and use the below image to add a texture to a single quad.
You must use the Lab3 T2 program as a starting point and implement your code in Java using JOGL.
Task 3
Make a spinning chessboard that is visually similar to Task 1. However, use a shader approach rather than OpenGL 1.1.
In this implementation, you must use only two triangles (one quad) for the entire chessboard. Thus, the checker pattern will need to be generated within the fragment shader. We’ve done most of the work for you, so you should be able to solve this problem mostly by modifying the two shader files (task3.frag and task3.vert). The only additional part is to add code to rotate the board, which should be done by modifying the model transform (and not by editing the vertex locations).
You need to…
- Modify the vertex shader to apply both the orthogonal projection and the model transform (i.e. do not modify the coordinates of the vertices in the vertex buffer)
- Modify the fragment shader to produce the checkerboard effect (as in task 1). You must use a function of the (u,v) coordinates to solve this (and not a texture map)
- Ensure that your code works without generating any OpenGL errors (we print these automatically).
- OpenGL can be a bit different on different machines, so make sure you test your code in the lab environment.
- You may end up with the board inverted (black squares and white swapped), but this is not a problem.
- The background can be any colour you like.
- IMPORTANT - We expect you to modulate the colour with the interpolated vertex colour (so, for example, if we change the vertex colours to red, your board should be red and black instead of white and black.) We have already modified the vertex colours in the supplied code, and you can use the image below as a reference for what your solution should look like.
You must use the Lab3 T3 program as a starting point and implement your code in Java using JOGL.

Note: Most devices support shader V4.6 (including the lab computers), which we default to. Some devices may only support earlier versions. For example, the VDI computers only support V1.4. If your device does not run the shaders, you may need to change the shader version from #version 460 to #version 140.
Tip: you can install plugins for IntelliJ that will make working with shaders a bit easier. I’m using GLSL support and OpenGL Support. There’s also Shadertoy, which can be helpful for getting the shader part worked out independently of the Java code.
Bonus Task
Shaders enable a very high degree of control over what is rendered within a triangle. To demonstrate this, I’ve created a shader that renders the Mandlebrot set.
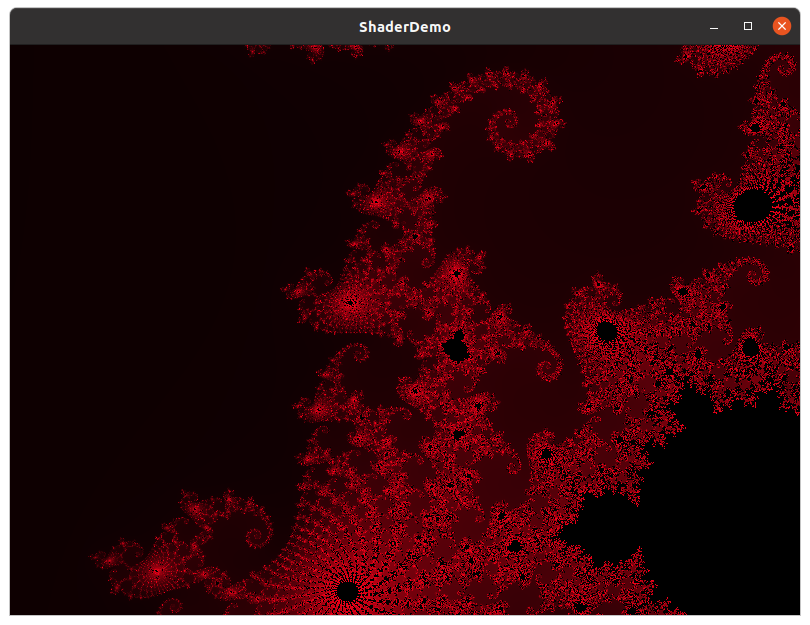
With traditional textures, zooming in becomes pixelated due to limited resolution. However, this is not the case with this shader, as it generates the image procedurally in real-time. Because of this, we can zoom in more than 1000x times, and it will still look sharp. (at some point, though, we run into problems with 32bit floating point precision.)
Here’s how I did it…
The bonus application is set up to zoom in and out of a single quad that uses bonus.frag to render the contents. The shader performs 512 iterations of \(z->z^2+c\) where \(c=-0.7463+i0.1102\). I have a counter that increments once per loop, and if \(|z|>2.0\), the loop terminates. I then colour each pixel so that a pixel’s red value is the number of iterations \(/ 512\). However, pixels with exactly 512 iterations are coloured black.
Your task is to implement something cool using a shader restricted to a single quad. Some ideas could be:
- A reimplementation of my Mandelbrot shader.
- A Perlin noise shader (or even better fractal Perlin noise)
- Procedural detail mapping (mix a texture with Perlin noise so that it has fake ‘detail’ when zoomed in. This detail map should fade out when an object is far away)
- Can you write a shader that renders the entire Task 1 problem on a single, untransformed quad? That is, render the background and rotated chessboard onto a single screen aligned quad.
- Something else…
As always, bonus tasks are not marked, but if you make something cool, it might turn up in next week’s lecture :)
Changes to our Gitlab settings
To simplify things, we’ve made a few minor changes to how the GitLab repos work. This shouldn’t affect anything on your end, but here are the changes:
- You still need to fork the repo, however, it should now automatically be set to private, and a marking user added automatically (so there’s no need to add me as a developer anymore).
- I now have the lab instructions on the course website instead of inside the README.md. This makes adding clarifying statements after the lab has been released a bit easier. If we do this, we will make sure to highlight any changes. This also allows me to make use of \(\LaTeX\).
- The repos were previously named lab1, lab2, etc, but now are called comp4610-lab3. This will avoid any naming collisions with other courses.