Week 4 GitLab CI/CD and Docker Tutorial
In this week’s lab, you will learn about:
- Deploying a Continuous Integration service in Gitlab
- Annotating tests written in
JUnit - Docker Architecture
Prerequisites
You have installed Java (preferably with IntelliJ as the IDE), and have some experience in programming in it.
Docker Installation (Optional for local builds)
For macOS and Linux#
Please make sure you have the following things installed and ready to go!
- For Mac: Docker Desktop Community
- For Linux: Docker Engine Community
For Windows#
If you have Windows 10 Professional (it doesn’t work in Home), try WSL 2 and Docker for WSL 2. WSL stands for Window Subsystem for Linux. It allows you to run Linux within Windows. That’s what we’ll be using. WSL 2 works faster than WSL1 but it’s harder to set up since it’s still in preview.
If you do not have Windows 10 Professional and you do not want to buy it, follow this blog post to install VirtualBox and a Linux VM so you can follow inside of Linux. I’d suggest using Ubuntu.
Or, if you know PowerShell really well and know how to translate bash commands to PowerShell commands, feel free to install Docker Desktop Community and do everything from PowerShell (honestly it shouldn’t be too bad.)
Verify Docker installation:#
Make sure when you go to a bash prompt and type docker info that it outputs system info and doesn’t error out. This will let you know that everything is working.
CI/CD Overview
This intro is inspired from MIT’s metaprogramming tutorial, under the CC BY 4.0 license [1]
Continuous integration, or CI, is an umbrella term for “event-triggered actions that run whenever a particular event happens (usually on the the server where the code is stored)”. Here, the action means some sort of script/sequence of programs are going to be invoked. There are many companies out there that provide various types of CI, often for free for open-source projects.
When talking about build processes on code changes, there are many considerations such as dependency management, setting up build systems locally and remotely, testing etc. Similarly, for larger builds, we could even need to have a hierarchy of pipelines in which the parent pipeline controls it’s children. You will also see that on working in large teams, this could become very complicated and prone to errors. For every PR/post-commit/commits with specific messages, you might want to upgrade to a new version of the documentation (for which the types of tests needed to be run are minimal), upload a docker image or a compiled version of your application on a remote machine, release a major version of the code to production, run your test suite, check for formatting errors, benchmarking, and many other things.
In fact, with the recent trend towards microservices, the changes inside the local development environment of the user are less likely to break, however they would likely break an application call which calls this microservice on the other side of the network call.

To solve this (especially in the context of teams) we have the concept of a cloud-based build system called continuous integration (CI).
Some of the big ones are Travis CI, Azure Pipelines, GitHub Actions, and Gitlab Pipelines. They all work in roughly the same way: you add a file to your repository that describes what should happen when various things happen to that repository. By far the most common one is a rule like “when someone pushes code, run the test suite” (which is what exercise 1 of this lab is about). When the event triggers, the CI provider spins up one/more virtual machines (or more), runs the commands in your “recipe”, and then usually notes down the results somewhere. You might set it up so that you are notified if the test suite stops passing, or so that a little badge appears on your repository as long as the tests pass. This is called test annotation.
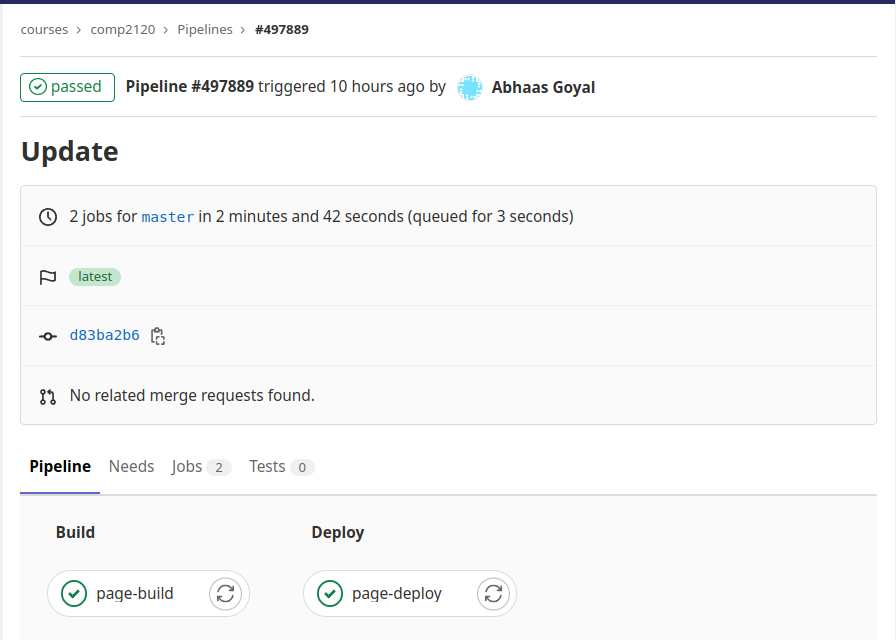
As an example of a CI system, the class website is set up using Gitlab CI pipeline, which itself calls various scripts to automate build, test, run and deploying on the cloud. It uses the Jekyll blog software on every push to master and makes the built site available on a particular GitHub domain. This makes it trivial for us to update the website! We just make our changes locally, commit them with git, and then push. CI takes care of the rest. An example is given below:
Benefits and considerations#
The fundamental goal of CI is to automatically catch problematic changes as early as possible, resulting in a fast-feedback loop.
Some of the considerations are provided as a StackExchange` question
Aside: CI at SE@Google
Continuous integration: the contintous assembling and testing of our entire complex and rapidly evolving ecosystem.
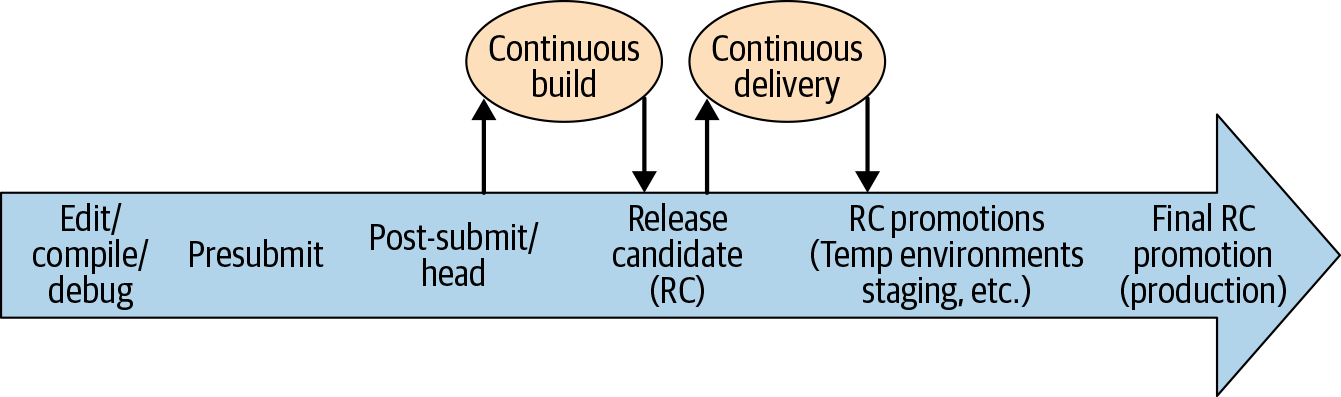
Based on the diagram above (the life of a code change including CI/CD), what considerations would Google take for efficient cycle of new releases of a project?
Activity 1
NB! See additional notes here.
Fork and then clone the repository for the lab from your workspace.
You can see that the repository is a solution to one of the problems in Codeforces, an online platform for competitive programming.
The source code has libraries for JUnit 4 for testing purposes, which we will enable to be run on every subsequent commit to master. The build system being used for the project is gradle, there are other ones such as maven but the build command would be similar. For the purposes of the lab, the project has been set up such that the corresponding annotated test pipeline should consist of two stages:
-
gradle-build- Compiles the source code into application bytecode. This is run viagradle assembleshell command. -
gradle-test- Tests all the written test cases for the project . This is run viagradle testshell command.
Alternatively, you can also use the gradle wrapper ./gradelw <assemble/test> at the root of the project, which will automatically install the dependencies for you. If gradle is selected, before running the build and test stages, you also have to pull the respective docker image (of gradle/java) in the corresponding runner.
Write the CI pipeline to build and test the project in the file .gitlab-ci.yml at the root of the project. The test results should be annotated as an artefact at the end of running the pipeline.
The pipeline for Gitlab is written in the YAML file format (See this. For this exercise, the pipeline after completion should look like the following (Goto CI/CD -> PipeLines -> <Job Number> on the Gitlab repository website):

Now, when we push any of the changes to the remote repository, we expect these pipelines to be run by a computing entity (which is called a runner in Gitlab’s/Github’s lingo). Normally, one has to install and set up the runner by themselves in a specific machine that takes in jobs in a queue (see Install Gitlab Runner for more details), however in this scenario, we can assume that the runner has been set up by an administrator.
Notably, we are going to be using a shared runner, which can take in jobs from any one in the organization. There are shared runners for subjects such as comp2100, comp2300 already present so one can use these.
For the purposes of the lab, we are going to use the COMP2100 runner, which can be run by tagging it in the necessary steps of the pipeline
specific-pipeline-step:
    tags:
        - comp2100
Finally, we are also going to display the annotated results in the browser as follows:
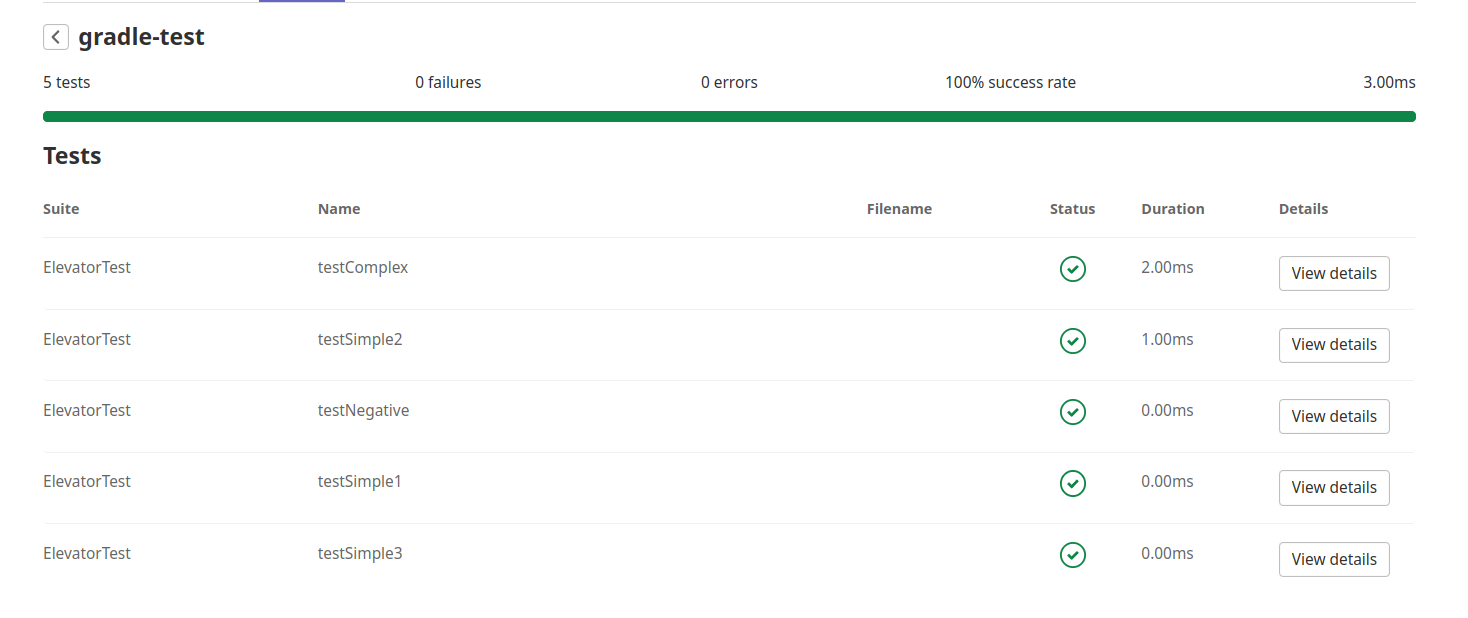
Check out the necessary documentation for instructions for setting up annotations.
For hint: see an example
Activity 2
As of now, the pipeline is run for every push to the main branch. However, in practice this would waste a lot of unnecessary computational resources, so we need the runners to only run specific stages under specific circumstances (such as running the whole build and test stage on pull requests, not running extensive tests on documentation changes and using something like proselint instead, etc). We can configure certain filters on stages and their conditions to be run in the same file.
Make the specific Gitlab Pipeline for gradle-test only during pull requests (this could be done for gradle-build as well, but this is just to show a differentiating example between the two)
You can look at the corresponding documentation for potential solutions.
Docker Overview
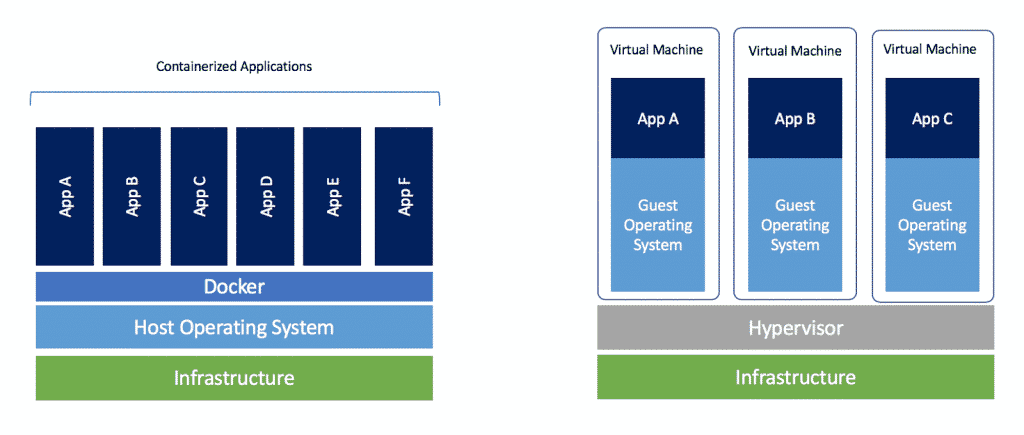
Virtual Machines are relatively heavy-weight; what if you want to spin up machines in an automated fashion? Enter containers!
- Amazon Firecracker
- Docker
rktlxc
Containers are mostly just an assembly of various Linux security features, like virtual file system, virtual network interfaces, chroots, virtual memory tricks, and the like, that together give the appearance of virtualization.
Not quite as secure or isolated as a VM, but pretty close and getting better. Usually higher performance, and much faster to start, but not always.
The performance boost comes from the fact that unlike VMs which run an entire copy of the operating system, containers share the linux kernel with the host. However note that if you are running linux containers on Windows/macOS a Linux VM will need to be active as a middle layer between the two.
Containers are handy for when you want to run an automated task in a standardized setup:
- Build systems
- Development environments
- Pre-packaged servers
- Running untrusted programs
- Grading student submissions
- (Some) cloud computing
- Continuous integration
- Travis CI
- GitHub Actions
Moreover, container software like Docker has also been extensively used as a solution for dependency hell. If a machine needs to be running many services with conflicting dependencies they can be isolated using containers.
Usually, you write a file that defines how to construct your container. You start with some minimal base image (like Alpine Linux), and then a list of commands to run to set up the environment you want (install packages, copy files, build stuff, write config files, etc.). Normally, there’s also a way to specify any external ports that should be available, and an entrypoint that dictates what command should be run when the container is started (like a grading script).
In a similar fashion to code repository websites (like GitHub) there are some container repository websites (like DockerHub)where many software services have prebuilt images that one can easily deploy.
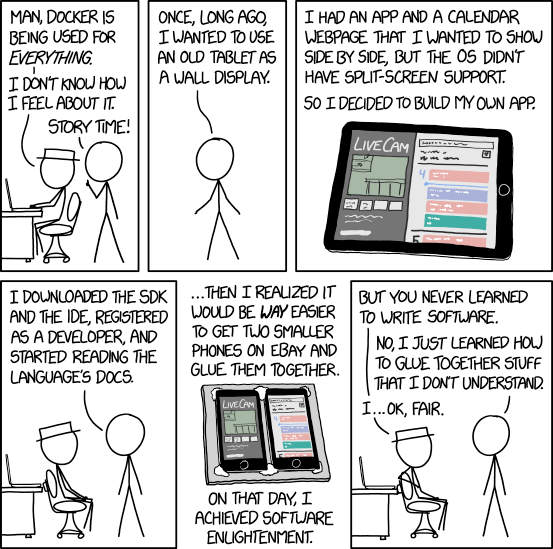
Mandatory xkcd comic:
Activity 3: Mount Contents Inside of Container
We are going to use the nginx framework as a web server within a Docker container. Follow the steps listed below to achieve it.
- Run the
nginxDocker image using thedocker runcommand. - Access the web server and make sure you can see the default page.
- Create an
index.htmlpage on your local computer. - Modify the
docker runcommand to display your HTML page instead of the default page.- Look into how to mount external contents into the counter (e.g., volumes).
- You may need to find out where the default
index.htmlfile is located inside of the Docker image. - These links might be useful:
Activity 4: Mount Contents inside of Container with Compose
{ .do-box }
Using the following documentation, write a Docker Compose file to run the nginx container so you can run it without using the docker run command. This link might be useful - docker compose
{ .info-box }
Make sure that the Docker Compose file mounts the volume so you see your own index.html instead of the default one.
Hints
If you want to look inside of a running container (using a shell) to look at the filesystem or see the running processes, you can use the following command:
$ docker exec -it CONTAINER_ID /bin/bash
If you want to start a container and use a shell to look at the filesystem or see running processes, you can use the following command:
docker run -it IMAGE_NAME /bin/bash
If you want to find a file on a Linux filesystem, try looking at the find command.
If you want to mount volumes in Docker, you might find the -v switch helpful.
Finally, for most distros nginx stores it’s default index.html file to be loaded in /usr/share/nginx/html (For reference, the current docker image of nginx is based on Debian, see here)
Extension: Setting up your own Gitlab Runner
Instead of relying on ANU’s machine as an instance for running stages, we can use self-hosted runners on gitlab from providers such as AWS (via EC2), Azure (via it’s VM service), etc. In this case, we assume that the host is the same as your local machine, and you needs to configure it to run the pipelines.
Install Gitlab Runner on your local machine and run the CI tests from there.
See the corresponding documentation on:
1. Installing
2. Registering
3. Configuring
References
[1] MIT Missing semester: https://missing.csail.mit.edu/2020/metaprogramming/ [2] https://github.com/btholt/complete-intro-to-containers/blob/master/README.md