Lab Tasks
Welcome to the COMP1720 labs! These labs are the heart of the course, and they’re your opportunity to practice the core concepts you’ll need for the assignments. If you are feeling a bit lost—that’s ok! It’s just week one and there are no dumb questions in this course.
In this week’s lab you will:
-
make new friends (well, at least one new friend) as you work in pairs
-
spin the p5 roulette wheel—where will it land?
-
draw some shapes and make your first p5 sketches with your lab buddies
-
submit your best work to complete the lab.
Task 0: Artwork Discussion
From time to time, labs will have a Task 0. These are an optional task and give the opportunity for you to meet and chat with your fellow lab goers and tutors.
This weeks task 0 is:
Choose one artwork discussed in the week 1 lectures and then an artwork or other media/experience/artefact (include a picture or reference) that you have experienced or found online. Explain why these two works could be considered “art”. Give at least one reason that they are artistic in different ways.
Task 1: Find a partner
Say hello and introduce yourself to one of the people next to you. This person is now your lab partner (just for today)! There will be several group activities in these labs during the semester, but you won’t have a specific lab partner for the whole course.
If the people next to you are already in groups, feel free to ask your tutor to find you a partner somewhere else in the room (or form a 3!)
Ask your partner a bit about themselves (where did they grow up? what are they studying at uni? what are they hoping to learn in this course?).
You’ll be using the same tools you setup in lab 1. So open VSCode and dive in.
Open the lab repository folder for lab 2
(Remember we will be using the same repo for every single lab, just a different
folder in the repo). In VSCode, open the repo and navigate to the week-02 folder,
open sketch.js; this is where you’ll write your code today. Finally, start the
p5 live server.
Task 2: let’s play p5 roulette.
In this lab we’re going to play “p5 roulette”. The ideas is to use random p5 commands to start making an artwork collaboratively!
The rules of p5 roulette are:
- click to spin the wheel
- when it stops, follow the instructions
- if it’s a function call (e.g.
ellipse(x,y,w,h)) you get to add that line of code anywhere in your sketch, and you get to choose the parameters (x,y,wandhas well) - if it says “replace any number with …” then you get to replace any
number in the code (e.g. a
100) with whatever the roulette wheel says (e.g.frameCount) - if it says something else (e.g. to delete some lines of code) then just follow the instructions
- if it’s a function call (e.g.
- don’t ever delete/change the starting code (i.e. the
draw()orsetup()functions) - if the p5 roulette wheel ever tells you to do something which makes no sense (e.g. delete a line of code when you haven’t added any lines yet) then just ignore that and spin it again
- make sure you talk through the options (e.g. parameter choices) with your partner
Here’s the wheel!
Task 3: Break it down!
The roulette wheel is a great way to get started and try new ideas. But another great way to get inspiration is to read and experiment with other artists’ code.
In this section, we’ve provided a working sketch using the functions you’ve just been using. Your job is to experiment with the code and see if you can make it do something interesting! See if you can break it and understand how it works.
If you need ideas you can always go back and get another function from processing roulette. Other ideas include adding colours, changing rotation values or the for loop. Don’t worry about making something beautiful, the aim is to experiment.
Reading and editing other artists’ code is an important skill and a great way to get inspiration. But don’t worry if you don’t feel like you understand this code yet, we’ll cover all this in the lectures.
Try and make this sketch your own — modify it and experiment with it for a bit. Before you move on, call your tutor over to show them what you’ve done!
Task 4: Upload to gitlab!
In this task, you’re going to take your “best” sketch from today and upload it gitlab. This will show you how you “submit” your lab work each week and how to check that it’s been “received”.
For every week in COMP1720 from 1 to 11, you have a folder in your lab repository with files to fill out. From week 1 to 8, you have our standard “p5 sketch” template with a sketch.js file.
Your last task in every one of these weeks is to take your “best” work from the lab, put it in your lab sketch.js file, and then commit and push to gitlab. This way your lab work will be available for you, your tutor, and others to see (if you share the URL with them).
Doing this every week and hopefully sharing your lab creations among your lab colleagues and others in the course is a really important way that we build a collaborative community and we hope that you take advantage of that.
Pushing your best work to gitlab is also the way that we track your progress in labs and award your (small) weekly in-lab mark; so don’t skip it!
If you want to save multiple sketches in your gitlab, you can add extra sketch files (e.g., sketch2.js, sketch3.js, etc), but only one sketch at a time will show up on the test server.
Commit your best work in this lab to week-02/sketch.js in your lab repo and push it
to your fork on the GitLab server. Give it a helpful commit message like “completed lab 2!” or something so that when you’re looking through the git
log view later you know where you were up to. Check the CI jobs to see that your repo is working (see below).
CI
In GitLab, there is a feature called Continuous Integration (CI). It’s a set of testing programs called “jobs” which run (on the server, not on your laptop) every time you push something to your repo. In COMP1720 we use CI to do some basic testing to keep track of which labs you have completed, send your sketches to the test server, and give you helpful pre-feedback on technical requirements in the assignments.
In the lab repo there’s a different job to check that you’ve completed your work each week. You can check the CI jobs by hovering your mouse over “CI/CD” in the sidebar, clicking “pipelines”, then in the main area clicking on the status button of the “latest” pipeline which is at the top of the list.
Then you’ll see a big diagram of all the jobs in the pipeline.
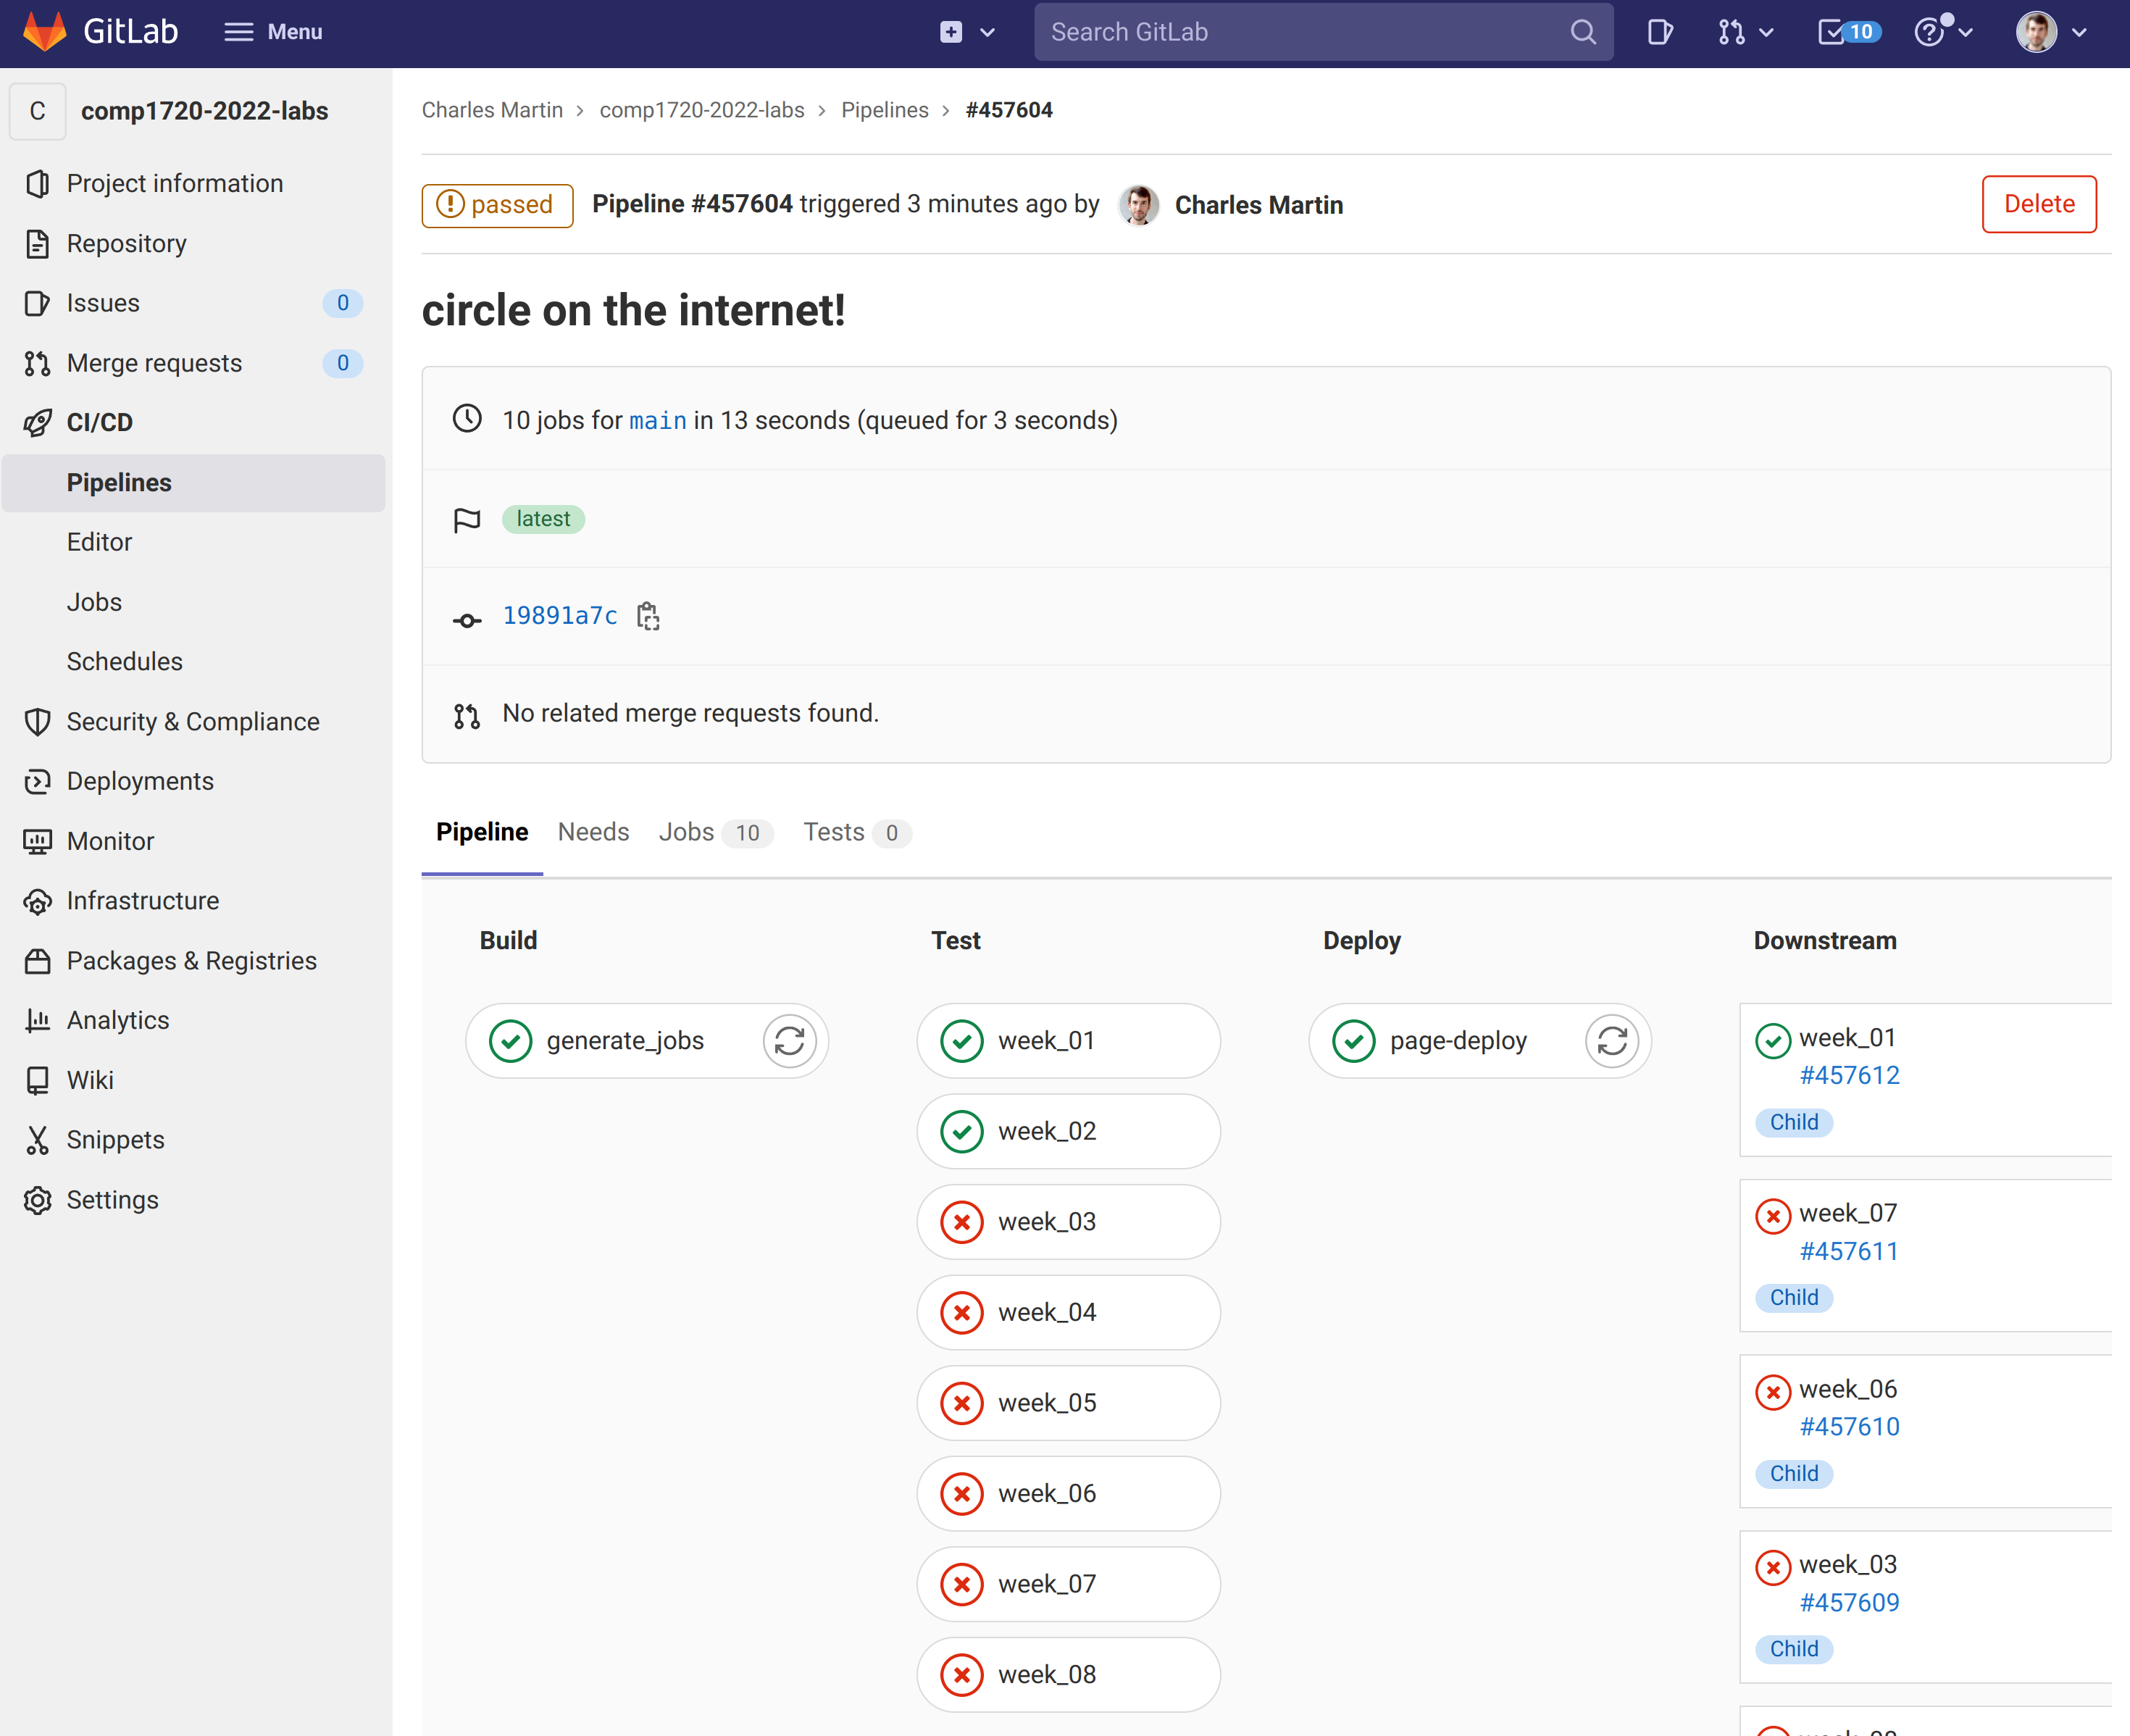
You should see some ❌s for weeks that you haven’t completed yet, this indicates that the CI job for that week has failed (so far). Hopefully you do see a green tick for week 1 and week 2.
If you want to know why the CI tests failed, then you should click on the ❌ itself, then keep clicking the ❌s until you see a black screen full of text (you can also find the CI pipelines and build jobs through the “CI / CD” sidebar on the left).
Don’t be worried by this stuff—espesically by the angry redness of the ❌ and the scary-looking “build failed” emails. This is actually all good news, because it lets you know if things aren’t working as they should be while you’ve still got a chance to do something about it. For heaps more information on how we use CI in this course, see the GitLab CI section in the FAQ.
Finally, if you did find this stuff challenging that’s ok. You can take heart that all of the stuff you just learned will be useful for every piece of work you submit in this course, and you just had a low pressure, zero-stakes introduction to it. So well done you, you’ve saved yourself a bunch of stress at assignment submission time (when stuff is actually on the line).
Extra Tasks
These are extra tasks which you should only attempt after you have completed the lab tasks above. You’re not marked on these tasks and they are designed to give you directions for further exploration!
Painting with Smooth Lines
If you’ve been paying attention in lectures, you might have seen the mouseX and mouseY variables used to follow the mouse cursor. You can use this technique to quickly create a p5 sketch for “painting” as follows:
function setup() {
  createCanvas(windowWidth, windowHeight);
  background(255);
  noStroke();
}

function draw() {
  fill(255,0,0,100);
  ellipse(mouseX,mouseY,50,50);
}
You might have noticed that the when you move the mouse quickly, a trail of circles are left along the screen instead of a smooth line. Your task is to make a painting sketch that solves this problem and can draw smoothly across the screen however you move the mouse. (Hint: you might need to use variables in addition to some new drawing commands from the p5 reference).
Colour with HSB
So far we have been using RGB values to specify colours, but p5 supports other colour modes (or ways of interpreting numbers as different colours.
Have a look at the colour mode page and read about the HSB (hue, saturation, brightness) colour mode. Make a sketch where you draw some objects in HSB mode.
One of the great things about HSB is that you can change colours smoothly forever by cycling through different hue values while keeping the other parameters static. We usually represent hue as a number between 0 and 360.
Use the modulo (%) operator and frameCount to smoothly change some of your colours as your sketch runs. You might like to change the speed and alter the saturation and value of some colours as well.
Draw with Arcs
p5’s ellipse and rect shapes each take four parameters (x, y, width, height), but there are other interesting shapes that take more parameters. Have a look at the arc command which takes six parameters (x, y, width, height, start stop) and draws part of a circle. The “start” and “stop” parameters are measured in radians—the angle measurement you might have used in maths.
Make a new sketch entirely with arcs - what interesting things can you do with arcs that other shapes can’t do? One idea might be to make a tessellating fan or scale pattern. Make something cool!