Outline
In this week’s lab you will:
- learn about hit testing using the p5 mouse variables
- use conditionals to build basic buttons both rectangular and circular
- build your own version of the PlaySchool window wall
Before you start your lab session, make sure:
- you’ve seen the week 3 lecture on conditionals & loops
- you can fork, clone, commit & push to GitLab (like you did for assignment 1)
Task 0: Colour Palette
Last week’s lecture was about colours, so let’s make a colour palettes:
Find something that inspires you which isn’t visual (could be a poem, a book, a piece of music, a memory) and create a palette of at least three colours to represent it (you can use
p5or any other method (including Coolers). Show your colour palette and explain how it is connected to your inspiration.
Task 1: fussy musical instrument
The COMP1720 team bought a mysterious musical instrument off the internet they don’t really know how to use (it was a late night purchase… okay?!?!), and they’re trying to re-create it in p5.js. They’ve gotten most of the way there, but need some help writing the if-statement that determines if their re-creation should play a note.
The conditions this musical instrument needs to create a note are quite wacky, in order for a note to play they all need to be satisfied:
- the instrument is on the ground
- it is not raining outside
- the musician is wearing a blue or green t-shirt
- there are more musicians in the room than listeners.
Write an imaginary condition statement (the bit inside the if (xxx)) which is
true when all the above conditions are met, and show it to your neighbour / tutor.
See if they agree with what you’ve wrote.
Task 2: hit testing
What is a button, really? It’s an area of the canvas where if you click on it, stuff happens. And if you click somewhere else (not on the button) then nothing happens. So you can see in the above descriptions that there’s some conditional logic (and Booleans) involved in making a button in p5.
In the week 3 lecture we discussed the way that p5 uses certain variables to provide information about what’s going on with user input (see the Events section in the reference). Figuring out whether the mouse button is pressed is a helpful starting point when it comes to making a button, but you also need to figure out whether the mouse is “over” the button. This process is called hit testing.
Rectangular Buttons
In the widget below, write a condition statement using x and y that will
highlight only the rect (hint: you can link more than one condition together
with && and
||).
The starting expression in the text box is just the boolean value true, but
you should delete that and write your own conditional expression. If you’re struggling writing conditionals, you should review the week 3 lecture content on them.
In addition to this, each red dot in the sketch has its own x and y (its position), which refer to
the x and y in the condition box. If the condition is true for a red dot, then it will light up, however if it is false, then the red dot will disappear.
If you’re feeling stuck, start small: choose one edge on the rectangle below. Can you make dots only appear on the inner side of that edge?
Circular Buttons
Ok, this one’s a bit trickier—write a condition using x and y that will
highlight only the ellipse (i.e. none of the background). You’ll need the
dist() function. Remember you can access the builtin width and height variables in the condition box!
How could I use this information to draw circles in p5 without using the
ellipse() function?
Other Shaped Buttons?
It might sound surprising, but you can use these two methods above to hit test for practically any shaped button. This is because most complex shapes can be built out of simpler ones (like circles and rectangles). Using && and || we can combine conditions to match shapes.
If you want to see this conditional stuff from another angle, Dan Shiffman has a video on conditionals.
Task 3: PlaySchool windows
Find a partner in your lab. If no one around is currently looking then let one of your tutors know and they will find a partner / group for you.
PlaySchool is a show from the ABC which many Australian kids grow up watching. The show had a segment with three windows, and through each window was a magical surprise.
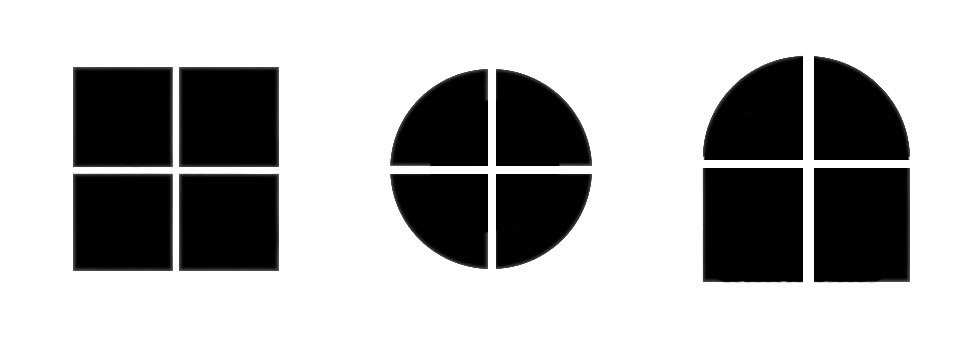
In this part, you’re going to work together with your partner to recreate the “PlaySchool” sketch. You’ll implement three windows, where each window is a button that changes the background of the sketch:
- the square window sets the background to: a starry night
- the circle window sets the background to: a beautiful sunset
- the arch window sets the background to: a party
Individually clone your fork of the lab repository repo if you haven’t already. In VSCode, open the repo and navigate to the week-04 folder, open it in VSCode and start the live server (click “Go Live!” in the bottom right corner) as usual.
Choose one window each and write some code to implement it. If you get stuck along the way, ask your partner for help! Once you’ve both finished, look at each other’s code and see if there are any differences and if either would behave differently.
Once you’ve finished, try and implement the remaining window and then save your code into week-04/sketch.js in your lab repo and push it
to your fork on the GitLab server. Check the CI jobs for a tick to see that your repo is working.
Task 4: break it down!
As in every lab, we’ve provided some code for you to mess with and make your own. This code is based on the classic “Whack a Mole” game. Open up a new copy of p5live for you to work on the game as a pair.
Play with the code and see what you can do to it (it’s totally okay to not understand how some of it works!).
Extra Tasks
Moving Buttons
Normal buttons are boring. If you have time, try modifying your PlaySchool
sketch so that the windows (i.e. the buttons) move around. You’ll probably need
some variables to keep track of the window positions (since they won’t be
constant numeric values like 200 any more). If you want to really stretch
yourself, try and make the windows “run away” from the mouse—so that they’re
almost clickable, but they stay just out of reach.
Build the Fussy Instrument
(N.B.: this is a bit of a weird task!) Is there any way you can
think of to actually create the fussy musical instrument from Task 1
in p5? What resources would you have to pull together to do it? Have
a look at the different libraries available in p5 and see if you
could plan a way to do. (Noting that we will be looking a sound in
later labs, but this is a good chance to start exploring the p5
reference if you haven’t already).