In this course, we will use some additional software that will need to be installed on your personal device.
- Digital, a logic simulator.
- VS Code, an IDE for coding and debugging later in the course.
- Git, for downloading, and submitting, exercises and assessment items.
- Various other packages as required.
Installation
Lab Machine#
Lab machines already have the main environment set up, all you need to do is set up VS Code.
Windows 64-bit#
- download Digital. Unzip the file and run
Digital.exe. If you have not got a working install of Java on your computer, Digital most likely will not run. You can install Java from here, make sure you download the Windows version. - download & install Git. Git Bash will behave like a terminal on the lab machines and should let you do all the usual Git commands.
- download VS Code from here. If you need a version other than the 64 bit windows installer, you can find it on their alternate downloads page.
- set up VS Code
- set “Git Bash” as the default terminal in VSCode
- open VSCode and open a terminal (Ctrl+Shift+`)
- from the little plus dropdown menu in the terminal area, click “Select Default Profile”
- choose “Git Bash” from the upper dropdown menu that appears
- test it: close your terminal (“x” button), then open a new terminal. It should have a line that says “MINGW64 ~” at the end. That means it’s worked!
- install Make into Git Bash
- download
make-4.4.1-without-guile-w32-bin.zip(or similar version) from ezwinports - Double click the .zip file, click “Extract all”. In the “Select a destination” menu choose “C:\Program Files\Git\mingw64"
- test it: open a Git Bash terminal in VSCode type
makeand press enter. It should saymake: *** No targets specified and no makefile found. Stop.— this is good, it means Make is installed and accessible in Git Bash!
- download
macOS#
You will need make, git and java installed on your machine. There are a
couple ways that you can do that, first open up a terminal and check if you
have them installed already by typing:
make --version
git --version
java -version # it may also be --version (note the 1 / 2 '-'s)
If all of those commands worked (actually printed out a version number), then you can skip to the rest of the software install.
Install using Homebrew (slightly harder, but recommended)#
-
check if you already have homebrew installed by running
brew -vin terminal. If it is there, then you can skip ahead to step 3 -
follow the install instructions on the Homebrew page. Then repeat step 1 to make sure the install worked.
-
install
makewithbrew install make -
install
gitwithbrew install git -
install
javawithbrew install java -
check that you have the command line tools by running the above commands again
Install using XCode (easiest but not recommended)#
You can install XCode from the app store, however it is a rather large download (~8GB) and even larger once it is done installing (~40GB), so if you have a slow internet connection or are space limited, then you should probably use the homebrew option instead.
-
run XCode
-
check that you have the command line tools by running the above commands again
macOS Software#
-
install
make,gitandjavausing one of the methods above -
download Digital. Unzip the file and run Digital.jar. NOTE: If you get a security error message about trying to run Digital.jar, try right clicking the file and choosing “Open” instead of just double clicking.
-
download & install VS Code. You may need to hold the control key and click to install in order to bypass a software security check.
If things go wrong, check the Troubleshooting section further down this page.
Linux (Not a Lab Machine)#
These instructions are aimed at Ubuntu, but should work for any sensible Linux distro that’s up to date. If you’re using something other than Ubuntu, I trust that you know what you’re doing. If you need help, you can try asking on the forum, but we may not be able to assist with all flavours of Linux. For Arch users: VS Code has an AUR package, so you don’t need to download a tarball.
- Check to see if you already have java installed with:
java --versionIf this returns a Java version, then you can replace the
17inopenjdk-17-jdkin the following command with that version number - ensure Git, Java, and other dependencies, are installed by running this command in the terminal:
sudo apt install openjdk-17-jdk git build-essential -
download Digital. Unzip the file. You can then run Digital by running the
Digital.shscript, or you can run theinstall.shscript to add a menu item to run Digital through (and also install the Digital MIME type to allow your computer to recognize Digital files). -
download & install VS Code. You’ll want to download the
.debfile. Install the package once downloaded. Using another IDE is difficult — our assembler is a VS Code extension. VS Codium is an option as well, as used on the lab machines. - set up VS Code
VS Code
Setup#
-
have VS Code installed by following the relevant platform specific instructions
- open VS Code, then open the Extensions view, on the left side of your screen — it’s the button with this icon:

- search for and install:
- COMP2300 Extension (
anu-extensions.comp2300-extension) - QuAC Companion Extension (
anu-extensions.quac-companion)
- COMP2300 Extension (
-
reload the VSCode window (using the command palette).
- using the command pallette again, install the toolchain by running:
COMP2300: Install Toolchain
Using#
VS Code has good documentation. The lab material will link to specific parts of it where appropriate. Many settings can be changed to customize the appearance and behaviour of VS Code — feel free to set things up to your liking. In particular you may want to enable autosave.
Troubleshooting
Here’s a list of issues you might come across, depending on the specific details of your machine. As always, be careful with copy-pasting random code you found on the internet (even in a university course!), and try to understand the problem first before you try the solutions listed.
If new problems come up on the forum, they will be added to this page once a solution is found.
Unable to build / Wrong highlighting#
If you have PlatformIO IDE installed with VSCode, then you will have to disable it and reload VSCode
to fix it.
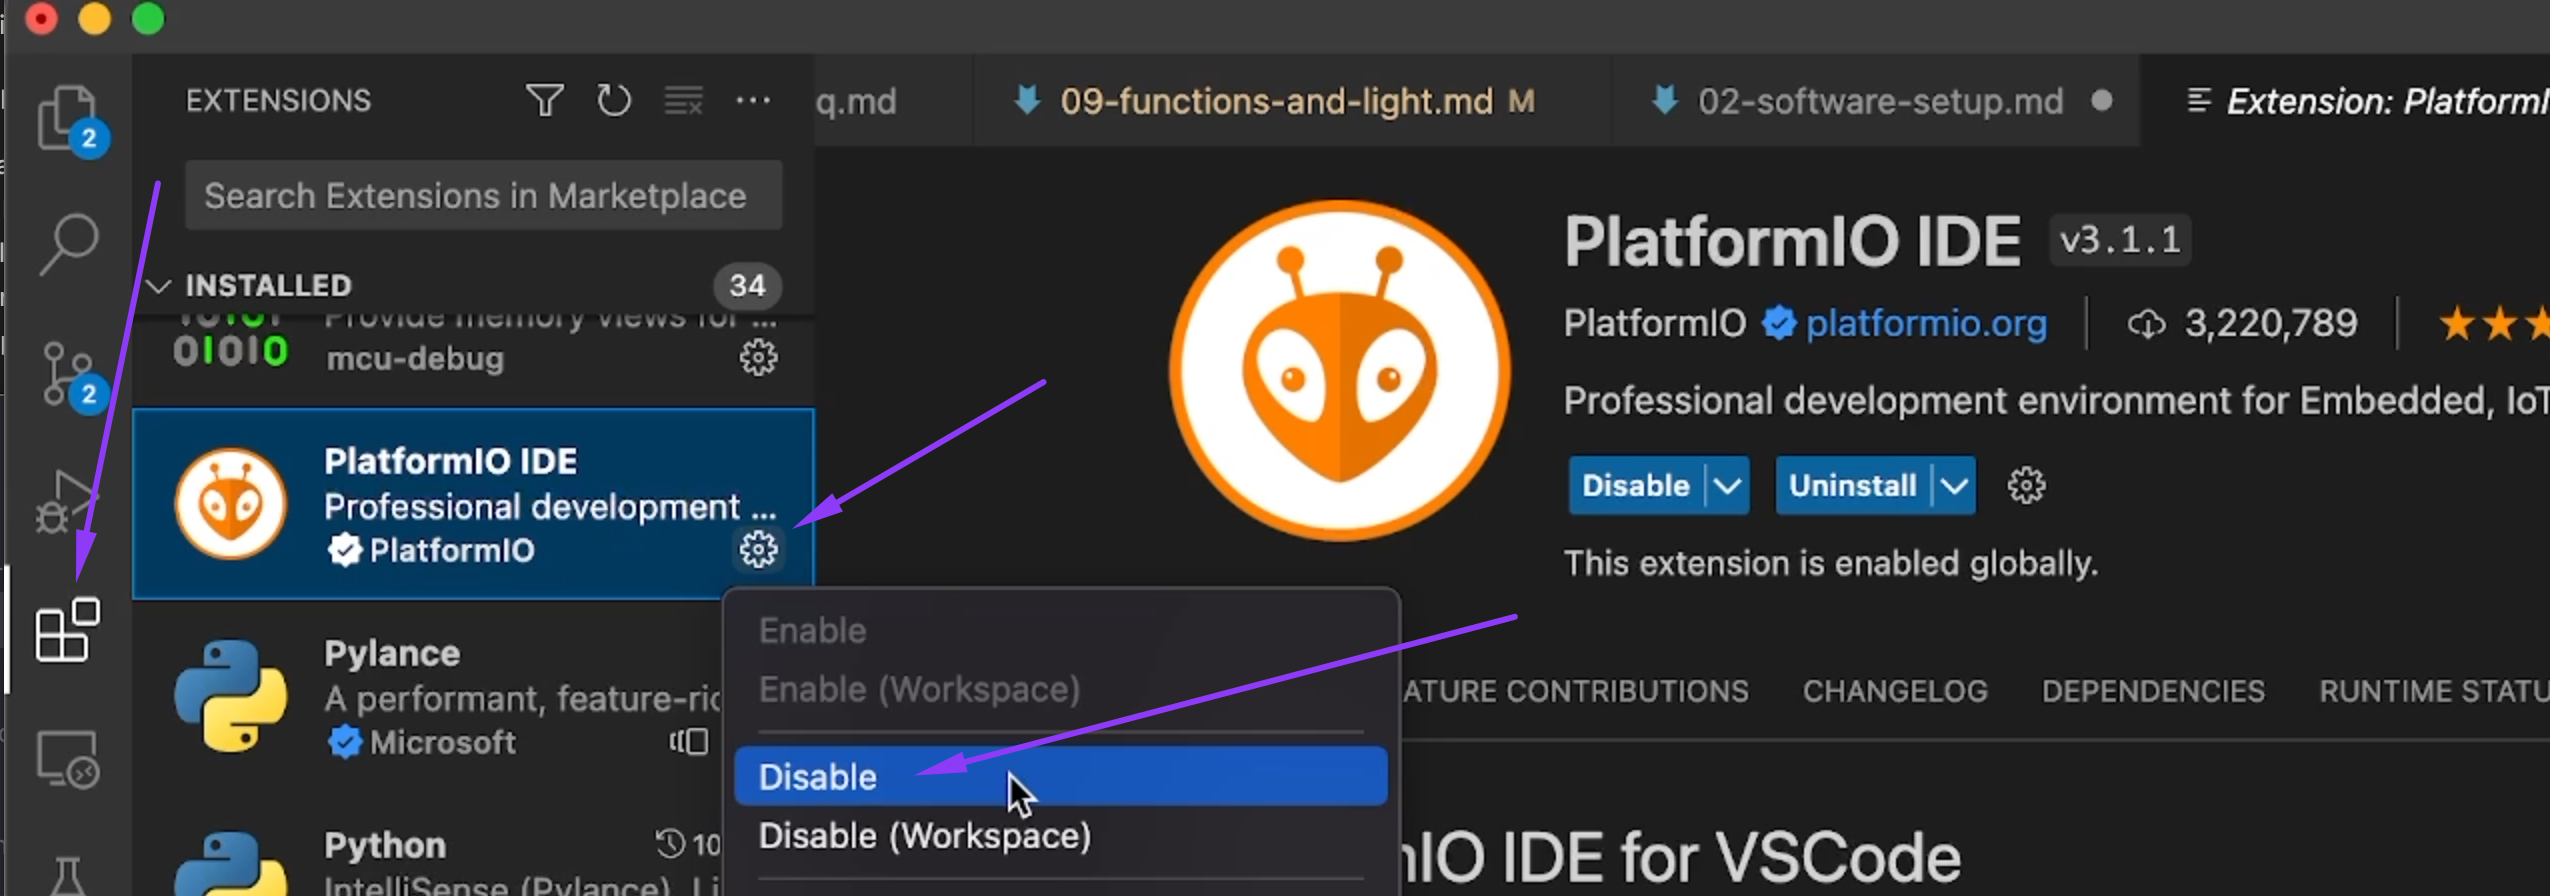
Then run the following command:
> Developer: Reload Window
OS Specific Problems#
macOS#
Digital can’t see my files#
The reason for this is because more recent versions of macOS have restricted access to common user folders, for example Documents and Downloads. Because of this, Digital is unable to see files / folders in these folders.
To get around this, you can put your repos inside another locations, like $HOME (the folder
your Documents, etc. folders are in), or you can run Digital from the shell file instead.
To run Digital from the shell file, open your Digital folder in finder and double click Digital.sh
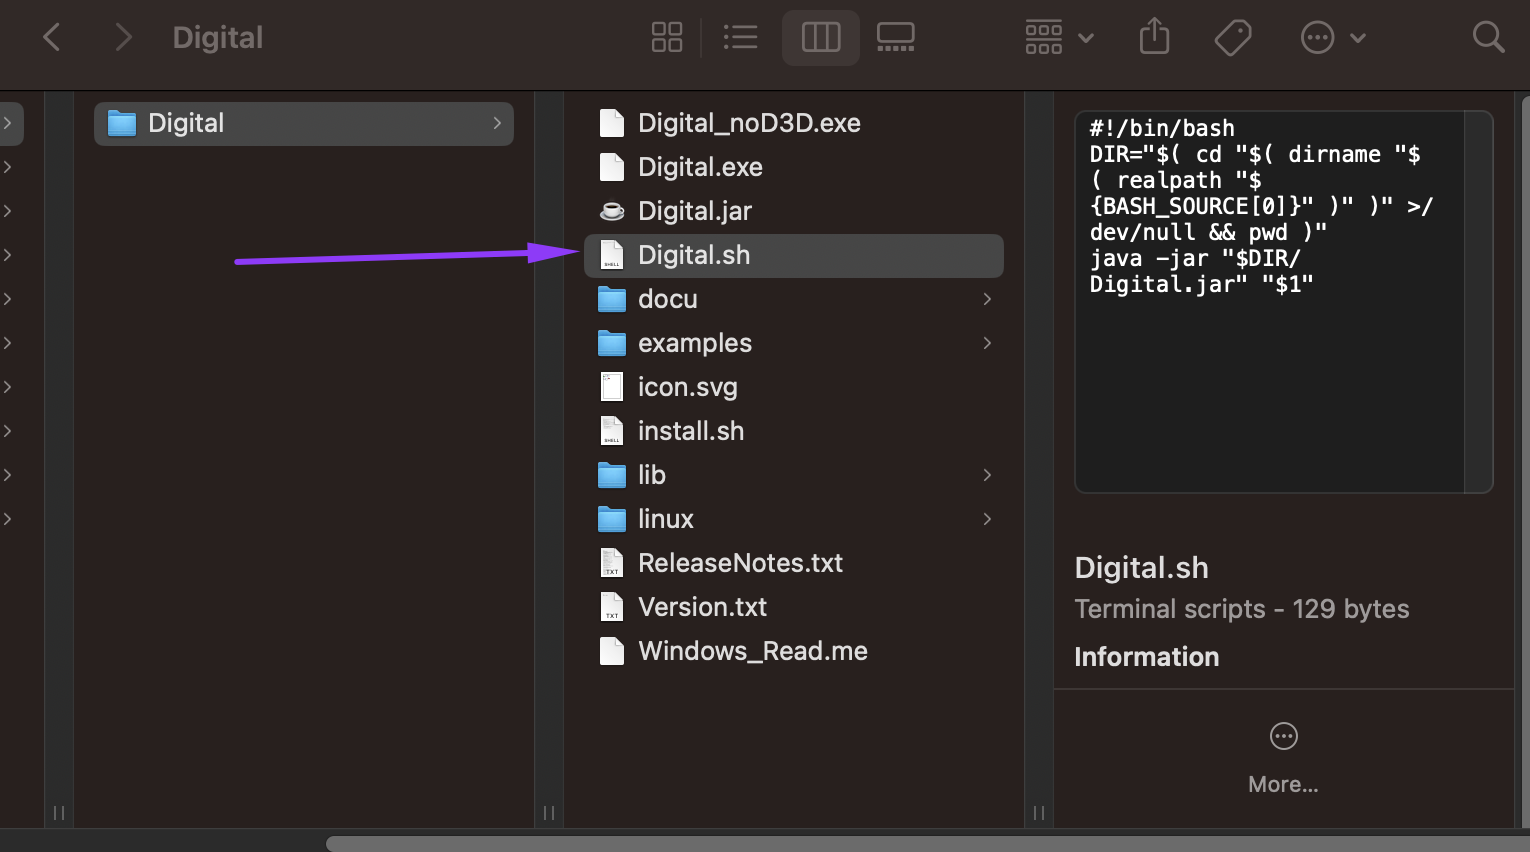
You can also run it from command line like so:
# cd into the Digital folder then ...
./Digital.sh
What this does is that it makes Digital run under the terminal application instead of the java runtime (as far as the OS is concerned at least), so that when Digital tries to access these protected folders, the terminal app will prompt the user for access, which can then be granted so digital can view the files (this only needs to happen once, so it may not prompt you if you have already provided access to terminal in the past).
Can’t find the Java Runtime#
This can occur when you have installed Java using the homebrew method, however it hasn’t set up the expected file link correctly. If when you try to run java --version
in terminal, and you get this response:
The operation couldn’t be completed. Unable to locate a Java Runtime.
Please visit http://www.java.com for information on installing Java.
Then you can fix it by:
-
run
brew info java - the command will tell you what to run next, look for a line like the following:
# For the system Java wrappers to find this JDK, symlink it with
sudo ln -sfn /usr/local/opt/openjdk/libexec/openjdk.jdk /Library/Java/JavaVirtualMachines/openjdk.jdk
in this example I would then run the following in a terminal command:
sudo ln -sfn /usr/local/opt/openjdk/libexec/openjdk.jdk /Library/Java/JavaVirtualMachines/openjdk.jdk - check the problem has been resolved:
java --versionshould now print out info about the java versions
Linux#
Windows#
Integrated Terminal Freezes#
On some Windows machine VS Code terminal tab freezes at start up. This happens irrespective of the shell selected. Because of this the debugger will not run.
The cause of the problem is still unclear. There is no fix at the moment.
Git HTTP Basic Authentication Failed#
Open the start menu, and search for Credential Manager. Select Windows Credentials, then search for git in the list of generic credentials. Either update your password or delete the entry to resolve the issue.
VSCode#
VS Code Developer Tools Console#
Before you look at the specific problems, here’s a tip for getting the most useful error messages out of VS Code when things are going wrong. In command pallete, run the Developer: Toggle Developer Tools command and you’ll see a new pane pop up in VS Code. Switch to the Console tab (top-right of the screenshot) and you’ll see something like this:
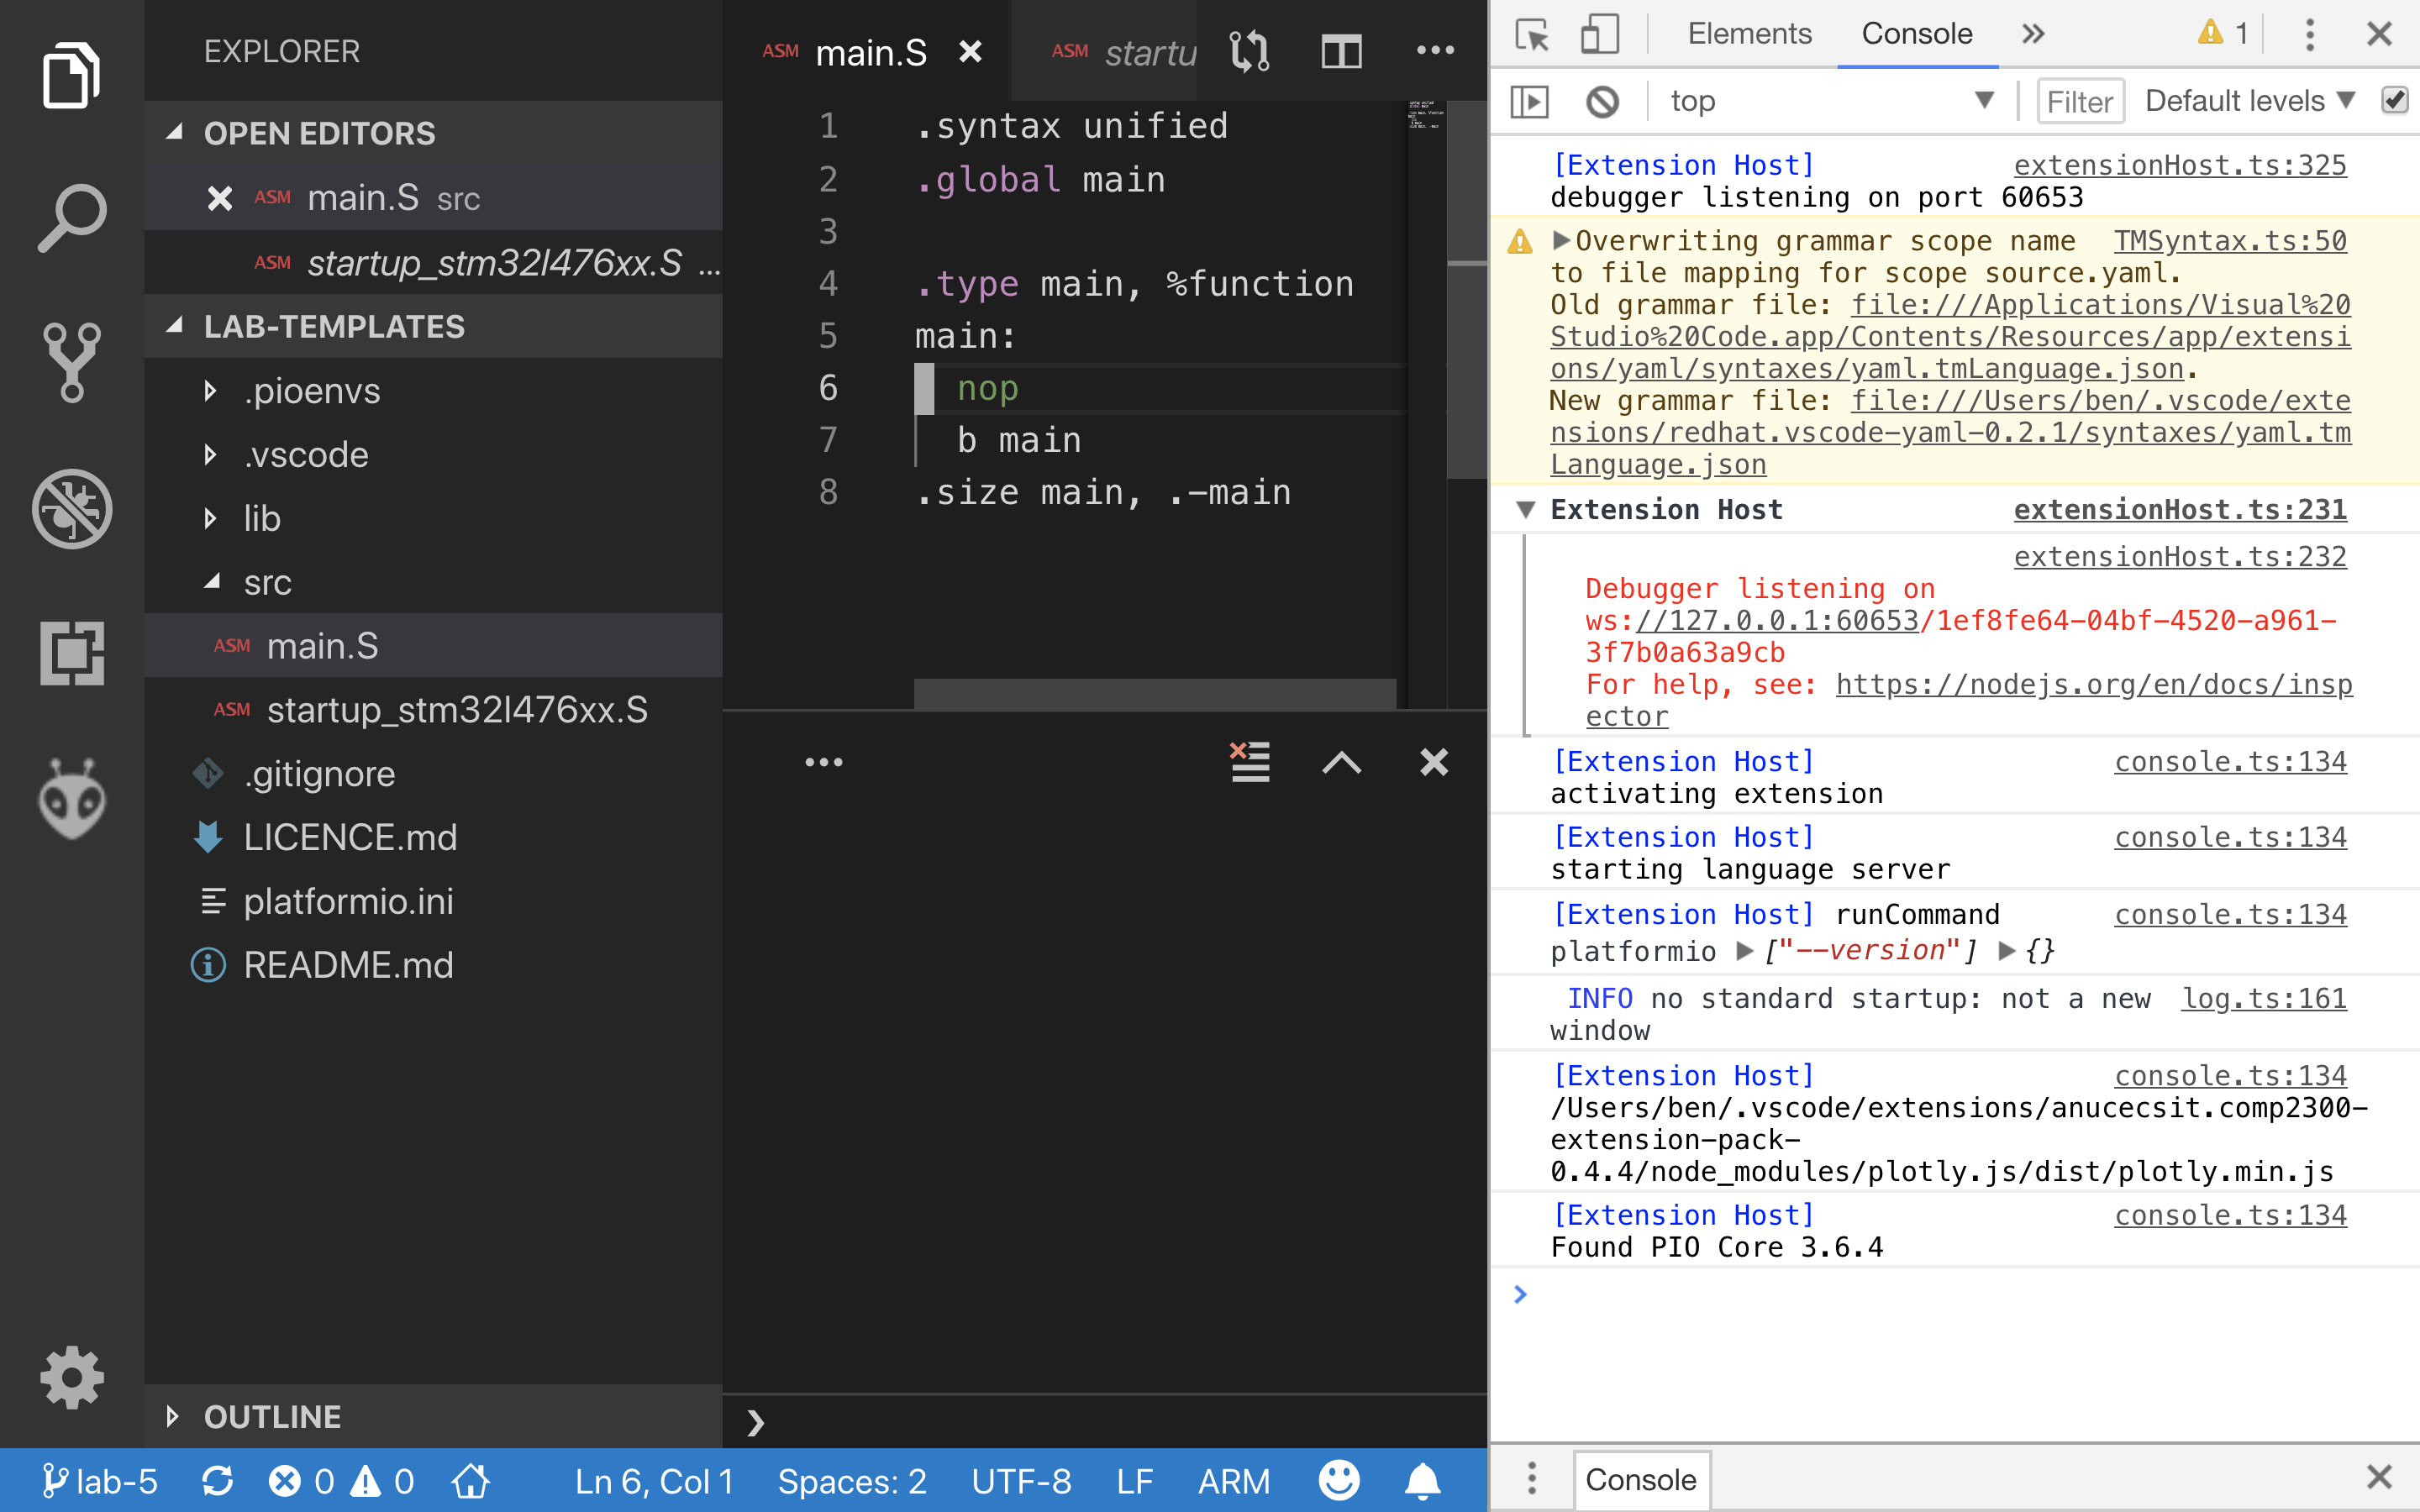
Keep this view open while you do the command which isn’t working for you, and it might output some error messages here (watch for red lines of text) which give you more detailed information about what’s going wrong. If the issue is not immediately obvious, now would be a good time to consult with a tutor or post on the forum.
can’t set a breakpoint by clicking in the left-hand “gutter”#
If you suddenly lose the ability to set a breakpoint by clicking in the “gutter” to the left of the line numbers next to your code, then check that VSCode is still treating your file as an ARM file rather than just an Assembly file.
To see if this is the case, check the bottom-right hand corner of the VSCode
window (just to the right of the smiley face ☻). If it says “Assembly”, then
click there and switch it to ARM (you should probably use the “Configure file
association for .S” drop-down option to set this to ARM for all .S files
while you’re there).