In this course, we will use some additional software that will need to be installed on your personal device.
- VS Code, an IDE for coding and debugging later in the course.
- Git, for downloading, and submitting, exercises and assessment items.
- Various other packages as required.
Installation#
Lab Machine#
The easiest way to do work in the labs is to use the lab machines. These machines already have the main environment set up, all you need to do is set up VSCodium.
(VSCodium behaves the same way as VS Code for the purposes of this course, it’s just the variant of the editor we have installed on the lab machines).
Windows 64-bit#
This course involves writing applications that interact with the operating system using “system calls”. Unfortunately, Windows’ system call interface is very different from Unix-type systems (i.e. Linux and Mac). However, the Windows Subsystem for Linux (WSL) is a virtual machine1 that allows you to use Linux system calls and operations on a Windows machine. Programming through WSL is the officially recommended method for Windows users in this course.
- Download & install Git. Git Bash will behave like a terminal on the lab machines and should let you do all the usual Git commands.
- Download VS Code from here. If you need a version other than the 64 bit windows installer, you can find it on their alternate downloads page.
- Set up VS Code
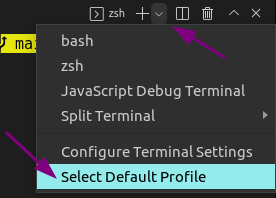
- Open a terminal from the terminal menu at the top of VS Code. A terminal window will open at the bottom of your screen. In this terminal window, there will be a drop-down menu at the top-right. Choose “Select Default Profile”, and choose “Git Bash”.
- Install WSL.
- Set up WSL
- Open WSL in a terminal by simply typing
wsl. - You will first be prompted to create a default Unix user account. When typing in your password, nothing will show up on screen, but your password IS being typed in! This is normal Unix behavior that will appear elsewhere too (e.g. putting in Git passwords).
- In WSL, run
sudo apt-get update && sudo apt-get upgrade -y. APT (Advanced Package Tool) is the default package manager on Linux; this will update its package information. - Run
sudo apt-get install -y make clang gdbto install Make, Clang, and GDB, the key tools for C programming you will need throughout the semester. - Set up Git in WSL by running
git config --global user.name "<Your UID>"andgit config --global user.email "<Your UID>@anu.edu.au"
- Open WSL in a terminal by simply typing
- Set up VSCode to allow using WSL inside it (Optional; this allows using the VSCode debugger. You can also use the terminal commands for GDB if you’d like.)
- Make sure you are using Visual Studio Code, as a few extensions we use are not available on VSCodium (the open-source version) on Windows. Unfortunately, no workaround has been found as of yet, so VSCodium on Windows is not supported.
- Install the WSL extension by Microsoft
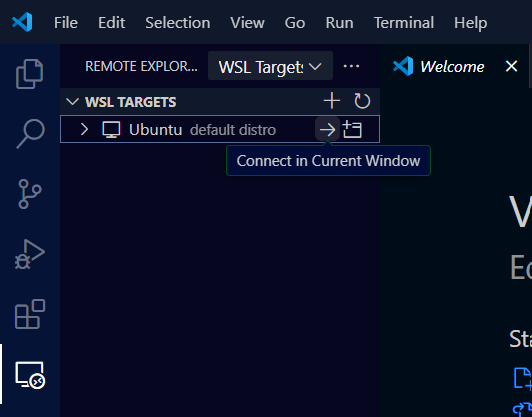
- You will now see a “Remote Explorer” tab on the left side. Upon clicking, you’ll see a pane that says “WSL Targets”. Click on the “Connect in New Window” button next to where it says “Ubuntu”. See below for more.
- Navigate to your local files. WSL uses a seperate filesystem from your Windows OS, but the normal Windows filesystem can still be accessed in WSL through the directory
/mnt/c(where it is “mounted”). This directory’s contents are exactly the same as the “C:” drive on your system. Using terminal commands (see Lab 1;lsandcdare sufficient), navigate through to where you have your COMP2310 work.- In the future, VSCode will remember “recent” folders you accessed in WSL and you won’t have to do this annoying navigation step again.
- Go to the Extensions tab and install the extensions inside the remote WSL: Ubuntu. This will allow you to access the extensions inside WSL.
- Done!
Some notes about WSL#
WSL has a completely seperate filesystem to Windows; if you find yourself in the /home directory in WSL, you are
actually in a completely different place to your local files. However, you can still access your device’s local files
through the /mnt/c directory (in technical terms, the Windows filesystem is mounted on /mnt/c in WSL). So e.g. the
file C:\Users\adnan\Desktop\comp2310\lab1 in your Windows system can be found at /mnt/c/Users/adnan/Desktop/comp2310/lab in
WSL.
If you run WSL from a Windows terminal or Git bash, i.e. through the VSCode terminal, which is already in some directory in
your local filesystem, then in WSL it will place you in the WSL version of that directory in /mnt/c, so you don’t need to
worry so much about this issue. Other ways of running WSL, such as running a WSL remote in VSCode, may find you in the /home
directory where you will need to navigate over to where your files actually are on /mnt/c.
Access between file systems is quite slow due to the protocol used for WSL 2, on the other hand, so you might want to actually consider placing all your work in the Linux filesystem. This is your choice depending on what’s convenient though, since then it’s only possible to open your files while in WSL.
Again, be wary of the fact that on Linux, passwords do not show any “*” characters when being typed in! So it may look like you are not typing in anything, but in fact you are. This applies to Git passwords.
One thing you may come across when using WSL in VSCode is that there might be limits on the user writing files in a specific
folder. The command sudo chown -R [username] [/folderPath] makes a particular root folder accessible to the user.
macOS#
-
Install XCode from the App store.
-
Download & install VS Code. You may need to hold the control key and click to install in order to bypass a software security check.
If things go wrong, check the Troubleshooting section further down this page.
Linux (Not a Lab Machine)#
These instructions are aimed at Ubuntu, but should work for any sensible Linux distro that’s up to date. If you’re using something other than Ubuntu, I trust that you know what you’re doing. If you need help, you can try asking on course forum, but we may not be able to assist with all flavours of Linux. For Arch users: VS Code has an AUR package, so you don’t need to download a tarball.
-
Download & install VS Code, either via your package manager, or via the
.debfile. VS Codium is an option as well, as used on the lab machines. -
Ensure that you have gdb installed with
sudo apt-get install gdb
The rest of this page is information to help you if you get stuck with software issues. If you’ve just finished your initial software install, head back to lab 1 now.
VS Code#
Setup#
-
Have VS Code installed by following the relevant platform specific instructions
-
Install the clangd extension

-
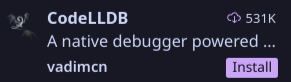
Install the CodeLLDB extension
Using#
VS Code has good documentation. The lab material will link to specific parts of it where appropriate. Many settings can be changed to customize the appearance and behaviour of VS Code — feel free to set things up to your liking. In particular you may want to enable autosave.
Virtual Machine#
The following steps can be followed on any machine, but provide a worse experience than developing natively on your computer. Try the machine specific instructions first, and follow these as a backup if you encounter issues.
- Install Virtual box
- Download the Ubuntu 20.04.4 ISO image (Desktop image)
- Make a new Virtual Image
- Any machine name is fine.
- Pick ‘Linux’ and ‘Ubuntu’ as the machine type.
- It is recommend to use at least 2048 MB of RAM and 20 GB hard drive size.
- When prompted, select the ISO file you downloaded
- When Ubuntu loads click ‘Install Ubuntu’
- Continue with default options until it installs (it will only erase the virtual image data, not your host operating system data).
- You can safely select the ‘minimal installation’
- Configure the settings
- Any location is fine
- Use
studentas the name. Leave the autofilled entries after inserting this name. - Pick a password and don’t forget it.
- Other defaults are fine.
- Accept and wait for configuration to finish
- Accept the restart and press Enter when prompted
- In Ubuntu, open the ‘Terminal’ application
- In Terminal run
sudo apt update && sudo apt install -y clang git makeEnter your password when prompted. It will not display the text as you type.
- In Terminal run
sudo snap install --classic codeEnter your password when prompted.
- You may want to adjust the screen resolution. Open Settings > Screen Display and set the Resolution as you like.
- Set up VS Code
From here you can follow the Git steps in labs 1 and 2. Note you will need to redo the ‘first time only’ parts, as this is effectively a new computer.
Troubleshooting#
Here’s a list of issues you might come across, depending on the specific details of your machine. As always, be careful with copy-pasting random code you found on the internet (even in a university course!), and try to understand the problem first before you try the solutions listed.
If new problems come up on Ed, they will be added to this page once a solution is found.
VS Code Developer Tools Console#
Before you look at the specific problems, here’s a tip for getting the most useful error messages out of VS Code when things are going wrong. In command palette, run the Developer: Toggle Developer Tools command and you’ll see a new pane pop up in VS Code. Switch to the Console tab (top-right of the screenshot) and you’ll see something like this:
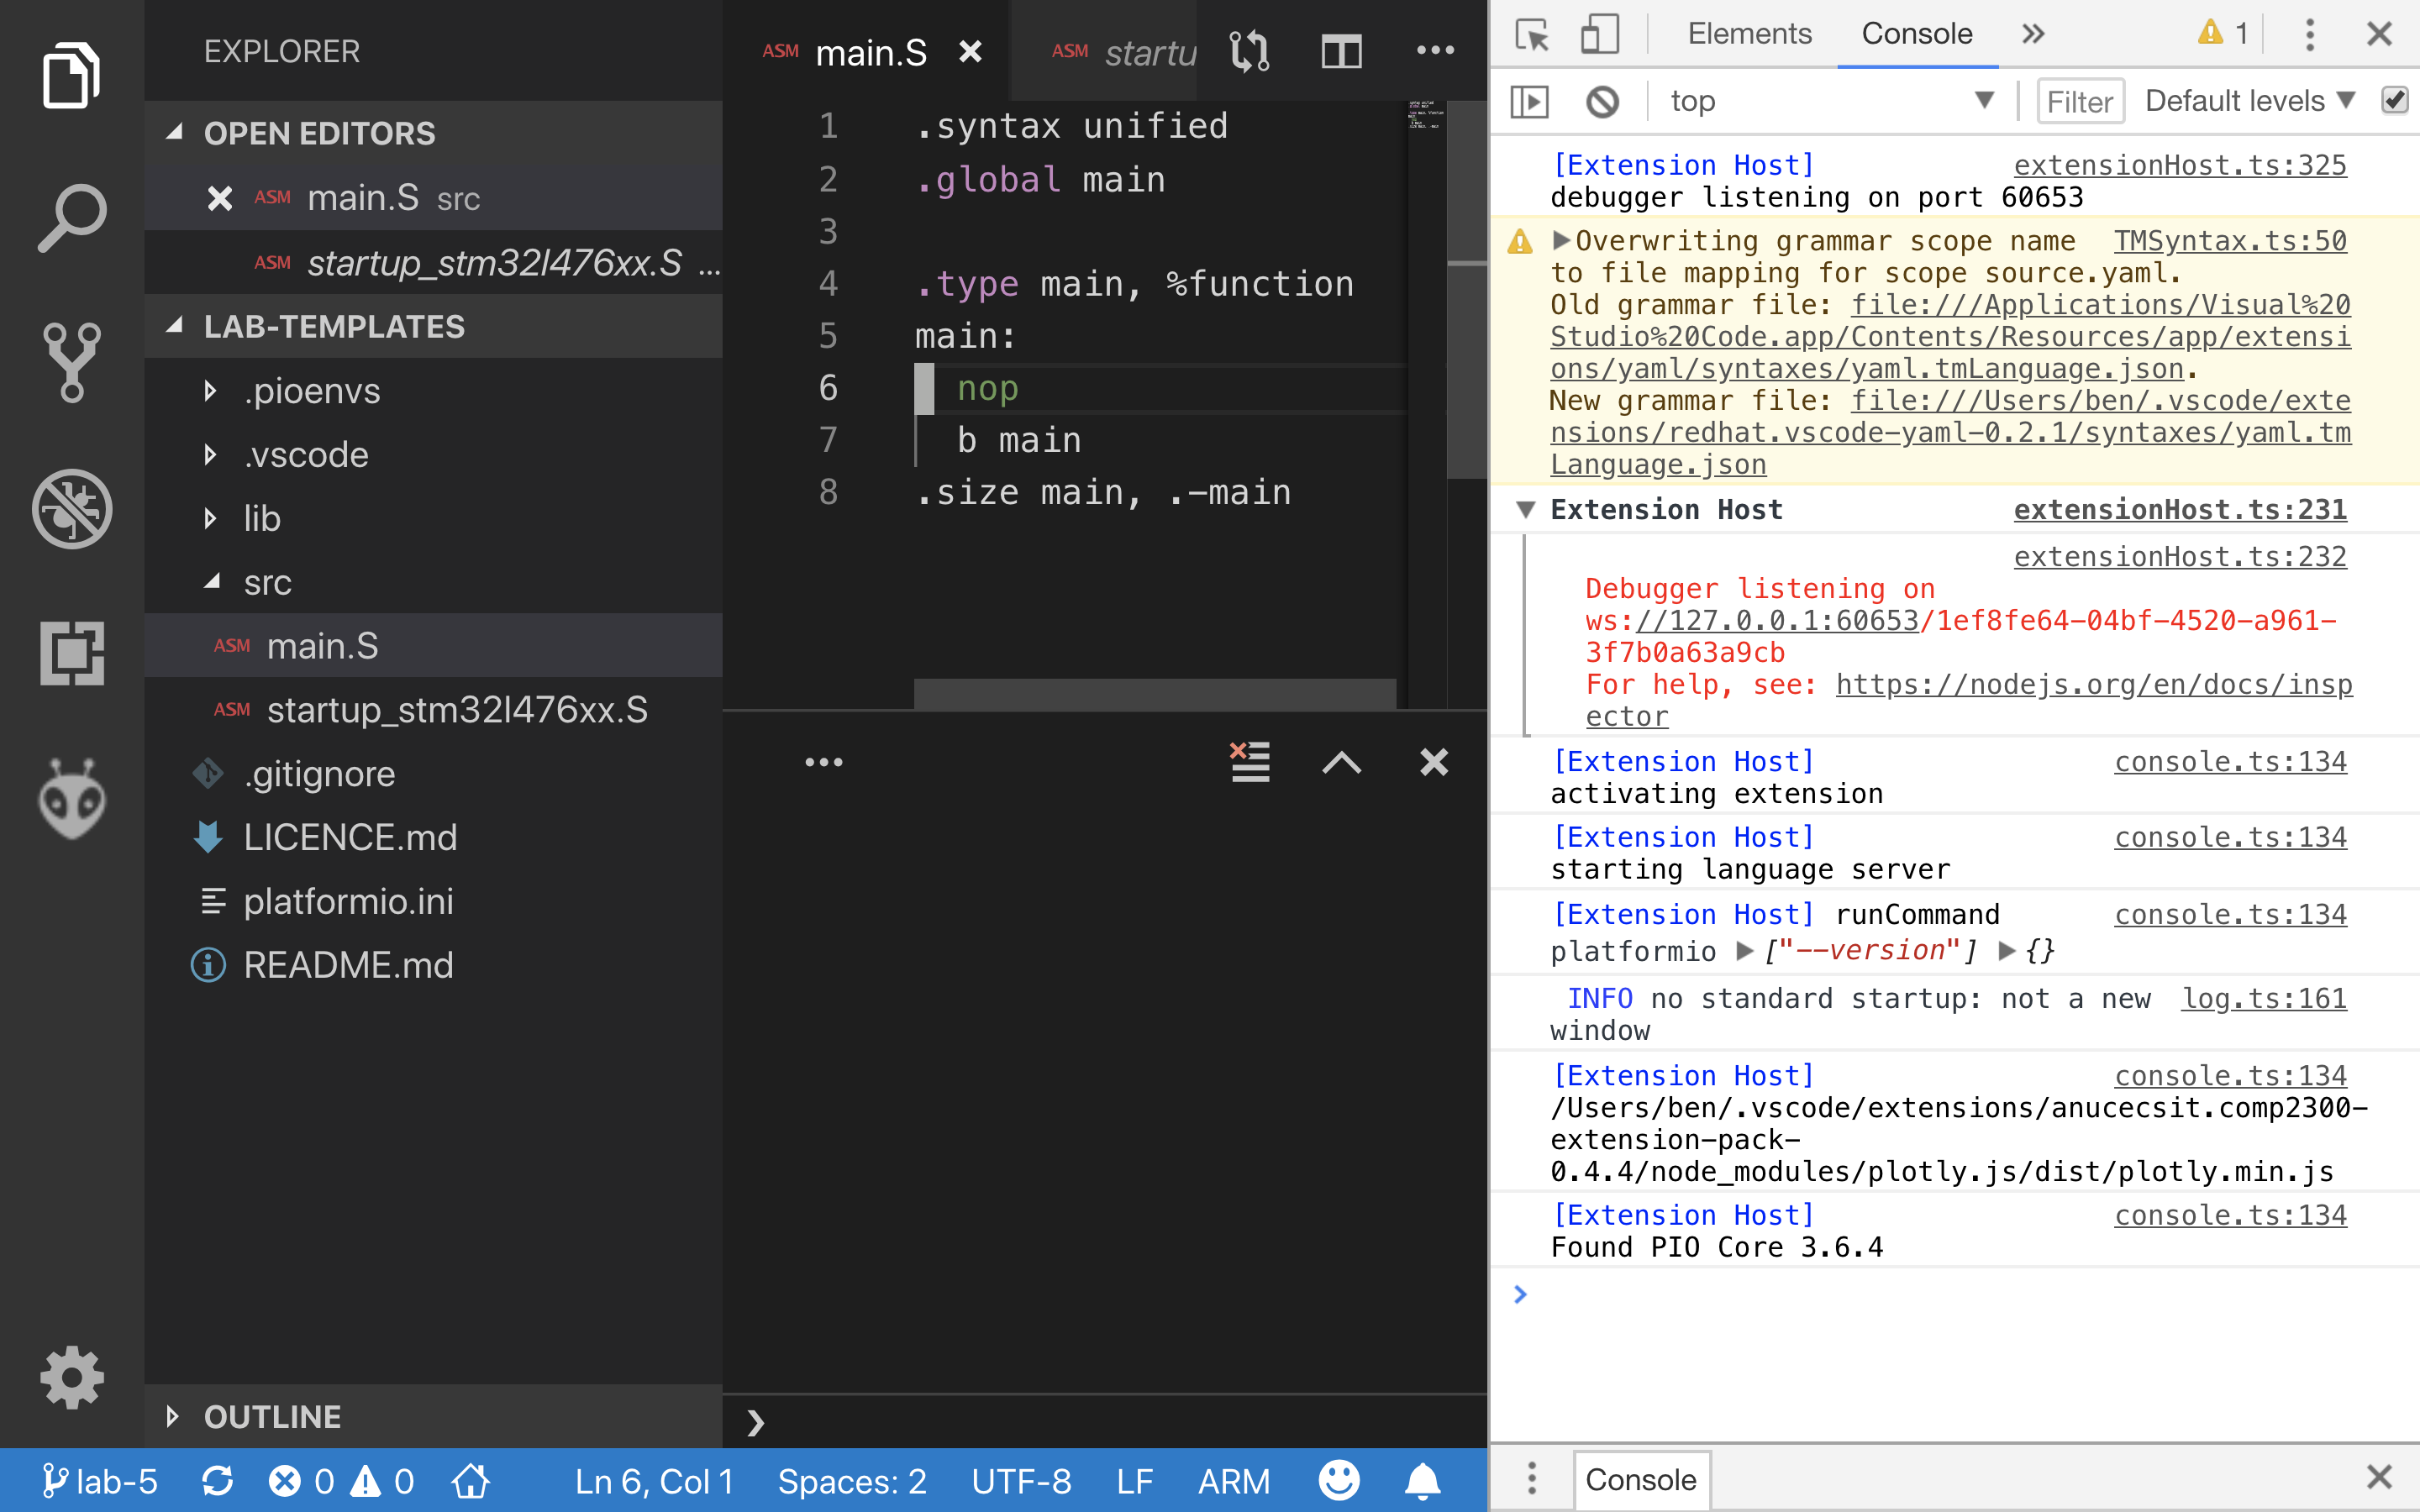
Keep this view open while you do the command which isn’t working for you, and it might output some error messages here (watch for red lines of text) which give you more detailed information about what’s going wrong. If the issue is not immediately obvious, now would be a good time to consult with a tutor or post on EdStem.
Make not found/Clang not found#
If you get an error of the form make: command not found or clang: command not found, you will need to
install or fix your installation of make or clang. On Mac, these tools come with XCode and should be installed
with it. On Linux, you can just use apt to install them if your device does not already have them.
On Windows, such errors likely mean you forgot to enter WSL before starting to program. In particular, if you forget to enter
WSL and your Windows installation has make but not clang, you may get the following confusing-looking error:
process_begin: CreateProcess(NULL, clang -Wall -Wconversion -g -c -o src/hello_world.o src/hello_world.c, ...) failed.
make (e=2): The system cannot find the file specified.
make: *** [<builtin>: src/hello_world.o] Error 2
The fix is simply to enter WSL and use make/clang from there.
OS Specific Problems#
[Windows] Integrated Terminal Freezes#
On some Windows machine VS Code terminal tab freezes at start up. This happens irrespective of the shell selected. Because of this the debugger will not run.
The cause of the problem is still unclear. There is no fix at the moment.
[Windows] Git HTTP Basic Authentication Failed#
Open the start menu, and search for Credential Manager. Select Windows Credentials, then search for git in the list of generic credentials. Either update your password or delete the entry to resolve the issue.
[Windows] DOS Line Endings#
Various issues can be caused on Windows by the fact that standard line endings in Windows are different
than on Unix systems (\r\n instead of \n; there is an extra “carriage return” character for historical
reasons).
The fix is to run the command dos2unix in WSL to convert files to Unix line endings. In VSCode, there is also
a button at the bottom of the screen that says either LF or CRLF which you can use to change line endings through there.

Line endings also cause an issue where switching between Windows and WSL may cause your Git to
think that all files have uncommitted changes due to differing line endings. The fix is to make sure
that the Git setting core.autocrlf is consistent between your Windows and WSL installations; so e.g. run
the following in WSL:
git config --global core.autocrlf true