Outline
In this lab you will:
-
use p5’s drawing functions to produce generative art
-
learn how to critique artworks
-
meet some great conceptual and code artists (well, you’ll meet their work, anyway)
-
push (submit) your lab work to GitLab (there’s no mark for today’s lab, but it’s a perfect chance to practice pushing your code for the assignment submissions)
Introduction
In this lab we’re going to talk about some big ideas. We’ll be covering:
- a brief history of generative art,
- how to evaluate art works; and
- how you can compose your own visually interesting generative artworks
We’re just getting started in this course, and you probably feel like you haven’t yet learned all the basic skills you need (or would like to have) to make the artworks you can see or imagine. That’s ok—the purpose of this lab is to get you started thinking about interpretation. You might think that in an artistic context, that word is talking about the way that different people will have different responses to and preferences for the things that they see. Adele might like portraits, while CaiHeng prefers landscapes… that sort of thing.
Actually, this lab also explores a different meaning for the word interpretation, which is equally important in a code art course. This lab is about the way that a work of art can be represented as an instruction (or a series of instructions) which must be interpreted (or executed, or realised, or performed) to make a complete artwork.
Part 1: drawing by code—what kind of art is generative art?
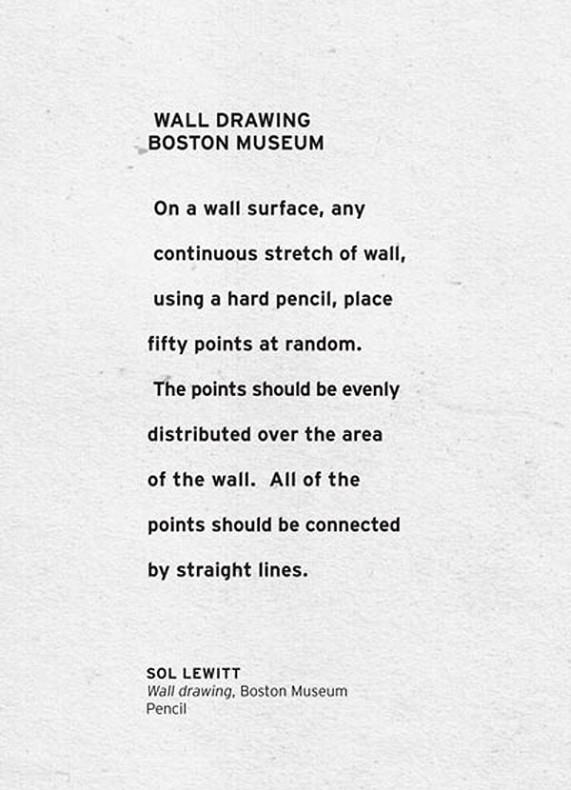
Generative art is much older than computers. In the mid-20th century, the artist Sol LeWitt created a series of works where he would describe an artwork in words, and sometimes using a diagram. These instructions, which he called “wall drawings” would then be carried out by someone else. Here are the instructions for his Wall Drawing #118:
And here’s a result of following the instructions:

This is analogous to the kind of art we are doing when we make art with code. We create the instructions to describe an artwork, but the actual drawing is taken care of by the computer.
Another artist whose work follows a similar form is Casey Reas (one of the creators of Processing, which is the precursor to p5.js). Reas has created a large series of works which he called Processes. These works, like LeWitt’s wall drawings, were first composed in English. Here’s one of Reas’ Processes:
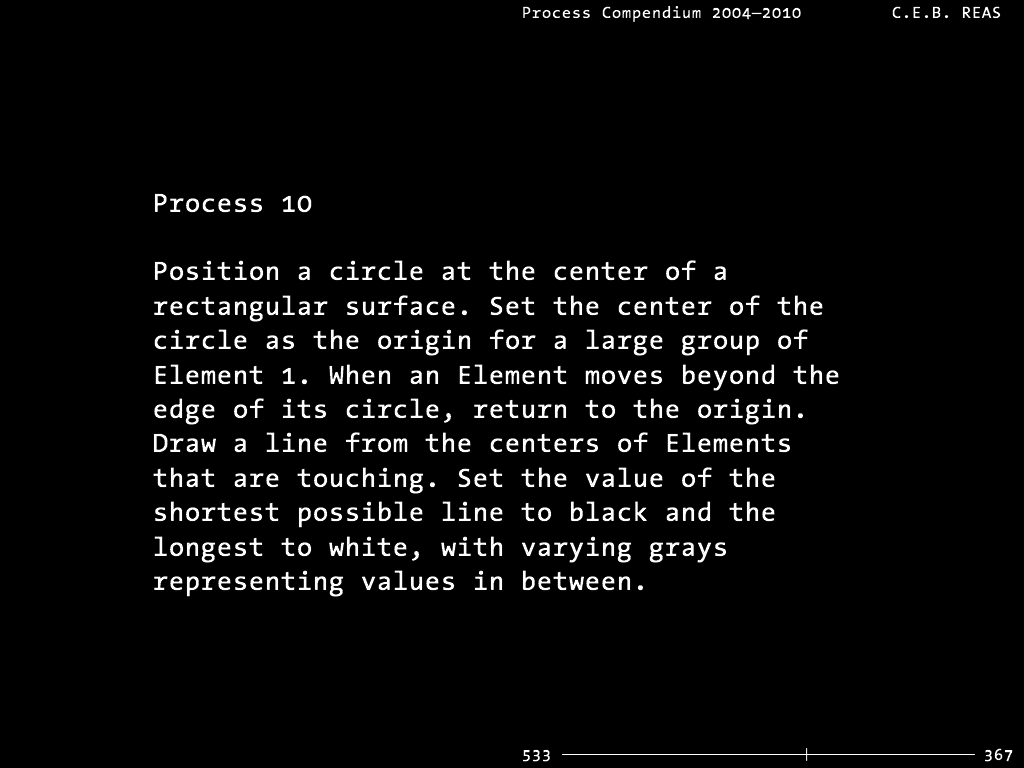
You might like to understand what is meant by _“Element”_ in this description. You can read about _Element, Form, Behaviour_ and _Process_ in Casey Reas’ _Process Compendium_.
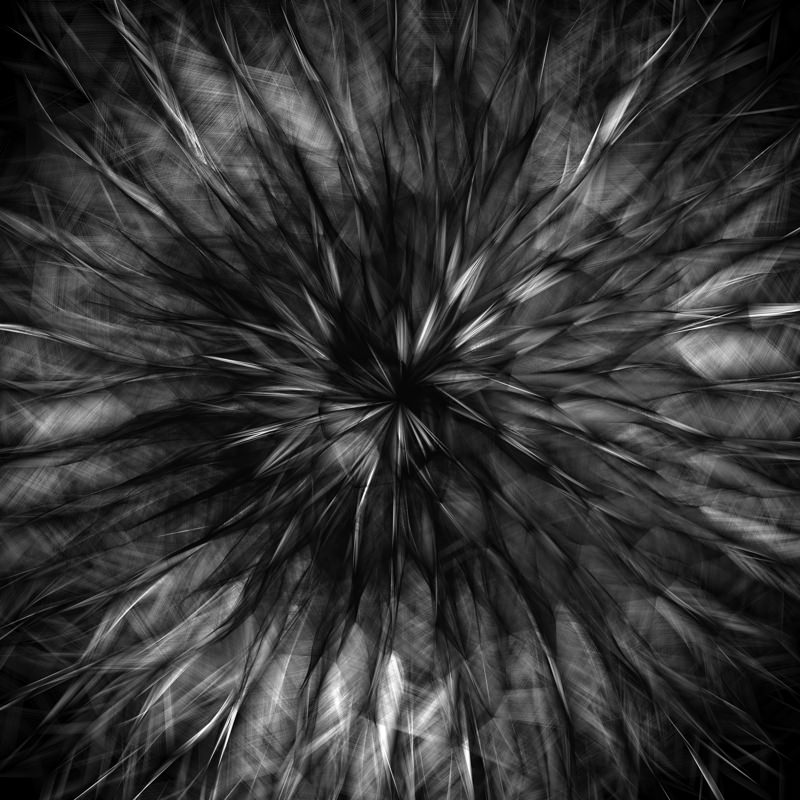
And here’s a result of following the instructions:
What is the work of art here? Is it the instructions or the realisation? And who’s the artist—the person who wrote the instructions, the person who followed them, or both/neither? Think about these questions for a minute, then discuss your thoughts with the person next to you.
Part 2: following the instructions
Ok, now it’s your turn. Here’s a new wall drawing instruction (let’s call it Matthew’s wall drawing #1)
on a purplish background, four gold non-circular, connected shapes of different sizes contained inside a “serene” circle
Fork and then clone the lab 2 template repo, open it in VSCode and start the live server as usual. Write a p5 sketch which realises the above wall drawing. You can refer to the p5.js references to see what kind of code instructions are at your disposal.
As you do this, avoid looking at what other people have done in the Teams chat (spoiler: we’re gonna try posting our work there!). Instead, think (or sketch on a piece of paper if you like) how you’re planning to interpret the instruction.
When you’re done, commit your wall drawing code to the repo. When you commit, you’ll give the commit a message to remind you what the code looked like at that point, something like “completed part 3 wall drawing”. Don’t move on to the next step until you’ve done this: you’ll be submitting your project work in the exact same way. Ask your instructor or a friend if you get stuck.
Open the following link https://extn1019.cecs.anu.edu.au/uXXXXXX/extn1019-2024-year-11-lab-2/ (replacing the X’s with your university ID, of course): it should show your breathing circle. Send this link to the Teams channel “Lab Work”, and check out what your classmates have done—how does it differ to yours? What other interpretations of a breathing circle might there be? If our personal webpages are not working - take a screen grab of your breathing circle and post in the Teams channel “Lab Work”.
Part 3: composing your own instructions
In the final part of this lab, you get to make your own wall drawing instruction. You can borrow ideas from the things you’ve seen already, but if you have new ideas then that’s fine too—this course is a place to experiment.
Find a partner in your lab (perhaps someone next to you). If no-one else is currently looking for a partner, let your instructors know.
Separately, each write a pair of drawing instructions for the other to realise in p5.js. The rules are: (1) don’t make it too complicated, and (2) try to imagine what your instructions will look like as you write them—the aim is to write instructions that will be interesting when drawn.
Have one person open up p5live (it’s like Google Docs for code!), click the “cocoding” button, and send the link of the new page to the other. p5live will allow you to watch your partner code in real-time. Choose one person’s instructions to follow, and have the other attempt to realise it in p5live. Once they’ve completed it, save the code to your local computer and swap roles.
Once you’ve finished, save the code from your instructions into your local repository, commit, and push it — this is the exact same process you’ll use to submit your assignment. If you’re unsure of anything, this is the time to ask for help!
Part 4: break it down!
As in every lab, we’ve provided some code for you to mess with and make your own. This code is based on Casey Reas’ Process 10 from above? With your partner from the previous exercise, play around with parameters to see how it works, add colour or change the drawing style. Break it down and make it your own.
Summary
There’s still lots we haven’t really talked about in this lab. One of the main omissions is the fact that LeWitt’s wall drawings are static, but when working in a digital medium like p5 you can make things move! Still, be patient—we’ll cover all that as the course progresses.
If you got somewhere today, though, congratulations! Even if you didn’t get all the way to the end, you can still mess around with this stuff at home and ask questions (and show your work!) on the EXTN1019 forum.
In this lab you:
-
used P5’s drawing functions to produce generative art
-
learned a little bit about how to critique artworks
-
met some great conceptual and code artists
-
pushed (submitted) your lab work to GitLab
Search the web for more LeWitt wall drawings. Can you implement any of them in p5? If you really want a challenge, can you add a dynamic (time-varying) component to any of the things you’ve done today? For example: could your “serene” circle breathe?