Outline
- re-introduction
- live coded intro to drawing with p5.js
- create your own variables
- (re)design a film poster/album cover of your choosing using simple shapes in p5.js
- blog posting
Re-Introduction
We’ll start over this week: covering some essential items we’ve neglected or missed out on so far.
Acknowledgements
 Sovereignty of this land was never ceded.
Unit Outline and ANU Course
This course is designed to meet both ANU Course structures and ACT BSSS Unit requirements.
There are subtle differences.
Here is the Unit Outline which meets ACT BSSS Requirements!
Here is the ANU Course Information!
And here is the front entry page for EXTN1019 Creative Computing website which includes a link to the ANU course outline
Assessment
Assessment is covered in both the course and unit outlines, and through the deliverables page for the EXTN1019 course website.
This year assessment will be comprised of:
- 6 blog posts (worth 30% of the total mark)
- a mini project to get you started with building creative computing projects (worth 30% of the total mark)
- a final project which will be exhibited at the end of the year (worth 40% of the total mark)
See the deliverables page for full details!
Your Instructors
You can read more about Matthew and Charles on the people page!
Introduction
Every other week in this class, you will have the opportunity to make creative code “sketches” of your own. These “sketching” classes are less about introducing new content and more about letting you make and play with the concepts we have introduced so far.
You will then share something you made during class in your blog posts which are due every other week. The blog posts are assessed, but we are not assessing the quality or the polish of your code sketches (or your code for that matter); hence the term “sketches”. It’s just a way for you to practice making cool visuals with code regularly. All you have to do is post a screenshot/screen recording of what you made on the Teams CC blog channel and write a few paragraphs about how you interpreted the provocations, the approaches (coding and artistic) you took to create your design, where you found inspiration, what you found challenging, and what you could improve on.
Wattle Courses
While you will write and post your blog post in teams, and push your code to GitLab, there is one more thing you MUST do to submit your blog post.
Wattle is ANU’s implementation of Moodle, a Learning Management System for education institutions.
Almost all courses delivered at ANU use Wattle. So — it is great to get some experience now. Each blog post, the mini project, and the final project will have a place in Wattle for you to make a submission. You will have to login to Wattle, and paste a link to your Teams post, and a link to your gitlab repository for your wattle submission. You will receive your grades and feedback via Wattle.
I have so many questions about the blog post gah!!
Questions are great! Here is a tantalising link to a description of what the blog post assessments are all about. If you’ve read through that page and you still have questions, either ask your instructors in class or send them a message on Teams :)
Fork and clone the Lab 3 template repo. Check if your peers have forked and cloned!
Provocation of the day
For the most part, you will have freedom to create whatever you like during the sketching classes. The only caveat is, you will need to address a provocation which will be presented to you in the fortnightly lab content. A provocation is a word or phrase which can be interpreted and used as a source of inspiration in creative activities.
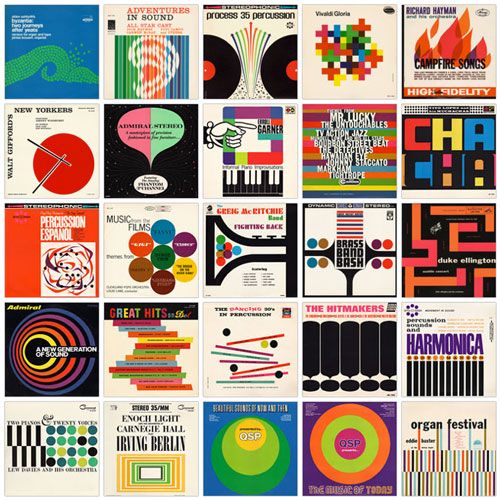
think: Your provocation for this week is to create a album cover/film poster to represent an artist, band, movie or album using only simple shapes (i.e. nothing photo-like) and typography. You should include the title of your chosen album/film as type in your design using variables. See some examples of vintage albums below which use simple shapes. p5.js provides functions for drawing a range of simple shapes.
Part 1: Titles
During the live coding session, you saw how to create and use variables. Now it’s your turn!
do: Create a variable with an appropriate name to store the name of your title by:
- declaring (create) a variable with the name
album_titleif you’re making an album cover ormovie_titleif you’re making a film poster. - assign (give) your variable a value (some information/data). In this case, it will be some text which represents the title of your chosen film/album.
- use the value of your variable to write the title onto your canvas.
- typography is a key part of visual design. To express the feelings you wish to evoke you may want to use different fonts to the inbuilt font used by p5.js. Here is how you load fonts, apply fonts, set font size and draw text! There is even more you can do with typography. If you have any questions about how to do this, ask one of your instructors.
Part 2: (re)designing your film poster/album art
Not sure where to start with the design process? Well…
- Is there a concept or theme behind the album or movie? Perhaps there is an iconic scene or musical phrase in the film or album respectively. How can you abstractly represent the theme/scene/phrase/concept using simple shapes?
- Look at the original album art/movie posters for inspiration (you can include these in your blog post).
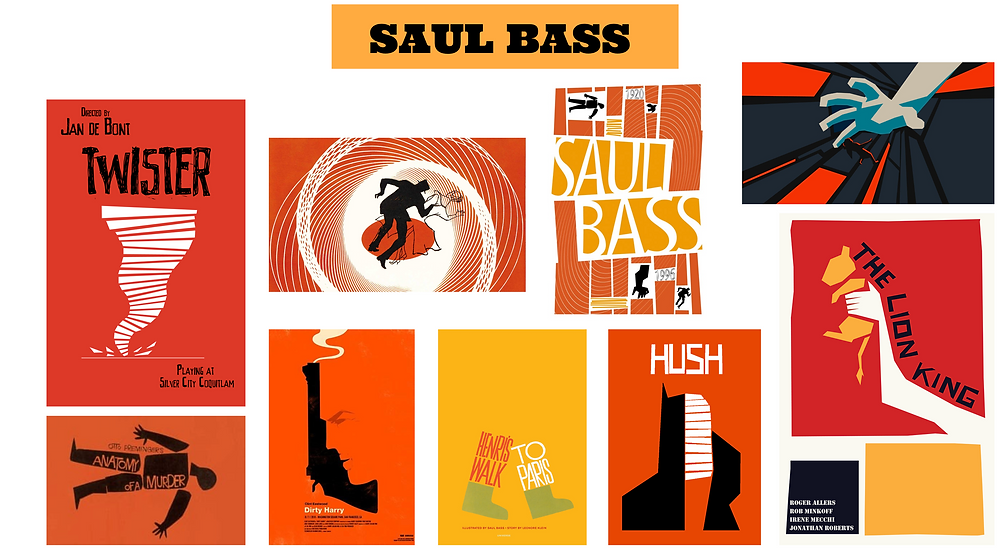
- Look at the works of minimalistic designers for inspiration. Saul Bass designed some awesome movie posters in this minimalistic style (have a look below) - although he admittedly did use some intricate shapes at times. Here is a link to the p5.js shape references and the p5.js typography references page where you can find all of the different shape/color/line/ functions to use in your code sketches.
extension: At this stage we have mostly been talking about static sketches. If you’re up for a challenge and you have more experience with programming, try to write your code such that, each time you refresh the page, the elements in your sketch change slightly. Your sketch shouldn’t change so much that it no longer represents the album/film you’re trying to depict - it should just generate some subtle variation. The random function might come in handy here, but there are heaps of ways to introduce variation.
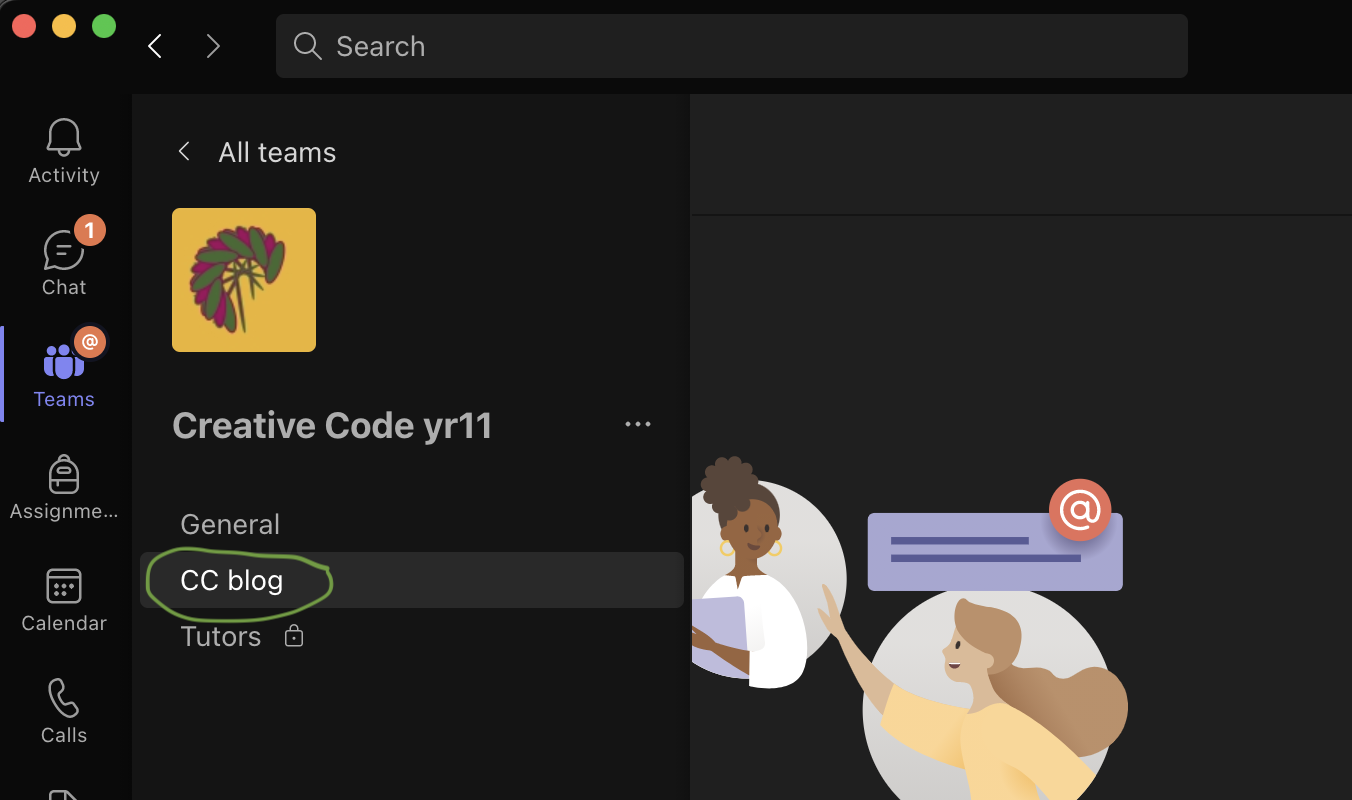
You can do more than one version of your album cover/film poster. Just make sure to take a screenshot of each version you make and so you can add it to your blog post on Teams. If you have a look at the CC blog channel tomorrow, you will see an example post there which you can follow as a template.
You are more than welcome to put on some headphones and listen to your artist/soundtrack of the film to get in the right headspace :) Have fun and, as always, ask your instructors if you have any questions — we are friendly folk!
Part 3: What to include in your blog post?
Screenshots and/or screen recordings
We want to see the thing! Add at least one screenshot/screen recording of what you made.
Discussions
We want to read the thing! Write a short paragraph which covers the following discussion points:
- tell us a bit about your chosen film/album and how you chose to represent it. You can include pictures of the original film poster/album cover too if you’d like.
- discuss any challenges you found when coding your sketch.
- discuss something you like about your sketch
- in your discussion, address the context below
Contexts: This blog post, your reflection and analysis should focus on the historical, social and/or cultural aspects of the album cover or movie poster. What inspires you about the history of that time, the visual design language, the culture(s), the people? Did the influences endure, inspire, or fade?
do: Once you’ve finished with the lab, make sure you commit and push your work to git so that its safe and sound on the ANU servers.
Summary
Congratulations! In this lab you:
- were formally introduced to variables
- sketched some posters/album art using the p5.js shape and typography functions
- got started with your blog posts 🙏 (emojis may also work as text)