Outline#
This chapter will explore how to fork and clone a remote repository on GitLab. Before we do some magic to the repository, we need first to make our own copy of it and a local copy afterwards—no need to worry as they are pretty easy to do. Simply follow the instructions below and you should be able to finish them all.
Linux Basic Commands#
Before we start, let’s quickly learn some basic Linux commands first so that you can freely navigate the file system and operate on files and folders in Linux, just like what we normally do in Windows and MacOS.
Useful Commands for Navigation#
| Command | Name | Usage |
|---|---|---|
pwd |
print working directory | Shows the current location in the directory (folder) tree. |
cd directory |
change directory | Changes the working directory to the given directory. |
cd ~ |
~ is an alias for your home directory. Will change to your home directory. | |
cd . |
. means the current directory you are at. Will move to the current directory, meaning nothing happens. | |
cd .. |
Move up into the parent directory (if one exists). If you are in /students/uXXXXXXX/Desktop and you type cd .., you will end up in /students/uXXXXXXX. |
|
cd - |
Return to previous directory. | |
ls |
list | Lists the contents of the directory you are currently in. |
ls directory |
List the files in the specified directory. e.g. ls comp1100. |
|
ls -l |
List files one file per line. This also shows you additional info about the file, such as permission and modified date. | |
ls -a |
List all files, including hidden files. Hidden files are those files that begin with a ".", such as ".bash_history" file in your home directory and ".git" folder in your project directory. | |
ls comp1100/labs/l* |
List all files whose names begin with the letter 'l' in the "comp1100/labs" directory. |
Useful Commands for Files and Directories#
| Command | Usage |
|---|---|
touch |
Create a new file. e.g. `touch file.txt`. |
cat |
Display the contents of a text file on the screen. e.g.: cat file.txt would display the file we created in the previous section. |
file |
Find out what kind of file it is. e.g., file /bin/cat tells us that it is a Linux executable file. |
cp |
Copy a file from one location to another. e.g. cp file.txt comp1100 copies the file.txt file in the current directory to the "comp1100" directory. |
mv |
Move a file to a new location or rename it. e.g. mv file.txt text.txt renames "file.txt" to "text.txt" and mv file.txt .. moves "file.txt" to the parent directory. |
rm |
Delete a file. e.g. rm file.txt deletes "file.txt". Think twice before deleting!!!. |
mkdir |
Make a new directory. e.g. mkdir comp1100 makes a new directory named "comp1100". |
rmdir |
Remove a directory. e.g. rmdir comp1100 deletes a directory named "comp1100". Think twice before deleting!!!. |
Some useful shortcuts for the command line#
| Shortcut | Description |
|---|---|
Tab auto completion |
If you type a partial command or filename that the shell recognizes, you can have it automatically completed for you if you press the Tab key. Try typing the first few characters of your favourite Linux command, then hit Tab a couple of times to see what happens. |
history command |
Show your complete command history. |
↑ and ↓ arrow keys |
Scroll through your most recent commands. You can scroll back to an old command, hit Enter, and execute the command without having to re-type it. |
Scrolling the screen with Shift + PgUp and Shift + PgDn |
Scroll back and forward through your terminal. |
In this section, we have only shown you a few shell commands that will be useful for the course. If you want to learn more, please feel free to search online for tutorials. The GNU Bash Manual can be found here.
A handy cheat sheet for many common commands can be found here.
Fork#
Imagine you are working on a group project, and each team member has their own copy of the project. In Git, a fork works in a similar way. It allows you to create your own copy of a project remotely hosted on GitLab.
When you fork a project, you make a personal copy of it that you can freely modify and experiment with. The original project remains untouched, and your fork becomes an independent entity. Forking is especially useful when you collaborate with others. By forking a project, you can freely make changes and improvements without directly affecting the original project or disrupting the work of others:
We will use an example to show you how to fork a remote repository. Let’s start by following the instructions below:
-
Log in with your uni ID & password and open a remote repository
-
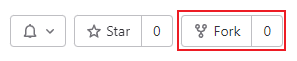
Fork the repository by clicking on the “Fork” button. This will create your own copy of the lab repository:
-
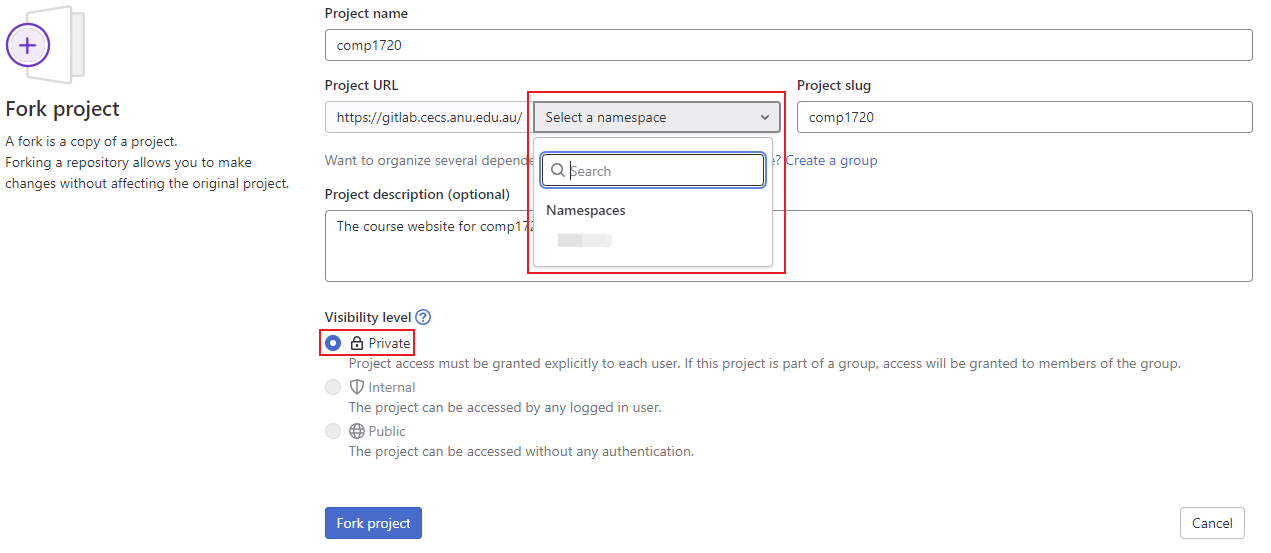
Pick your username as the namespace and Private as the visibility. Leave the other settings untouched. Click “Fork Project” when done. The page will redirect you to your new fork when it is ready.
-
Check the URL bar and make sure it contains your UID, e.g.
gitlab.cecs.anu.edu.au/YOUR_UID/comp2300-2023-lab-pack-1. This means you are looking at your copy rather than the original template.
Permission Control#
After forking, you now have your own copy of the original template. You have full control of your repo since your copy is set to be private. To collaborate with your teammates, You need to invite them to your project with a few simple steps:
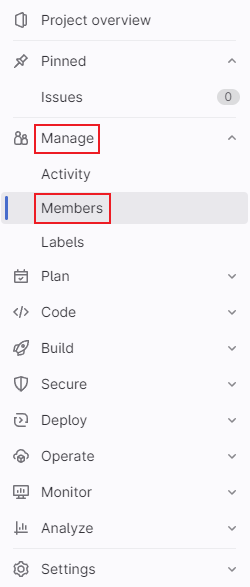
- Select “Manage” > “Members” inside the navigation menu on the left-hand side:
- Click on “Invite members”:

- Input your teammates’ email addresses, their roles in your project and the expiration date of their access:
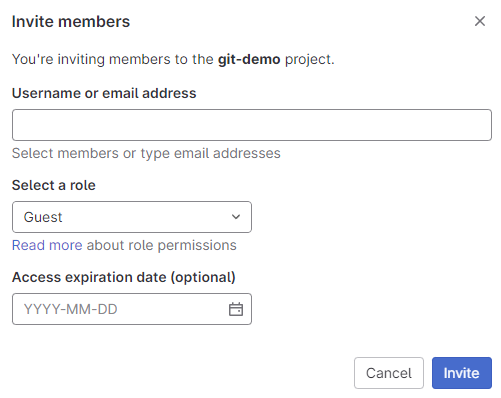
After invitation, an email will be sent to each of your teammates, and they need to confirm it by clicking the link inside.
Clone#
If all goes well, you now have forked a remote repository to create your own copy. Writing codes and operating on files directly on your web browser would be inconvenient, so let’s clone the repository to create a local copy on your computer.

We will also use an example from COMP1720 to show you how to clone a remote repository. Let’s start by following the instructions below:
-
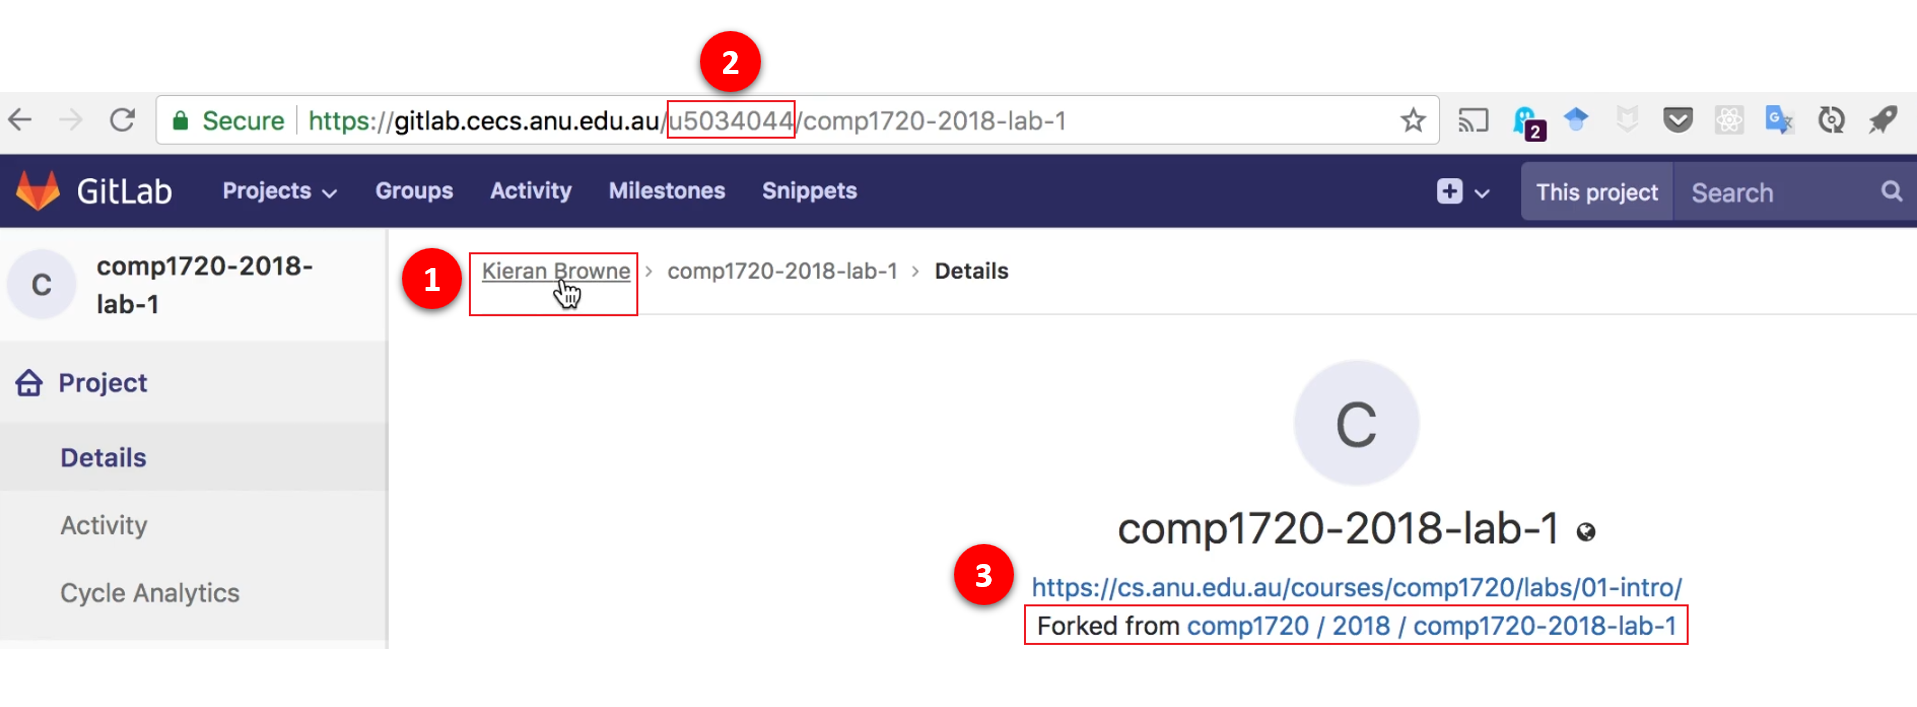
Navigate to your remote repository on GitLab. You can find out if the repository is your copy or the original template by checking the breadcrumb at the top left corner. Note: If it’s your copy, the first link in the breadcrumb shows your name rather than the course number. You can also check it by looking for your UID in the URL address and an additional line of description showing “Forked from …” under the name of your repo:
-
Find the “Clone” button. You can see two options after clicking it:
- If you are comfortable with using your UID and password, you may copy the HTTPS link.
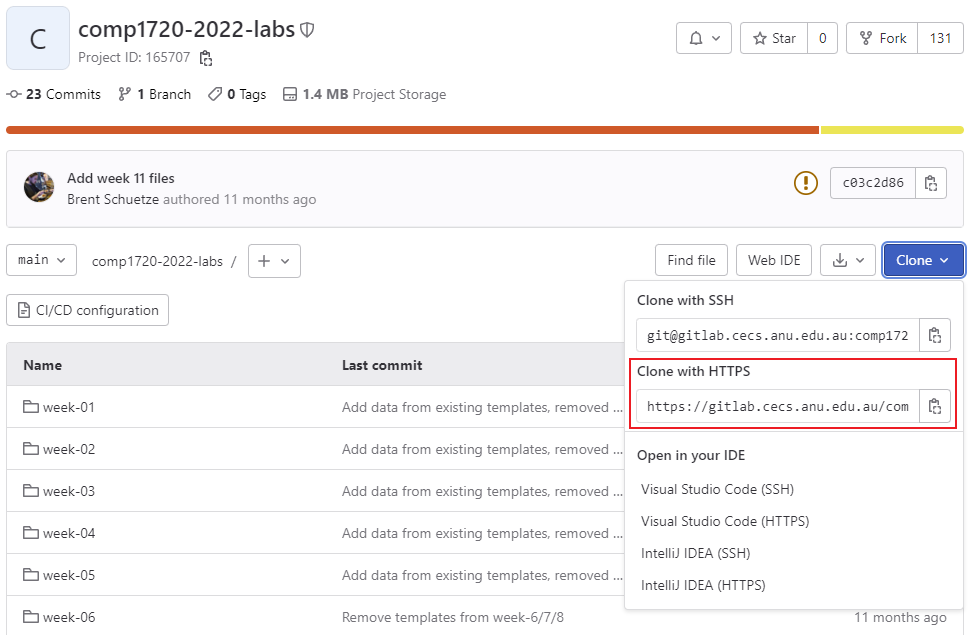
- Alternatively, you can go for the SSH link after finishing additional configuration. Using an SSH key can save you time managing and entering your password.

- If you are comfortable with using your UID and password, you may copy the HTTPS link.
-
Open your Terminal (PowerShell in Windows) and navigate to a new directory for this project. You could create and go to that new repository using Finder on MacOS or File Explorer on Windows. Still, this manual aims to show you how to do so by using commands so you can clone your project using any Operating System. Note: Windows also provides WSL (Windows Subsystem for Linux) for you to run a Linux environment alongside Windows. For the setup tutorial, check out how to install WSL if you are interested.
- First, go to the parent directory where you have your projects inside after opening Terminal. You can use
cdcommand to go there, such ascd ~/projects.
Remember Tab autocompletion? Instead of typing the complete path of the target directory by hand, you can press Tab to let it autocomplete the path for you after you type the first few letters, as long as the directory exists.
- Use
git clonecommand to clone your remote repository to the local computer. The syntax of this command isgit clone [repo_link], such asgit clone https://gitlab.cecs.anu.edu.au/comp1720/2023/comp1720-2023-labs.gitPress Enter after you finish typing. If successful, you should see an output similar to the output below:
 Cloning into 'comp1720'...
 remote: Enumerating objects: X, done.
 remote: Counting objects: X, done.
 remote: Compressing objects: X% (X/X), done.
 remote: Total X (delta X), reused X (delta X), pack-reused X
 Receiving objects: X% (X/X), X.XX MiB | X.XX MiB/s, done.
 Resolving deltas: X% (X/X), done.
- First, go to the parent directory where you have your projects inside after opening Terminal. You can use
Moving on#
Fantastic! Now you’ve learned how to fork and clone a remote repository. You can now operate your project using a local text editor or IDE. Hang in there! Check out the following two chapters to learn how to add, commit, push, and pull to synchronize your local repository to the remote one on GitLab and collaborate with your teammates.