Introduction#
Get ready to explore Git, which is one of the most important foundations of digital world. Before we take advantage of GUI-based software like GitHub Desktop or SourceTree, it’s important for you to walk through the command-line interface and basic commands of Git.
Because Git doesn’t have a graphical interface, you may find it unfriendly and confusing to learn top-down for your first impression. Many students memorise a handful of commands and think them as magic incantations, and do the same as the following comic from XKCD when things go wrong:
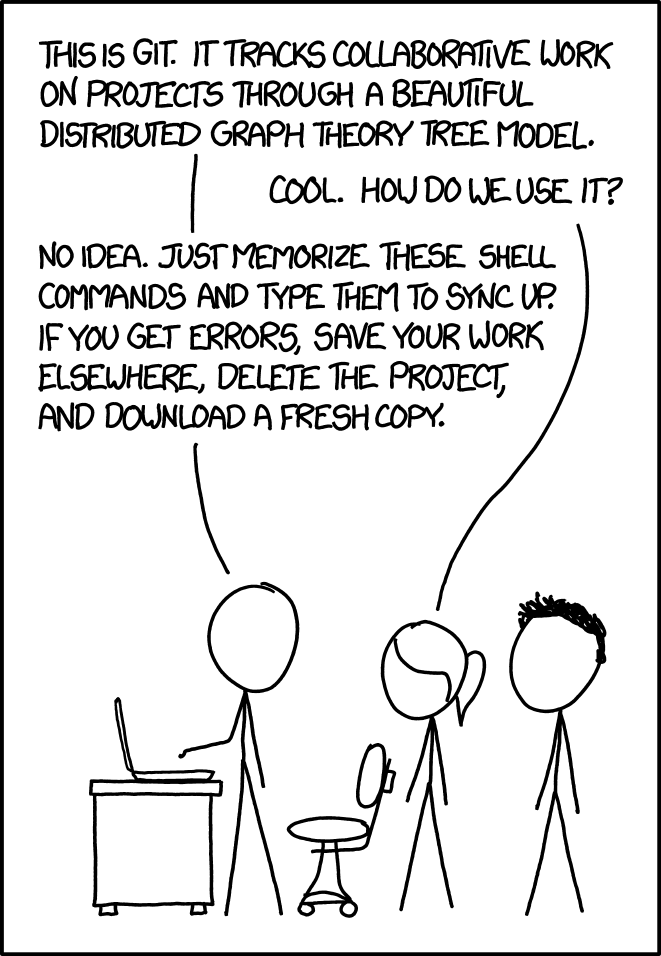
But trust me, it’s not as scary as it seems, so don’t be scared. Although Git doesn’t have a pretty interface, it has a beautiful core. Throughout this manual, We will not dive right into comprehensive technical details because we need to first understand the theoretical concepts. For this reason, we design the manual to be bottom-up, starting from installation in this page, to the basic concepts like version control and data model in the next page, and the specific commands afterwards.
While learning how to work with Git, you can use this manual as a guide for your first practice of code versioning. Later on, you will gradually remember when and how to use the basic commands on your own (hooray!). Within this manual, we will point you to a set of further references that you can use to further expand your Git skills. Please fasten your seat belt, and we are ready to go!
Git Installation#
Before installation, please make sure you don’t have Git pre-installed on your computer.
Simply open Terminal (PowerShell for Windows) and type git --version. If you see something like git version 2.xx.x, you already have Git installed. You may skip this section and check out how to set up an SSH key in the second section below or use Git commands in the next page.
Getting started#
To install Git, we will use Terminal on MacOS/Linux and its equivalent of Windows Subsystem for Linux (WSL) on Windows. After installation, you can choose to use Git in Terminal or IDEs with a graphical interface. Simply follow the instructions below to set everything up.
Windows#
If you’re using Windows, the most convenient way to install Git on Windows is to use Winget, a package manager for Windows. Winget is now generally pre-installed on most new Windows systems and is available on Windows Store.
If you have Winget installed, you can install Git by typing winget install --id Git.Git -e --source winget in PowerShell.
You can also choose to install the latest release from Windows download page.
Here’s a short video about how to install Git on Windows:
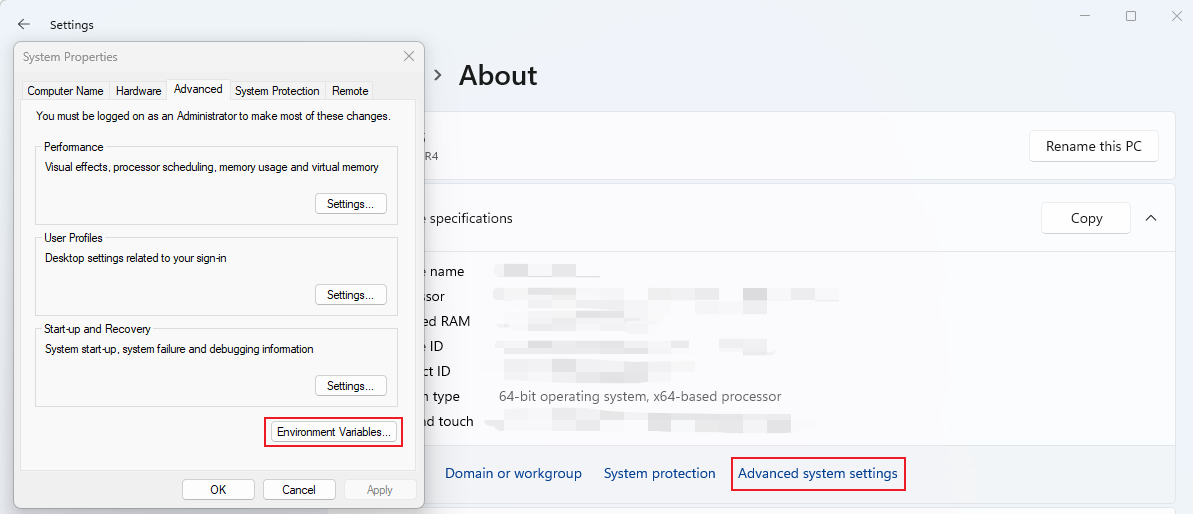
After installation, remember to add Git into Environment Variables:
If Git still doesn’t work on your IDE, you’ll need to restart it!
MacOS#
If you are using MacOS, you should first type git --version at the command line to check if you have Git installed.
- MacOS will prompt you to install the command line developer tools if this is your first time using Git. In this case, a pop-up window will appear, asking you to install the tools. Click
Installand follow the instructions. However, the pop-up window may not appear sometimes. If so, you can manually install the command line developer tools by enteringxcode-select --installat the command line. - Another way to install Git is to use homebrew. First, make sure that you have homebrew installed. If installed, simply run
brew install gitin the command line. This should automatically install Git for you.
With the installation completed, you can double check by typing git --version at the command line. You are expected to see a similar output to git version 2.xx.x.
Here’s a short video about how to install Git on Mac:
After installing Git, remember to close and restart your IDE!
Linux#
This manual only covers instructions of two popular releases: Ubuntu and CentOS/Fedora. It’s recommended to install Git in terminal to take advantage of its simplicity.
Ubuntu#
First, use the apt package management tools to update your local package index.
$ sudo apt update
With the update completed, you can install Git by entering:
$ sudo apt install git
You can confirm Git is installed successfully by running:
$ git --version
Check if you see similar output to this:
git version 2.xx.x
If yes, you have successfully install Git. After installing Git, you’ll need to close and restart your IDE!
CentOS/Fedora#
To install Git in CentOS, you can use yum, CentOS’s native package manager, to install the latest git package available in CentOS’s managed repositories:
sudo yum install git
For Fedora, you can use another package manager called dnf:
sudo dnf install git
If everything goes well, downloading and installation should be fairly quick. To double-check that it is functioning properly, try running Git’s built-in version check:
$ git --version
git version 2.xx.x
If you see the version number, you have successfully install Git. After installing Git, you’ll need to close and re-open your IDE!
SSH & HTTPS#
While cloning, you face two types of links: SSH and HTTPS. You may be confused and don’t know which one to copy. This section briefly explains what they are and how to set up an SSH key if you decide to use the SSH link. (If you’re new to Git, probably just stick with HTTPS for now.)
What are SSH & HTTPS#
Briefly speaking, SSH and HTTPS are network protocols designed to secure communication between different computers over a network. They both use encryption algorithms to safeguard data confidentiality and protect against unauthorised access. But they work in different ways with different focuses.
-
HTTPS HTTPS, or Hypertext Transfer Protocol Secure, can be viewed as a secure version of HTTP protocol. It uses encryption algorithms in an extra layer to secure data confidentiality over the Internet. While communicating with a server using HTTPS, your browser first verifies the authenticity of its SSL certificate and establishes a secure connection afterwards. It requires you to use your uni ID and password every time.
-
SSH SSH, which stands for Secure Shell, is a cryptographic network protocol that allows encrypted communication between computers over an unsecured network, usually for logging in and transferring files. The basic idea is simple: when you have trusted friends, you leave a key out for them so they can get into your house when you’re not home. Git allows you to sort of do the same thing with SSH so that you don’t need to type in your uni ID and password every time.
In summary, SSH focuses on secure remote access and file transfers, while HTTPS is primarily used to secure web-based communication between browsers and websites. You can use any one of them to establish a secure connection with GitLab.
How to use SSH#
To use HTTPS, You will need to type in your uni ID and password every time. If you want to use Git without a password, you can go for SSH, but it requires a mandatory SSH key to set up beforehand. Please follow the instructions below to set up an SSH key if you’ve decided to use it.
-
Generate an SSH key on your local machine.
a. Open Terminal (PowerShell in Windows)
b. Paste the text below, substituting with your GitLab email address:
ssh-keygen -t ed25519 -C "your_email@example.com"c. Keep pressing Enter until you see the key’s randomart image:
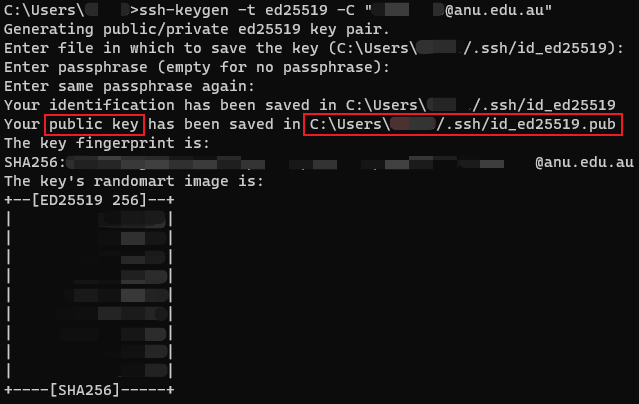
d. Copy the path of generated key in the log and use
cdandcatcommand to check out the public key. (For Windows, usecdandtypeinstead)- go into that created directory (.ssh) that stores the generated keys:
cd [path_in_the_log] - check out the public key:
cat id_ed25519.pubfor Linux & Mac andtype id_ed25519.pubfor Windows - copy everything from the output into the clipboard (
Ctrl + Shift + Cfor Linux,Ctrl + Cfor Windows andCommand + Cfor Mac)
Never show or give your private key to anyone else. Anyone with basic hacking skills can intrude into your computer easily with the private key.
- go into that created directory (.ssh) that stores the generated keys:
-
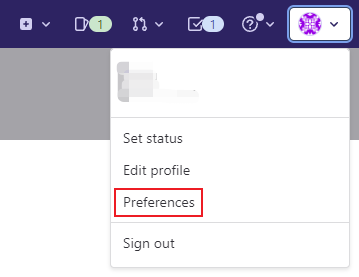
Paste your public key into GitLab.
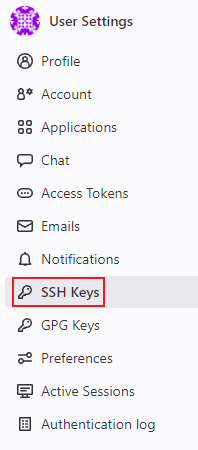
a. Click your avatar at the top right corner and select “Preferences”:
b. Select “SSH Keys” in the navigation menu on the left-hand side:
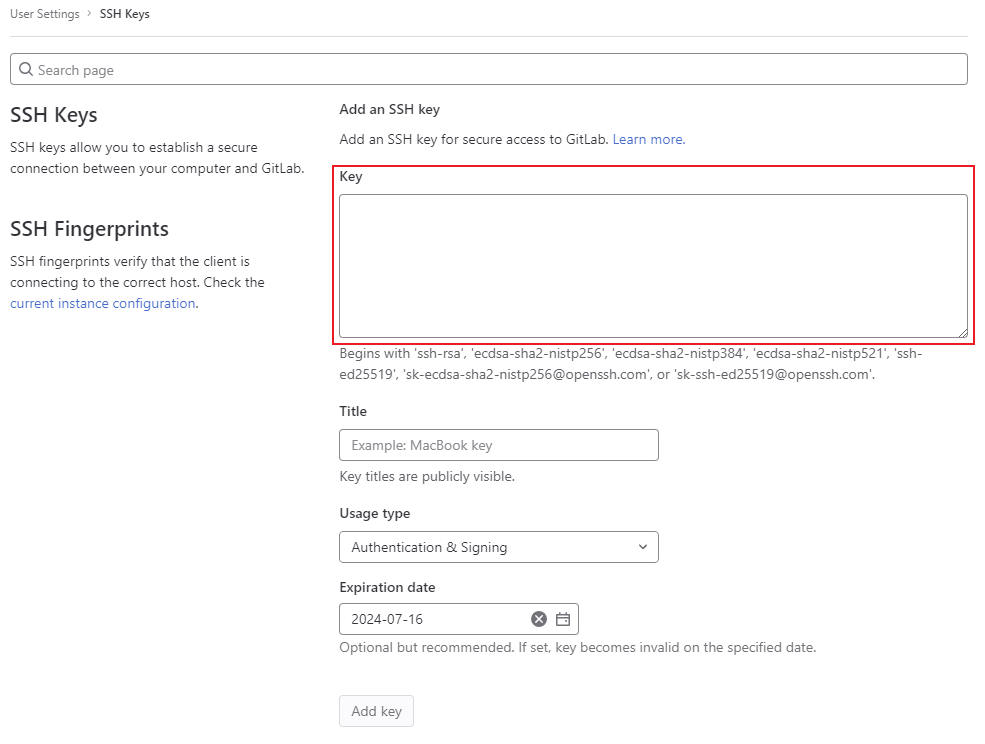
c. After pasting your copied public key into the “Key” box and inputting other fields such as title and expiration date, click “Add key”:
Well done! You’ve set up your SSH key. Now try to use the SSH link while cloning. You should be able to run it successfully now.
Further Reading#
If you’re interested in learning more about this section but encounter hard problems, you can check out the following links below:
- How to protect my GitLab account better?
- Once I enabled 2FA, I found I can’t use my password to clone the repository though HTTPS. How can I get private token?