Upstream pulls are the way to get updates to a course repository for which you created your own fork. Typically, these are the labs, homework, assignment 1, and assignment 2 repositories.
This guide assumes you are using IntelliJ to work with git, and that you have checked out your own fork via https, using a url like https://gitlab.cecs.anu.edu.au/u1234567/comp1110-labs.git .
The last part reflects the repository you have forked, and the middle part is typically your student ID - except for assignment 2, where it is the student ID of the team member who forked the assignment.
We generally assume that your fork has the same name as the repository forked, and we recommend that you rename older forks (e.g. from previous semesters) to be able to use the same name again for the current semester.
Remotes#
For the purposes of this course, a Git “remote” is a url like the one above pointing to a particular Gitlab repository. It has a name that can be arbitrarily chosen, but by default, when you clone a repository, the url will be used as a remote named “origin”. In lab 2, we showed you how to set up an “upstream” remote. In general, you can manage remotes in IntelliJ by clicking “Git” in the menu bar and selecting the option “Manage Remotes …”. You should see a window like this:
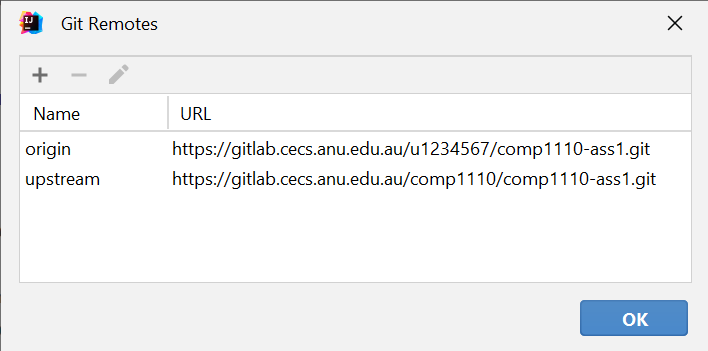
This windows lists two remotes - the “origin” that you used to clone the repository, and the “upstream” remote pointing to the repository that you forked. If you did not use a different name for your fork, the two remotes should only differ in that one contains your student ID (or the student ID of your team member who forked assignment 2), while the “upstream” remote replaces the student ID with “comp1110” - the part behind the last slash (“/”) should be the same in both, or at least be to related repositories. If you do not see two remotes, you can add the missing one by clicking on the “+” button.
Pulling from a Remote#
Once you have your remotes configured correctly, you can click “Git” in IntelliJ’s menu bar and select “Pull …”. You should see a window like this:
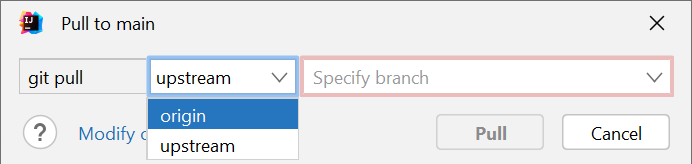
You can select the remote to pull from by using the middle drop-down field. In most cases, you will want to pull from “origin”, except for cases where you want to do an upstream pull, in which case you need to select the “upstream” remote. When you select a new remote for the first time, you may see something like this:
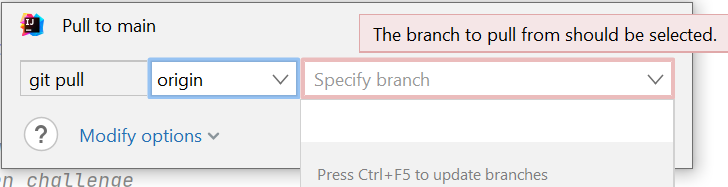
When there is no branch that can be selected, press the key combination described by the drop-down field (in this case, CTRL+F5, this may be different on other platforms).
Wait for a bit, and a branch should appear - in the case of this course, there always should be a branch called “main”, which is typically the one you want.
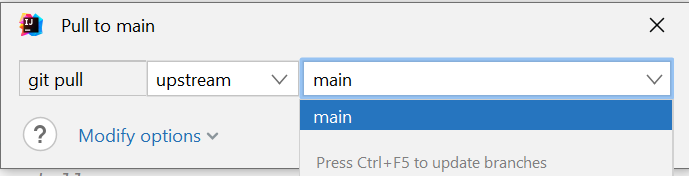
Once you selected a remote and branch, you can press the “Pull” button.
Things that can go wrong#
If you get the error message “There is no matching branch”, and updating
branches with CTRL+F5 doesn’t help, try closing the Pull dialog and
select instead “Fetch” from the “Git” menu. This should update the known
branches. Then try “Pull …” again. If you still cannot find the branch
name that you’re looking for in the list for the remote, log in to Gitlab,
navigate to the repository that you are pulling from (the “upstream” repo,
in our example), and check what branch names exist. Most of the time, you
should be pulling from the “main” branch.
If you get the error message like the following

this indicates that you have in your clone a different set of commits
than the upstream repository. (This may be a common case, if you’re
pulling updates into a repo that you have been working on, such as your
comp1110-labs repo.)
In this case, try instead the “Merge …” command from the Git menu.
This will bring up a window with an list to choose what branch to merge
into your clone’s main branch: choose “upstream/main”, and merge. The
merge should proceed without conflicts, unless you have modified some
files that have also been updated in the upstream repository (like, for
example, the main README.md file).
Pushing to a Remote#
If you configured your “upstream” remote correctly, it will point to a course repository that you cannot push to, so your pushes to it will be rejected. You may get yourself into a situation where IntelliJ by default tries to push to upstream. For those cases, note that in the Push window, you can select which remote to push to, as shown below:
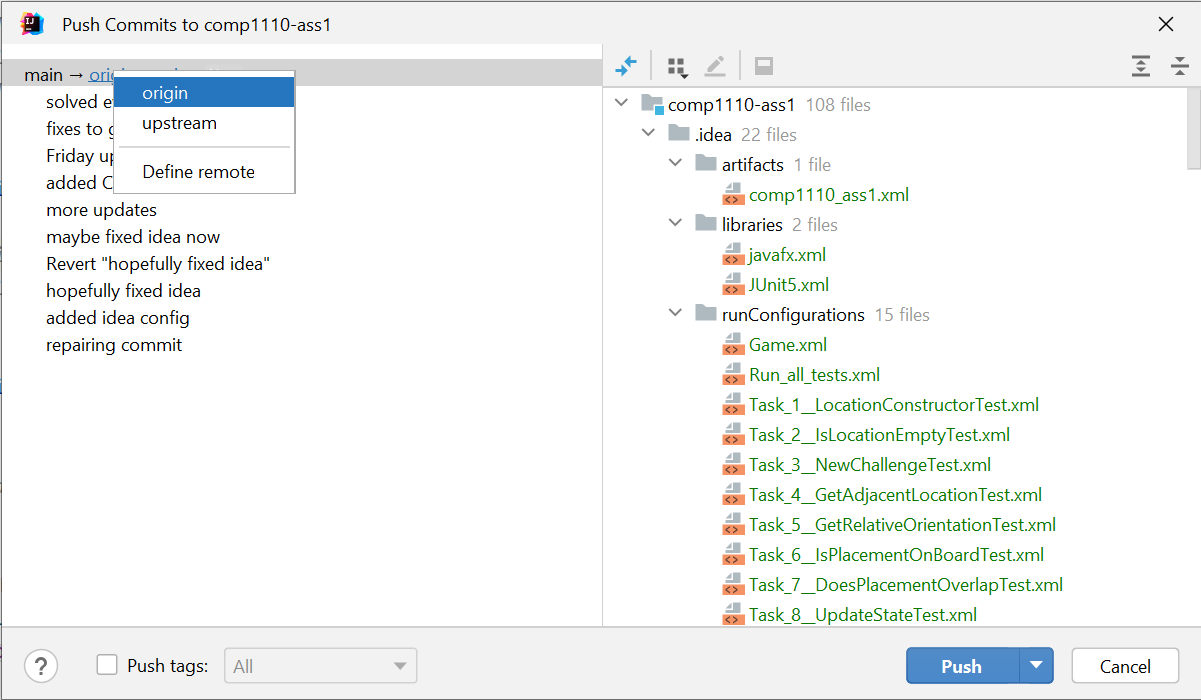
The Push window generally shows a combination of your local branch (usually “main”), followed by an arrow, followed by the remote to push to (this should typically be “origin”, and you can click on it change it), followed by a colon :, followed by the remote branch (usually “main”) again, on the top of the left half of the window.